Showing posts with label Rice. Show all posts

Monday, August 6, 2012

Simple Red Beans and Rice


Homemade red beans and rice

Yup!  Beans and rice again!  There are just so many possibilities to feed my family of six for near to nothing.  When this package of red beans and rice mix caught my eye, I just had to give it a try.  Not that I was looking for a great new go-to option, but I just couldn’t believe that a pre-packaged mix could come anywhere close to being as economical or tasty as my homemade version.


The consensus?  I was right.  Not one of us was impressed or even liked the red beans and rice from the mix.  I didn’t make the kids eat it---and that rarely happens in our house.  And the leftovers?  Most of them got tossed.

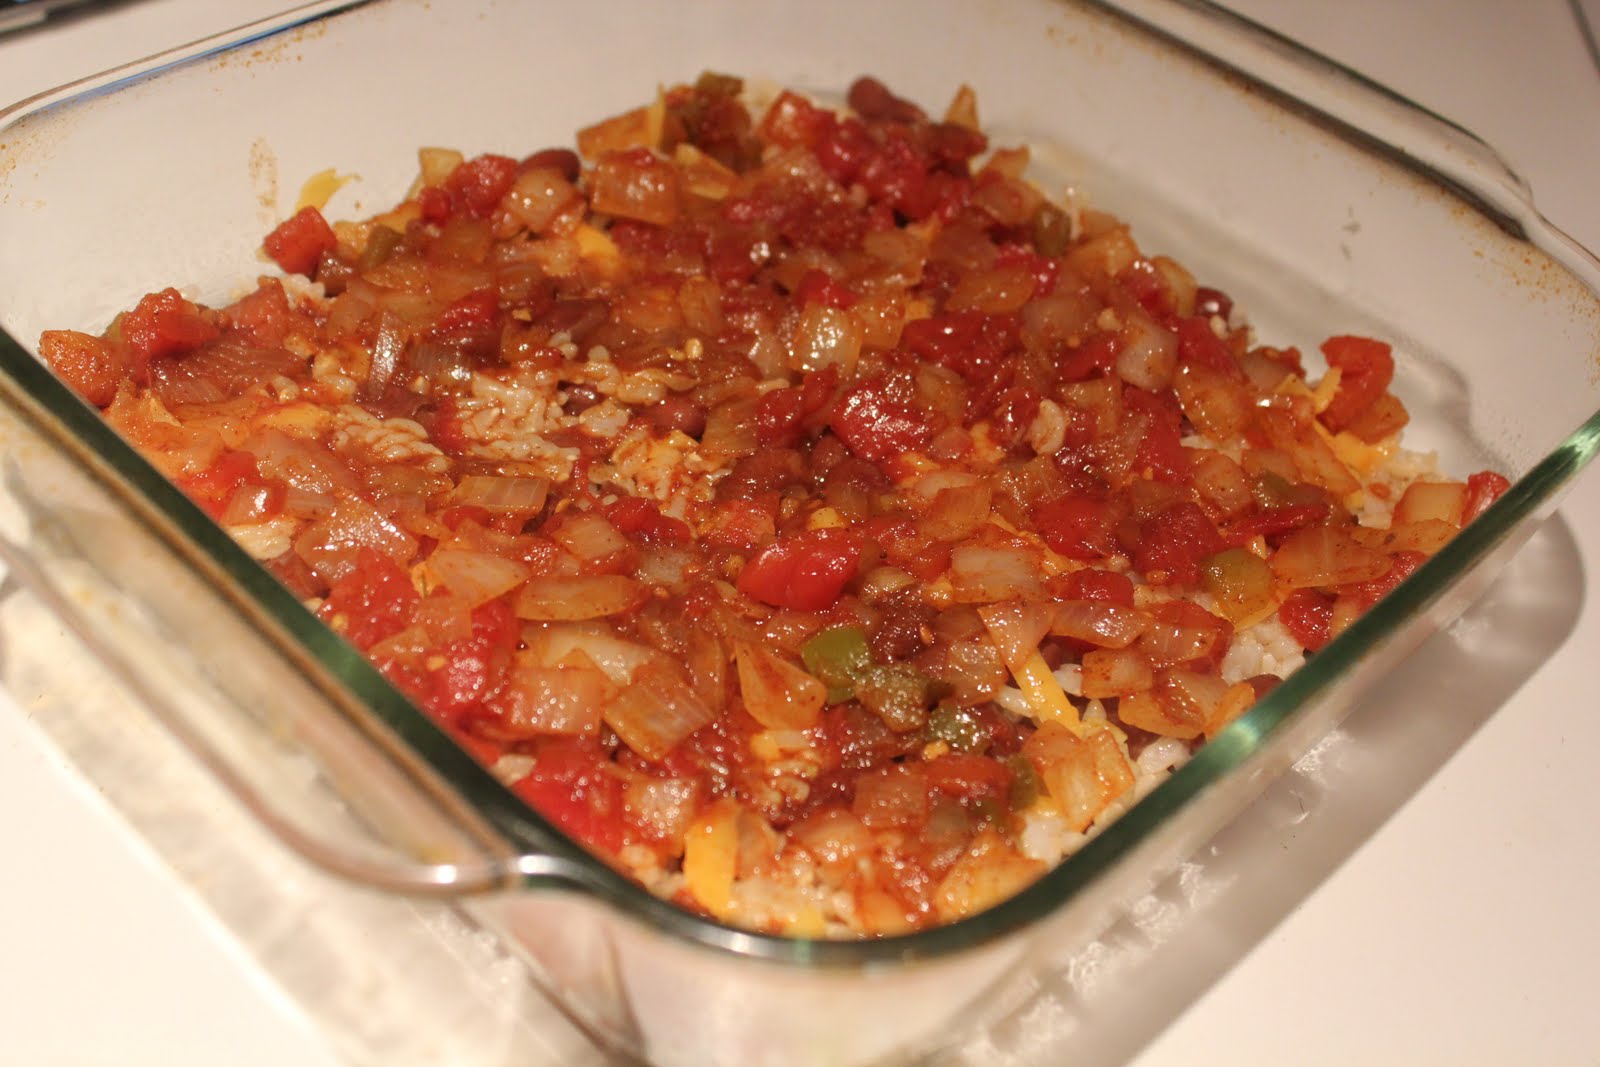
I added some leftover ham.


The following week, I made my own version of red beans and rice.  There are two ways that I make this dish.  The first, that I’m sharing today, is very simple and frugal.  The second way I make red beans and rice, isn’t as near-to-nothing because it uses some pricey meat.  I will definitely have to share that one in the future.

Ideally, I would use one red pepper and one green pepper.  When I made this to take pictures, I used two red because they were on sale.  I was also out of onions, so I just did without.


The recipe includes hot sauce as optional.  I usually don’t put any in the pot because of the kids, but Robbie and I add it to our individual bowls.  If you do not include the hot sauce, you may want to add a little more salt.

Of course, when I make red beans and rice, I end up with a ton.  We ate them for dinner, froze some for another dinner, and refrigerated some for lunch.

Simple Red Beans and Rice
2 bell peppers (any color)
1 onion
1-2 Tbsp. vegetable oil
2 qts. water
2 c. brown rice
2½ c. cooked red beans
Chopped or diced cooked ham or sausage (optional)
1 Tbsp. garlic powder
4 Tbsp. chicken or vegetable bouillon
1½ heaping Tbsp. paprika
½ tsp. pepper
1½ tsp. salt (more or less to taste)
Hot sauce (optional)

Dice peppers and onion.  Heat oil in large Dutch oven or stock pot.  Add peppers and onion to oil; sauté until soft and onions are slightly translucent.  Add all remaining ingredients.  Bring to boil; cover, reduce heat, and simmer until rice is done, about 40 minutes, stirring occasionally.


When rice is done, leave at a simmer and use immersion blender or back of spoon to smash some of the beans until desired consistency is reached, adding water as necessary.

I used a spoon to smash some of the beans against the pot
because my immersion blender died.

Soup will continue to thicken a bit as it sits.  Adjust seasonings as desired.  Yield:  lots!  (probably about 4 qts.)  Total cost without meat:  less than $6.

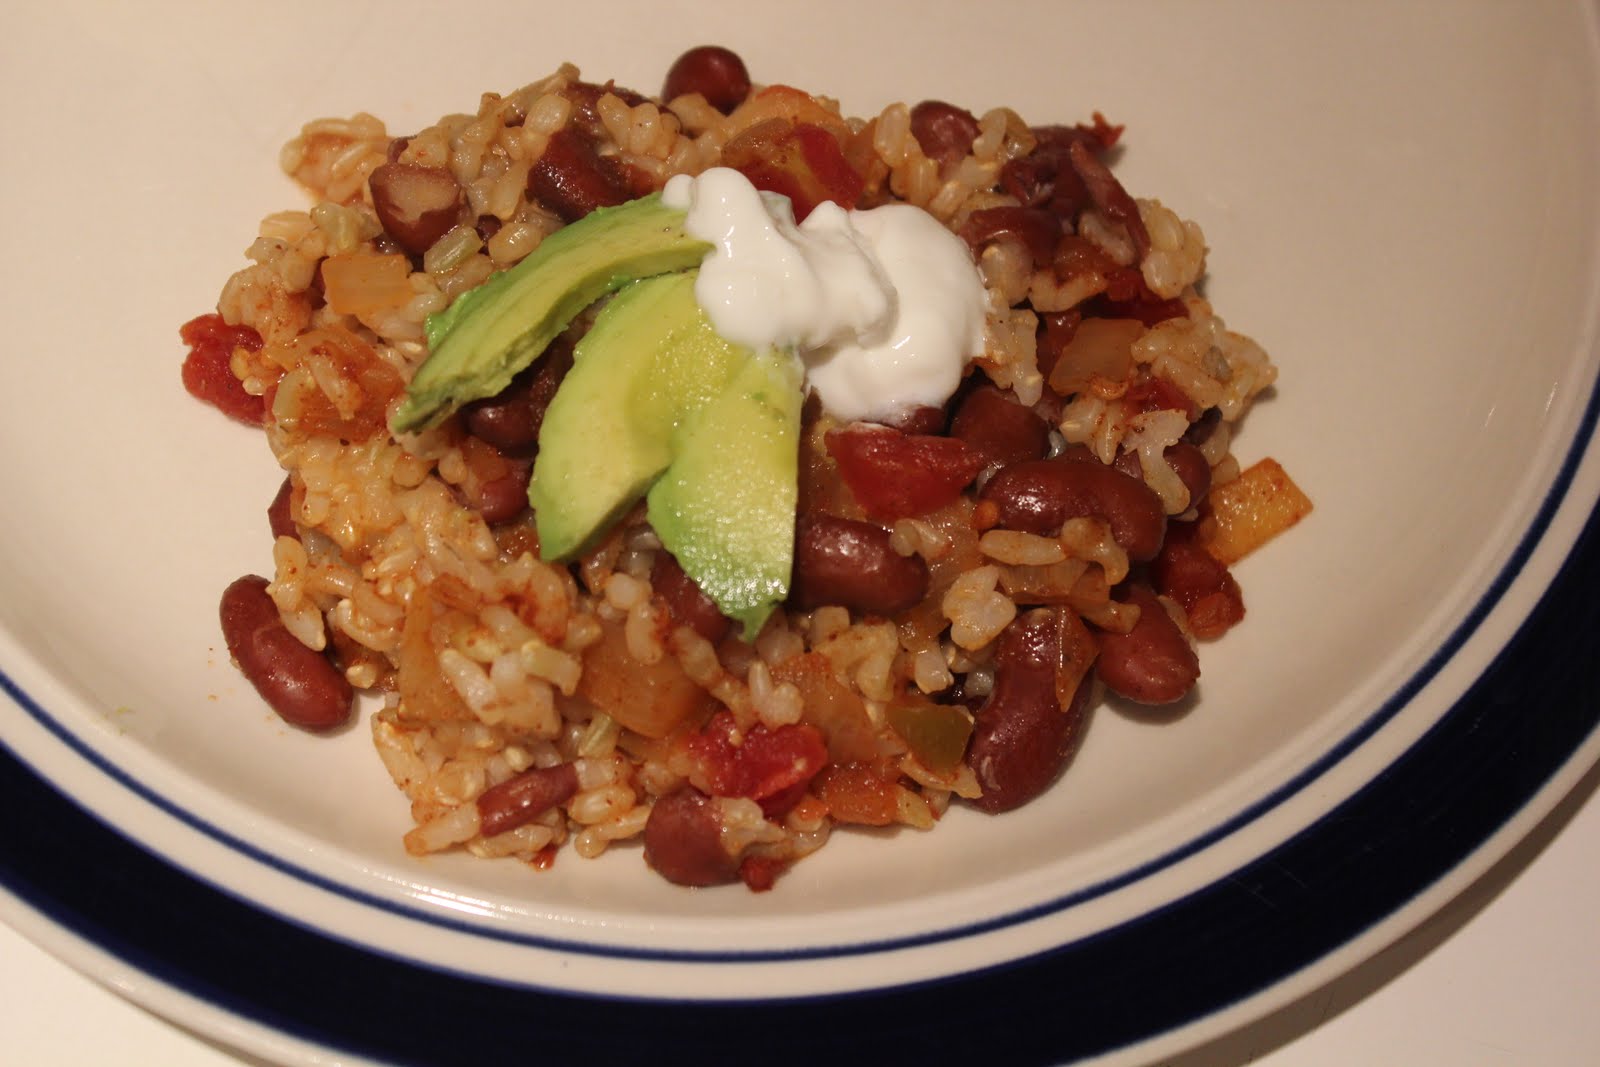
It even just looks better than the packaged version.

Wednesday, May 9, 2012

A Variation on Spiedies (Gluten Free)

Gluten free spiedies

It's almost summer, which means time to grill!  I had posted a recipe for spiedies a while back, which are traditionally made into a sandwich.  However, since we don't make traditional spiedies anyway, I decided to make it even more untraditional and nix the sandwich part of it.  I actually got the idea from my sister-in-law who recently discovered she has a gluten intolerance.  So instead of putting the meat and veggies on a sandwich roll, she put it on rice instead.  I'll admit, this isn't actually a recipe, just a different way of eating a recipe we had previously posted.


Gluten-free Spiedies
Cooked spiedies (marinated and grilled meat and veggies)
Steamed brown or white rice
Pepper jack or Monterey jack cheese, shredded

Place one serving of rice on a plate.  Top with meat and veggies and cheese.  Enjoy!


Monday, May 7, 2012

Arroz con Pollo (Chicken with Rice)


Arroz con Pollo (Chicken with Rice)

A while ago, I mentioned that my plans for Cinco de Mayo included a new Mexican beef stew.  Unfortunately, I forgot to get the beef roast out of the freezer in time.  So at the last minute, I flipped through my BHG Mexican cookbook and found a recipe for chicken with rice that was quick and easy, and I had almost all the ingredients on hand.  Those that I didn’t have, I just omitted.

From 1977 but still great!

Having never made this dish before, I wasn’t quite sure what to expect.  The results were fantastic!!  This is definitely going to become one of my go-to meals.

The original recipe calls for a 2½- to 3-pound whole chicken, cut up.  I just pulled two huge chicken breasts out of my freezer instead.  Not only was it faster and less messy, but slightly healthier.  Though I am looking forward to trying it with some dark meat pieces.


I did have to make some changes to make it a Near to Nothing recipe.  First, it calls for saffron.  I have never used saffron and probably never will.  It comes from the saffron crocus and is one of the most expensive spices by unit price.  If you want to include the saffron, just add ¼ tsp. with the other seasonings.

The original recipe also called for a 2-ounce can of pimientos cut into strips used for garnish.  Had I planned ahead, I may have bought a jar, depending on the price.  But since I hadn’t planned on making this dish, I just omitted them and will not be buying them in the future when I make it again.

Arroz con Pollo (Chicken with Rice)
2½ to 3 pounds chicken pieces
Salt
Pepper
2 Tbsp. vegetable oil
1½ c. long grain rice
1 c. chopped onion
2 cloves garlic, minced or ½ tsp. granulated garlic
3 c. water
8 oz. diced tomatoes (slightly more than 1 c.)
1 Tbsp. chicken bouillon
1 tsp. salt
¼ tsp. pepper
1 c. frozen peas

Heat 12-inch skillet over medium-high heat.  Meanwhile, sprinkle chicken pieces with salt and pepper.  When skillet is hot, add oil and let heat.  Add chicken and brown on both sides, about 15 minutes total.  
Remove chicken and set aside.

Of course, I used my iron skillet.


In remaining vegetable oil and chicken drippings, cook rice, onion, and garlic until rice is golden.


Stir in water, tomatoes, bouillon, salt, and pepper.


Bring to boil.  Place chicken pieces on top of rice mixture, cover, reduce heat, and simmer about 30 minutes, until rice is cooked and chicken is done.


If you don't have a lid, foil does the job.

Stir in peas; cover and cook 5 more minutes.

The chicken is still in there.  It got covered up when I
stirred in the peas.


Friday, April 27, 2012

Bean and Rice Enchilada Casserole


Meatless bean and rice enchilada casserole
Sorry, forgot to take a pic of the baked casserole.  Imagine this browned
with melty cheese on top and steam rising from the surface.


Cinco de Mayo is approaching!  I love Cinco de Mayo because it is just another excuse to make Mexican food.  Not that I need one---I actually cook a lot of Mexican.  But it’s a fun excuse to try new things.  I’m hoping to try a new Mexican beef stew this year.  And I want to make chimichangas.  Yum!

Since I have Mexican food on the mind, I decided to try a new variation on my enchilada casserole.  I wanted to make a meatless version that doesn’t require a lot of cheese.  So earlier this week, I cooked a pot of pintos and white beans, make a pot of brown rice, and threw together this bean and rice enchilada casserole.

It turned out really good!  Even though it doesn’t have any meat in it, it is still very substantial.  And it still provides a complete protein.  Additionally, the beans and brown rice add a lot of fiber that would be missing from more traditional meat or cheese enchiladas.

Bean and Rice Enchilada Casserole
1 large can enchilada sauce (or homemade)
Corn tortillas
1 qt. beans, drained (pintos, white beans, black beans, and/or kidney beans)
3 c. cooked brown rice
1 lb. frozen corn
6 oz. cheddar cheese, shredded


Preheat oven to 350°.  In 9X13” pan, spoon a thin layer of enchilada sauce to cover bottom.  Place single layer of tortillas over sauce.


Spoon ½ of the beans over tortillas, followed by ½ of the rice, ½ of the corn, and 1/3 of the cheese.  Pour 1/3 of the remaining sauce over all and cover with single layer of tortillas.


Repeat:  remaining beans, remaining rice, remaining corn, ½ of remaining cheese, ½ of remaining sauce, single layer of tortillas.  Top tortillas with remaining sauce, spreading to cover.  Sprinkle with remaining cheese.

I ran out of corn tortillas so I used flour to finish covering
the top.  No one even noticed!


Cover with foil, tenting as necessary.  Bake about one hour.

Monday, January 23, 2012

Leftover Barbacoa Rice Bowls


Last year (almost exactly a year ago, actually) I posted one of my favorite beef chuck roast recipes - barbacoa.  Sadly, I haven't found chuck roast within my spending guidelines recently, but I did have some in my freezer, so I pulled it out and made barbacoa.  I love to make burritos out of it, but I also enjoy repurposing the leftovers.  I already discussed making barbacoa omelets.  Lately, I've been making rice bowls with the leftovers.  It actually extends the barbacoa, as you can use mostly rice and beans as fillers and just add a little bit of meat.  You also don't get the extra empty calories of the tortilla!  You could also replace the rice with lettuce, add salsa, and make a salad if you want an even healthier meal.

Barbacoa Rice Bowls
Steamed white or brown rice
Beans (black or pinto)
Barbacoa
Barbacoa cooking juices
Desired toppings (sour cream, Greek yogurt, cheese, avocado, hot sauce, salsa, etc.) 

In a bowl combine rice, cooking juices, beans, and barbacoa.  Microwave until hot (or you can reheat each individual item first); add desired toppings.  Eat.  Does it get any simpler than that?


A note on the cooking juices.  After shredding the barbacoa, I poured some of the juices from the slow cooker over the top of it to add flavor and to keep it moist.  I poured the remaining juices into a container and put it in the refrigerator.  When you do this, the fat will float to the top and harden, making it easy to scrape off the next day (it sounds gross, but at least you know you're getting rid of it!).  When assembling each bowl, take a couple spoonfuls of the juice and put it over your rice.  It will congeal in the refrigerator, but will liquefy when you reheat it in the microwave.  The juice is full of flavor and will make the rice super yummy and flavorful!

I know.  It looks pretty gross, but I wanted to show you how easy it is to take all the fat off.

No more fat.  Just delicious flavor!

Monday, May 16, 2011

Beans and Rice Casserole


A while back, Sumiko wrote about how her family saves money by eating a lot of beans and rice.  We don't eat beans and rice very often (unless there's meat involved), but I did find one meatless recipe that suits my entire family.  I'm hoping to find more, but I can only experiment so much before people start starving!  Anyway, I enjoy this recipe because it's cheap, healthy, low in fat, and high in good protein.  It's also very filling!

Beans and Rice Casserole
1 cup uncooked brown rice
2 cups kidney beans
1 Tbsp olive oil
1 large onion, chopped
14.5 oz can diced tomatoes with chiles
1/4 cup salsa
2 tsp chili powder
1/4 tsp salt
Shredded cheddar cheese, optional
Sour cream or Greek yogurt, optional
Tortillas, optional

Cook rice according to package directions.  I put 1 cup brown rice and 2 1/4 cups water in my rice cooker.  Once the rice is done, transfer it to a bowl and add the kidney beans; mix to combine.


Preheat oven to 350 degrees.

Heat oil in a skillet over medium heat.  Add onions; saute until tender.  Add un-drained tomatoes, salsa, chili powder, and salt.  Cook until heated through.

You don't need the name brand (i.e. Rotel) tomatoes; generic works just fine!


Grease an 8 inch square baking dish (or any 2-qt dish).  Spread one-third of the rice mixture in the bottom of the dish; top with one-third of the tomato mixture.


If you're going to add cheese, put a layer of cheese, followed by another layer of rice and another layer of tomatoes.  Add more cheese, then one more layer of each the rice and tomato mixtures.  I left the cheese out, figuring people could put whatever cheese they wanted on their individual plates.


Cover with foil and bake for 30-35 minutes or until heated through.  Serve as is or with cheese, sour cream, olives, green onions, avocado, hot sauce, tortillas, tortilla chips, etc.  I chose to eat mine with taco sauce, avocado, and Greek yogurt, while my husband chose to turn his into a burrito by putting it into a tortilla with some hot sauce, cheese, and lettuce.

Wednesday, May 4, 2011

Great for Cinco de Mayo: Chicken and Bean Casserole


Tomorrow is Cinco de Mayo.  If we had been more organized, we probably would have more recipes taylored specifically to Cinco de Mayo.  However, with the busyness of life, it snuck up on us and we weren't ready!  I do have one recipe that would be fitting to serve on Thursday: Chicken and Bean Casserole.  While it may not be authentic Mexican fare, it is tasty and has a Mexican flare (I honestly wasn't trying to make that rhyme). 


Chicken and Bean Casserole
1 Tbsp canola oil
2 cups diced chicken
1/2 cup diced onion
3/4 tsp cumin
1/4 tsp ground coriander
1 tsp chili powder
1 cup kidney beans
1 cup pinto beans (really, you can use whatever beans you happen to have on hand)
4.5 oz diced green chiles, drained
10 oz enchilada sauce
7-8 corn tortillas
1 cup cheddar cheese
1 cup Monterrey jack cheese
3/4 cup sour cream

Preheat oven to 375 degrees.

Heat oil in large skillet over medium heat.  Saute the chicken and onions along with the cumin, coriander, and chili powder until the chicken is cooked through.


Remove from heat.  Add the beans and chiles.  A note on the chiles: I bought a 4.5 oz can of whole chiles and diced them myself.  They were cheaper than diced and I actually got more chiles out of it, since there was less juice than in the chopped cans.  Mix to combine.


Spread 1/3 of the enchilada sauce over the bottom of an 8-in square baking dish.  Place a layer of tortillas over the sauce, followed by half of the chicken mixture, half of the cheese (combine the two types of cheese), and half of the sour cream.


Add another 1/3 enchilada sauce, tortillas, remaining chicken mixture, followed by the remaining 1/3 of the sauce.


Cover tightly with foil and bake for 30 minutes.  Remove the foil; add the remaining cup of cheese and dot with the remaining sour cream.


Bake an additional 5-10 minutes.  Allow to rest for at least 5 minutes before serving.


Garnish with additional sour cream, olives, cilantro, green onion, and/or crumbled tortilla chips, if desired.

We didn't put any garnishes on ours, but I would have liked some olives and green onions.  Also, note that this isn't the most aesthetically appealing dish there is!
More Cinco de Mayo ideas:
Whatever you decide to serve tomorrow, we hope you have fun with it!
    Related Posts with Thumbnails