Showing posts with label Desserts. Show all posts

Tuesday, November 6, 2012

Apple Streusel Cupcakes


Yes, I realize that the first post we've written in months was cupcakes and the second is also about cupcakes.  What can I say?  It's fall and finally cool enough to use the oven, so I'm making up for lost time.  Some of you may remember Sumiko's amazing Apple Streusel Cake she posted at the beginning of the year.  And let me emphasize the amazing part, because it truly is.  This post is just an adaptation of her cake into cupcakes.  It's pretty much the same with just a few minor adjustments.  I wanted to make this for my hubby to take to work, but figured cupcakes would be much easier than a cake in that type of environment.  I also took them to community group at our church and they were a major hit at both events, with several people asking for the recipe.  So, go make them today because you won't regret it (unless you're on a diet, of course). :)  But even then, they're so good, you still might not regret it.

Apple Streusel Cupcakes

Streusel Topping
2 c. flour
2 c. sugar
2 Tbsp. plus 2 tsp cinnamon
1 c. butter, melted

Cupcakes
½ c. water
4 eggs
1 c. sour cream
1 c. vegetable oil
1 box vanilla cake mix
1½ small boxes instant vanilla pudding (or 1 large)
2 tsp. cinnamon
¼ tsp. ground nutmeg
3 or 4 medium apples (we prefer Fuji and Gala)

Drizzle
½ c. powdered sugar
2-3 tsp. water

Prepare muffin tins by lining with paper cupcake wrappers.

In a medium mixing bowl, mix all streusel topping ingredients and cream together; set aside.


Preheat oven to 350°.  For cupcakes, place water in microwave about 30 seconds to heat.  Meanwhile, in mixing bowl, combine eggs, sour cream, vegetable oil, cake mix, pudding mix, cinnamon, and nutmeg.  Add warm water.


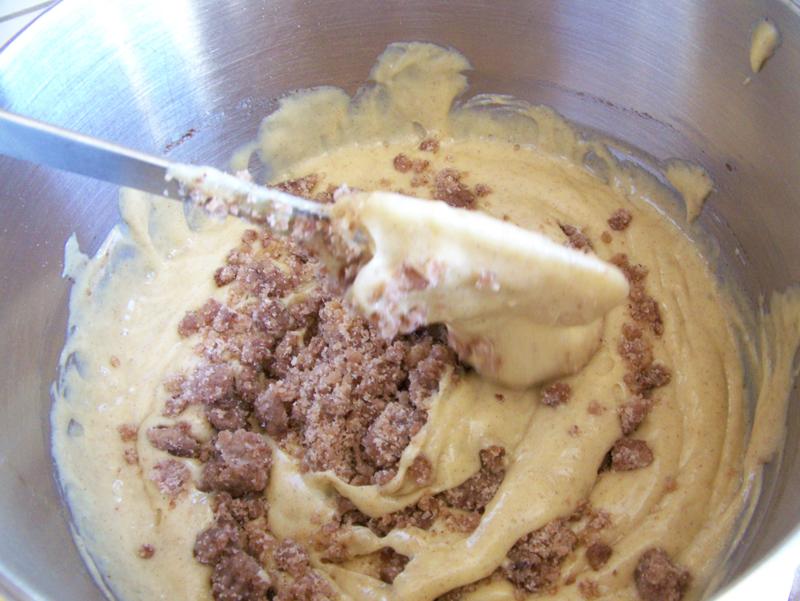
Mix on low until combined.  Increase speed to medium and mix about 2 minutes.  Fold about 1 c. streusel topping into batter, being careful not to over mix.


Carefully scoop batter into prepared cupcake tins, filling each one just over half full.  

Peel and core apples.  Cut into small bite-sized pieces.  Place on top of batter in cupcake tins.  Crumble remaining streusel topping over apples.


Bake 20-25 minutes, or until toothpick inserted in the center of a cupcake comes out clean.  Remove to wire rack.  Let cool until handleable; remove from tins and cool completely on a wire rack.  In small bowl, stir together powdered sugar and water; drizzle over cooled cupcakes.

Yields about 30 cupcakes.


Monday, October 29, 2012

Cake Series: Ghost Cupcakes


Last weekend, we went to a Halloween party and were asked to take some cupcakes for the kids.  So, I went about searching the web for fun cupcake ideas and I came across this one.  I knew I had to make them!  However, these directions call for each one to be made of one regular cupcake and two mini cupcakes.  I figured the other parents wouldn't be very thrilled with me if I gave their kids that much sugar, so I continued to scour the internet until I came across this.  I kind of merged the two methods and came up with my own ghost cupcakes.  They were a hit and the kids loved them (particularly the lollipop)!

Ghost Cupcakes
Cupcakes (any flavor)
Frosting (optional)
Lollipops (such as Tootsie Pops)
Fondant
Black food dye
Fine Paintbrush (or mini chocolate chips)

Make sure your cupcakes are cool before you start assembling your ghosts.  You can either leave your cupcakes plain (no frosting) or frost them.  However, if you frost them, you're going to want to also cover them with fondant so your white ghosts don't get frosting on them when you're assembling them. If you're going to frost them, cut out circles of fondant that will cover the top of your cupcakes. Spread a little frosting over the top then cover with your fondant circles.

To make the ghosts, you'll need to find something you can use to cut out fondant circles big enough to drape over the top of your lollipop and hang down.  I used a plastic bowl that is 5 inches in diameter.  It still wasn't quite big enough, so I just cut a little bit off the end of each lollipop stick and it worked perfectly!

What I used to cut out the fondant circles for the ghosts.

Once you determine how long you need your lollipop sticks to be, stick them straight down in the center of the cupcake.  Drape the fondant circle over the top of the lollipop.  With a fine paintbrush, use black food dye to paint the faces on your ghosts.  You can make friendly ghosts (like mine) or scary ghosts.  You can also make it easier on yourself and dab a little frosting on and stick mini chocolate chips on for eyes.


**Note: You probably won't want to use filled cupcakes for this recipe, as there might not be enough structure to hold up the lollipop.**

Monday, July 9, 2012

Peanut Butter S'mores


We just got back from vacation this week.  We spent some time on the beach in Crescent City, a day in the redwoods at Jedediah Smith State Park, and an afternoon at Lake Siskiyou.  Of course, we had to have s'mores everywhere we went!  But we make s'mores a little different than most people.  I like to kick it up about 10 notches by adding peanut butter!!  Soooooo goooood!  You can also use different chocolate.  I suggest dark chocolate!


Kicked Up S'mores
Graham crackers
Peanut butter
Chocolate
Marshmallows, store-bought or homemade

Spread one graham cracker with peanut butter.  Place chocolate on top.  Set aside.


Toast a marshmallow over a fire or BBQ.


I prefer mine more toasted, but this one was for Keanna.

Place hot marshmallow on chocolate and place second cracker on top.


Perfection!
Enjoy!


Monday, June 25, 2012

Chocolate Chip Cookies Revisited


Last March, I posted a delicious chocolate chip cookie recipe.  And while it is delicious, we've been able to improve upon it just a little bit based on some recommendations by one of Sumiko's friends from church, along with some of our own experience.  The recipe is almost exactly the same, but the technique has changed a bit.

Chocolate Chip Cookies 2
2 1/4 cups all-purpose flour
1 tsp baking soda
1/2 tsp salt
1/2 cup butter (real butter), softened
1/2 cup shortening
3/4 cup sugar
3/4 cup packed brown sugar
1 tsp vanilla
1 large egg
2 cups semisweet chocolate chips

Preheat oven to 375 degrees.

In a medium mixing bowl, combine flour, baking soda, and salt.  Set aside.

In a large mixing bowl (I use my KitchenAid mixer, but you can also use a hand mixer), cream butter until pale yellow and shiny.  Add shortening and beat until combined.


Add sugar; mix until well-combined.  Add brown sugar and mix well.

The brown sugar should be packed tight enough that it
holds its shape once you take it out of the measuring cup.
After the sugars have been mixed into the butter.

Add vanilla and egg; mix well.  Add the flour mixture all at once, mixing until almost (but not completely) combined.  Add chocolate chips; mix just until they're evenly distributed and the flour has been incorporated.  Do not overmix.  I like cookies to be thick, so I've found that in order to get thick, chewy cookies, you first of all, need to make sure the butter isn't too soft.  The second thing is to scoop the cookie dough balls and then freeze or refrigerate them for at least several hours (see tips for freezing below).  I usually make the dough at least a day ahead.  Bake straight out of the refrigerator or freezer for 10-12 minutes, or until cookies are light brown.  Cool 1 to 2 minutes before transferring to a wire rack to cool completely.

This is when you want to add the chocolate chips.


In this batch, I used half chocolate chips and half M&Ms.


Tips for freezing:

  • Scoop the dough into balls.  Place dough balls on a cookie sheet and freeze for 15-20 minutes or until dough balls begin to harden.  Place dough balls in a zip-top bag and freeze.  When you're ready for some fresh cookies, simply pull the desired amount of dough balls out of the freezer and place them on your cookie sheet.  You can bake them frozen, but add a little time to the bake time. 
  • You can also freeze baked cookies.  Simply bake as instructed, wrap cookies or place in zip-top bag and freeze.

Wednesday, June 20, 2012

Cake Series: Chocolate Peanut Butter Ganache


I made a dessert for Easter that was topped with ganache made with a combination of chocolate chips and peanut butter chips.  Brilliant!  Why didn't I think of that?!  Ganache, in and of itself, is so delicious, but then add peanut butter and you've got something that is out-of-this-world delicious!  I had recently made cupcakes for my husband to take to work and wanted to top them with whipped ganache.  But then I thought, why settle for that when I can top them with peanut butter ganache?  The cupcakes were chocolate and peanut butter anyway, so it fit perfectly.  The problem was that I didn't have any peanut butter chips and, to be honest, I really don't ever buy them, because they're expensive. So I decided to experiment a little bit and used peanut butter instead of peanut butter chips, and it worked!  Now, I will say that it didn't have a super strong peanut butter flavor, but it was definitely there nonetheless.

Chocolate Peanut Butter Ganache
8 oz. chocolate (I use chocolate chips)
3/4 cup heavy whipping cream
1/4 to 1/3 cup creamy peanut butter


In a medium bowl, add chocolate chips and peanut butter.  

Warm the cream in the microwave to a simmer.   Pour warm cream over chocolate chips and stir until the chocolate chips and peanut butter have melted and the mixture is smooth.  I somehow neglected to realize that my chocolate chips had just come out of the refrigerator and wouldn't melt, so I just threw the mixture into the microwave for a few seconds.  If your chocolate isn't melting all the way, you can do the same.  (Sumiko mentioned that she also microwaves the chocolate chips (and peanut butter) a little bit before adding the cream.)  At this point, you can either pour it over a cake as a glaze, or you can let it cool a while and spread it as frosting.  You can also wait until it's completely cool and then whip it with a mixer.  The ganache can be used as a frosting or a filling.


Unwhipped ganache

Whipped ganache, swirled with peanut butter filling.  Sorry for the poor picture quality.


Wednesday, June 13, 2012

Mrs. Jones's Cherry Crumbles

Super easy cherry crumbles

Last week I shared a no-cook cherry pie recipe and promised cherry crumbles this week.  The wait is over! This is a fabulous recipe for last-minute dessert and, if you substitute canned pie filling, you can keep all the ingredients on hand.

Only three ingredients:  pie filling (homemade or canned),
cake mix, and butter!

I got this recipe from Mrs. Jones, my fourth grade teacher.  It was her contribution to the recipe book that Barbara made me when I got married.  (If you missed that post, you have to see it here!)  Mrs. Jones is also the source of our resurrection roll recipe and a rich dirt pudding that I will have to share in the future.

Mrs. Jones's resurrection rolls are an Easter
tradition in our house!

Mrs. Jones's cherry crumbles recipe calls for canned cherry pie filling, but you could use any kind of pie filling.  Robbie's favorite is blueberry filling--yum!!  For this version, I used the same no-cook filling that I used for my cherry pie last week.  You may want to decrease the cornstarch just a bit if you want it runnier.  It is great over vanilla ice cream so it's nice to have the juice flowing down over the ice cream.

The following recipe is for a 9"X13" pan.  I halved it made it in a 9"X9" pan so that's what's in the pictures.

Cherry Crumbles
1 recipe cherry pie filling or 2-21 oz. cans cherry pie filling
1 box yellow cake mix (vanilla would work too)
1 stick butter, melted

Preheat oven to 375 for opaque pan or 350 for clear pan.  Spread pie filling in 9"X13" pan.  Sprinkle cake mix evenly over top.


Drizzle with melted butter.  Bake 35-40 minutes, until filling is bubbly and top is golden.  Serve warm or cool with ice cream or whipped cream if desired.


This dessert, though so simple, is worthy of the china!

As a bonus for today, I thought I'd include some of the marriage advice Mrs. Jones included with her recipe: "Dating is still important in marriage.  You need to plan dates and dress up for them.  It is a great way to keep your marriage wonderful."

Serving this to your husband is also a great
way to keep your marriage wonderful.

Saturday, June 9, 2012

Cherry Pie


No cook cherry pie

A couple weeks ago, a friend of ours stopped by with a ton of cherries from her cherry tree.  I never buy cherries because they are always over $2 per pound so it was a treat!  They were delicious just for eating, but I couldn’t pass up the opportunity to bake something delicious.  I ended up with some mini cherry pies and a cherry crumble!  Yum!

Aren't they pretty?

I opted to make three little pies rather than one big pie to conserve the cherries and have fun with different top crusts.  The recipe is for a regular 9-inch pie.  And the best part?  You don’t have to cook the filling first!!


Keep in mind that the amount of sugar will vary depending on the type of cherries you are using.  I’m not sure what type of cherries I had.  They were sweet enough to eat, but not super sweet.  If using sour cherries, you’ll want more sugar; if using super sweet cherries, back off on the sugar.

For the pie crust, I used my tender and flaky pie crust recipe.

Tender and flaky pie crust with strawberry filling.

Cherry Pie
3 lb. pitted cherries
2 c. sugar (more or less depending on type of cherries)
4-4½ Tbsp. cornstarch
3 Tbsp. water
1½ Tbsp. lemon juice
½ Tbsp. almond extract
⅜ tsp. salt
1 batch tender and flaky pie crust
3 Tbsp. butter, diced

In large bowl, combine all ingredients except crust; stir to combine.  Let sit about 15 minutes, stirring occasionally.

Notice the graininess of the sugar on the cherries.

Meanwhile, preheat oven to 425°.  Roll out bottom crust and place in pie plate.  Pour filling into crust; dot with butter.

The graininess goes away as they sit and even
more as the pie bakes.

Roll out top crust and seal over filling.  Cut steam vents in crust.  Place pie plate in oven on a piece of foil to catch any drippings; bake 30 minutes.


Reduce oven to 350° and continue to bake 25-35 minutes, or until crust is golden and filling bubbles out.  If crust browns too quickly, loosely cover with a piece of foil until filling is done.  Cool on wire rack.

This is why you need the foil---that goo would have
been burned to the bottom of my oven.


So delicious!

Be sure to check back next week for cherry crumbles!!
Related Posts with Thumbnails