Monday, January 30, 2012

Apple Streusel Cake


I make a lot of cakes.  They are usually elaborately decorated for baby showers, wedding showers, birthdays, or weddings.  To get some inspiration and decorating tips, I’ve been watching Cake Boss on Netflix.  I used their scissor-snip method to make Brobee look furry.


Anyway, I was watching Season 3, Episode 19, on which Buddy shares how to make an apple cake.  It looked so good, I just had to try it!  I made a few changes to make it my own, and it turned out amazing!

One thing I added was a cinnamon-sugar coating.  Rather than lining the cake pans with wax paper like I usually do, I buttered and coated them with cinnamon sugar.  Believe it or not, you can buy cinnamon sugar.  At Amazon.com, you can get 21.72 ounces for $14.99—that’s $11.04 per pound!  But I can make it for under $1 per pound.  I don’t measure.  I just fill a container with sugar and mix in some cinnamon.


I always use Fuji apples for everything—eating, baking, cooking, dipping.  If you live in central California, you can get Fujis for $0.57/lb. at Save Mart through Tuesday (1/31).  When I went to WinCo last Thursday, they had them for $0.78/lb.

This time of year you might notice that some of your apples look a little different inside.  This is called “water core.”  It is not really a disease, but more of a physiological disorder.  It can be caused by a number of factors, all environmental.  Water core apples are completely safe to eat and may even be sweeter than normal apples.  You can find the UC Davis info sheet here.


For the actual cake pans, I used two 8-inch by 3-inch pans.  I wouldn’t recommend trying this in 2-inch high pans as it rises quite a bit.  If you do attempt it, be sure to put some foil on the rack below your pans to catch the drips.  You will also need to increase the baking time.

I have found that this cake gets better with a little age.  It tastes great the first day, excellent the second, and amazing the third (if there is any left by then)!

Apple Streusel Cake
For Pan
Butter, softened
Cinnamon sugar

Streusel Topping
1 ½ c. flour
1 ½ c. sugar
2 Tbsp. cinnamon
¾ c. butter, melted


Cake
½ c. water
4 eggs
1 c. sour cream
1 c. vegetable oil
1 box vanilla cake mix
1½ small boxes vanilla pudding (or 1 large)
2 tsp. cinnamon
¼ tsp. ground nutmeg
4 medium Fuji apples

Drizzle
½ c. powdered sugar
2-3 tsp. water

Spread insides of two 8”X3” round cake pans with butter.  Coat with cinnamon sugar; set aside.


In small bowl, mix all streusel topping ingredients and cream together; set aside.


Preheat oven to 350°.  For cake, place water in microwave about 30 seconds to heat.  Meanwhile, in mixing bowl, combine eggs, sour cream, vegetable oil, cake mix, pudding mix, cinnamon, and nutmeg.  Add warm water.


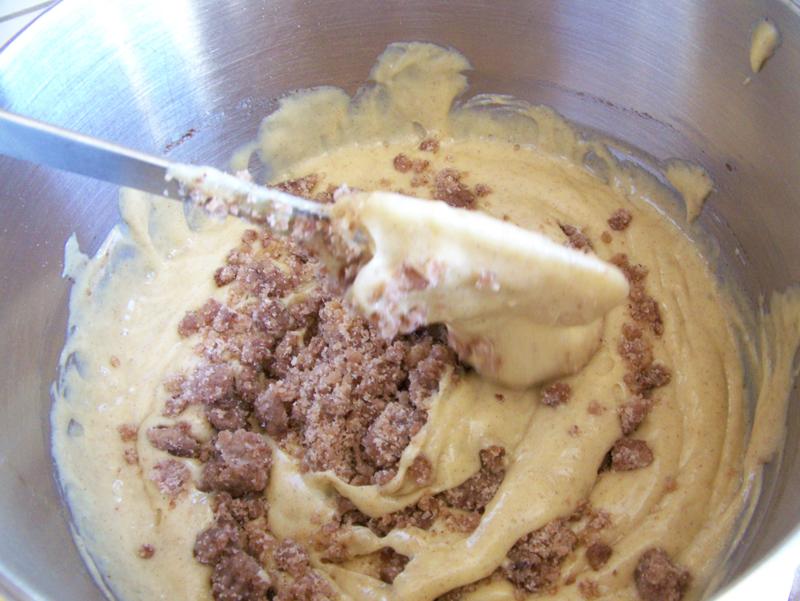
Mix on low until combined.  Increase speed to medium and mix about 2 minutes.  Fold about 1 c. streusel topping into batter, being careful not to over mix.


Divide batter between pans.


Peel and core apples.  Cut into 8ths then cut each wedge in half cross-ways.  Place apples on top of batter.  


Crumble remaining streusel topping over apples.


Bake about 1 hour, or until toothpick comes out clean.  Remove to wire rack.  Immediately run a knife around the pan to loosen.


Let cool until handleable and turn out; cool completely.  In small bowl, stir together powdered sugar and water; drizzle over cake.


Variations:
Coffee cake—omit apples
Apple-nut cake—sprinkle chopped nuts over apples before adding streusel
Caramel-apple cake—serve with caramel sauce


Friday, January 27, 2012

Roasted Brussels Sprouts


Brussels sprouts are one of the most misunderstood vegetables out there.  They've gotten a pretty bad rap, but I'm out to try to fix that.  I love Brussels sprouts and so does my 3-year-old daughter.  My suspicion as to why people don't like them is because they've never had them prepared in a way that makes them shine! The key to a good Brussels sprout is to roast it.  Sumiko wrote about roasting vegetables a while back, but I want to revisit it, since Brussels sprouts are in season and I've been finding them on sale (88 cents/lb)!  Next time you see them on sale, buy a few and give 'em a try!

My 3-year-old waiting for the Brussels sprouts to roast.  

Roasted Brussels Sprouts
Brussels sprouts, cleaned and outer leaves removed
Olive oil
Salt
Pepper

Preheat oven to 400 degrees.

Spread Brussels sprouts out on a pan with sides.  Drizzle with olive oil and sprinkle with salt and pepper to taste.  Place pan in preheated oven and roast for 20-35 minutes (depending on size), or until tender in the center.  Several times throughout the roasting time, shake the pan around a little bit.  

Eat and enjoy!

Seasoned and ready to go into the oven!

These aren't burnt!  You want the bits of brown on these.

A poor, misunderstood Brussels sprout.

Wednesday, January 25, 2012

Caesar Salad Dressing


Last summer our church community group had a BBQ and swim party.  I was in charge of dessert, so I took Kimiko’s brownies.  They were a big hit, but they were not what Keanna was talking about on the way home.  No, she was talking about Stephanie’s Caesar salad with homemade dressing.  Since then, I have not bought another bottle of Caesar salad dressing!  (I think I still have an old one in the bowels of my fridge that I need to toss.)

Stephanie got the recipe from Christina, another woman at our church who is an amazing cook.  When I received the recipe from Stephanie, I had to try it right away.  To my dismay, there were a few ingredients I didn’t have at the time.  But I tried it anyway with some substitutions.  The results were still fantastic (Robbie actually prefers the altered version).  I’ll post both versions below.

Original recipe:  Dijon mustard.  My recipe:  yellow mustard.

One of the concerns about making homemade Caesar dressing is the fact that it generally calls for raw eggs.  This recipe is great because it starts with mayonnaise instead of eggs so you don’t have to worry about egg contamination.

The one ingredient that I never would have had on hand before is anchovy paste.  I buy it in a tube from WinCo for less than $3 per tube.  That works out to a lot per pound, but it will last a long time.  You can find it in the canned fish section, right near the tuna.  Now I always have a tube of it in the fridge so I can whip up a batch of dressing whenever necessary.


Though I do roast a lot of garlic, I don’t always have some in my fridge or freezer when I want to make this dressing.  And sometimes I need the dressing right away.  In that case, I simply use garlic powder.


When I do roast garlic, I roast more than I need and
freeze the extra in air-tight containers for future use.

Keep in mind that fresh-squeezed lemon juice is more potent and has better flavor than bottled.  However, bottled lemon juice is more consistent in its flavor.  Use whatever you have, but remember that the type and quality of lemon juice could affect the final outcome.

Costco has the cheapest lemon juice by far if you use a
lot of it.  It comes in two-packs for not very much.

The original recipe calls for Parmigiano-Reggiano.  This is definitely not in my food budget.  I simply use the dry powdered parmesan from the WinCo bulk bins, and the dressing still turns out great.  Shhhh!  Don’t tell Christina—she’d be horrified!!


The one thing I’ve learned is that the flavors mellow out and change as the dressing sits in the fridge.  Always taste and adjust before serving.

A classic Caesar salad would be romaine lettuce and croutons with Caesar salad dressing tossed in and possibly more parmesan cheese grated on top.  For a more substantial salad, try chicken Caesar salad.  You can also wrap it all up in a tortilla for chicken Caesar wraps.


Caesar Salad Dressing
1 c. mayonnaise
1 Tbsp. Dijon mustard
1 tsp. Worcestershire sauce
Juice of 1 lemon (2-4 Tbsp.)
½ tsp. anchovy paste
½ c. grated Parmigiano-Reggiano
Salt and pepper to taste


Place all ingredients in blender; blend until thoroughly mixed.


Sumiko’s Caesar Salad Dressing
1 c. mayonnaise
2 tsp. garlic powder
1 Tbsp. yellow mustard
1 tsp. Worcestershire sauce
Juice of 1 lemon (2-4 Tbsp.)
½ tsp. anchovy paste
½ c. grated parmesan cheese
1-1½ tsp. salt
Few dashes pepper

Place all ingredients in blender; blend until thoroughly mixed.


Yummy!

Monday, January 23, 2012

Leftover Barbacoa Rice Bowls


Last year (almost exactly a year ago, actually) I posted one of my favorite beef chuck roast recipes - barbacoa.  Sadly, I haven't found chuck roast within my spending guidelines recently, but I did have some in my freezer, so I pulled it out and made barbacoa.  I love to make burritos out of it, but I also enjoy repurposing the leftovers.  I already discussed making barbacoa omelets.  Lately, I've been making rice bowls with the leftovers.  It actually extends the barbacoa, as you can use mostly rice and beans as fillers and just add a little bit of meat.  You also don't get the extra empty calories of the tortilla!  You could also replace the rice with lettuce, add salsa, and make a salad if you want an even healthier meal.

Barbacoa Rice Bowls
Steamed white or brown rice
Beans (black or pinto)
Barbacoa
Barbacoa cooking juices
Desired toppings (sour cream, Greek yogurt, cheese, avocado, hot sauce, salsa, etc.) 

In a bowl combine rice, cooking juices, beans, and barbacoa.  Microwave until hot (or you can reheat each individual item first); add desired toppings.  Eat.  Does it get any simpler than that?


A note on the cooking juices.  After shredding the barbacoa, I poured some of the juices from the slow cooker over the top of it to add flavor and to keep it moist.  I poured the remaining juices into a container and put it in the refrigerator.  When you do this, the fat will float to the top and harden, making it easy to scrape off the next day (it sounds gross, but at least you know you're getting rid of it!).  When assembling each bowl, take a couple spoonfuls of the juice and put it over your rice.  It will congeal in the refrigerator, but will liquefy when you reheat it in the microwave.  The juice is full of flavor and will make the rice super yummy and flavorful!

I know.  It looks pretty gross, but I wanted to show you how easy it is to take all the fat off.

No more fat.  Just delicious flavor!

Saturday, January 21, 2012

Stock Up Now for Valentine's Treats


I (Sumiko) was at Target last week and saw these in the dollar section.  I absolutely could not pass them up!  Cute, sturdy, reusable boxes for only $1 each!  I'm still trying to decide what to fill them with, but here are a few suggestions:


And who can you give them to?  I think the better question would be who can't you give them to?!?  Everyone appreciates knowing they are loved.  Here are a few suggestions:
  • Teachers
  • School staff (secretary, principal, janitor, maintenance man, aides, crossing guards, etc.)
  • Letter carrier
  • Church staff
  • Neighbors
  • Sunday school teachers
  • Widows
  • Classmates
  • Grocery store cashier
  • Bus driver
  • Barista
  • Grandparents
  • Babysitter
Honey Milk Balls

Friday, January 20, 2012

Honey Mustard Pork Roast


When I saw this pork sirloin roast on sale for $1.99 per pound, I just had to get it!  A couple months ago I tried a new pork roast recipe on Robbie and he loved it, so I thought I’d treat him by making it again.  This is one of those recipes that is a hybrid of a bunch of different recipes.
                                     

The first time I made this, I used pork loin instead of sirloin.  Either will work.  The main difference will be the cooking time.  Because a loin roast is generally skinnier than a sirloin roast, it will cook a bit faster.  To avoid over- or undercooking, be sure to rely on your instant-read thermometer rather than the clock.

I am usually in the seer-a-pork-roast-before-roasting-it camp, but I wanted to make this recipe super easy and super fast so I skipped that step.  Go ahead and sear it if you want to, keeping in mind it will decrease oven time.

To make this dish even easier, forego the mixing bowl and spoon—two less dishes to clean!  I usually just pour, squirt, and sprinkle the flavorings and seasonings on top and mix it all together as I’m coating the roast.  Of course, this results in a less homogenous coating, but it works and it’s fast.

The key to releasing the flavor of the rosemary is to crush it between your fingers.  You will almost immediately smell the difference between uncrushed and crushed rosemary.

The five-minute rest at the end of the recipe is a must—do not skip this step!  Resting allows time for the internal temperature to rise five more degrees to 160°, the target temperature for pork.  It also lets the meat absorb some of the juices.  If you cut it right away, a lot of the juices will run right out.

Honey-Mustard Pork Roast
3-4 lb. boneless pork loin or sirloin roast
3 Tbsp. Dijon mustard
1 ½ Tbsp. honey
½ Tbsp. lemon juice
½ Tbsp. dried rosemary, crushed
Quite a few dashes pepper


Preheat oven to 325°.  Lightly oil small, shallow roasting pan.  Place roast in pan; set aside.  In small bowl, combine mustard, honey, lemon juice, rosemary, and pepper; pour over roast.


Using hands or basting brush, coat entire roast, including bottom.


Place fattiest side up.  Roast uncovered until reaches 155° on instant-read thermometer, about 1½-1¾ hours.  Remove from oven, cover with foil, let rest 5 minutes.


Temperature had already risen one degree from
oven to counter.

Perfect!


Remove from pan, slice across grain.


Related Posts with Thumbnails