Wednesday, February 29, 2012

Bean and Barley Stew


So...I *may* be in the midst of a weight loss competition.  Well, sort of.  I'm part of the group, but am not officially competing; just needed to get a little motivation.  Anyway, since I started this 12+ week journey, I've been eating mostly soup for dinner.  I love soup, and I figured one pot of soup could feed me for almost a whole week, so I'm not always having to prepare two different meals (my family would prefer something heartier than the dieting me is eating right now).  Anyway, I have had some pretty delicious soups, including Sumiko's meatless comfort soup and the one I'm writing about today: Bean and Barley Soup.  I guess I shouldn't really call it a soup; it's more of a really thick and hearty stew.  I actually adapted it from this website, and I love it!  I used all dried beans and prepared them in the slow cooker ahead of time (some I had made and frozen, so I just had to pull them out of the freezer and defrost).  This makes this meal really quite inexpensive.

Bean and Barley Stew
1-2 Tbsp olive oil
1 cup chopped onion
2 cloves garlic, minced
1 bay leaf
1/2 tsp dried rosemary
1/8 tsp dried thyme
1/8 tsp pepper
3 1/2 cups water
1 Tbsp chicken bouillon
3 Tbsp tomato paste
3/4 - 1 cup each lima beans, black beans, and garbanzo beans
3/4 cup quick-cooking barley
1-2 carrots, sliced
1 packed cup spinach, roughly chopped

In a large saucepan, heat olive oil over medium heat.  Add onions and saute for about 2 minutes; add garlic and saute until fragrant, about 1 minute.  Add bay leaf, rosemary, thyme, and pepper; saute an additional 2-3 minutes.


Stir in water, bouillon, tomato paste, and beans; bring to a boil, reduce heat, and simmer for 15 minutes.  Add barley, carrots, and spinach; simmer uncovered for 10-15 minutes, or until barley is done.  If using regular barley, add a little extra water and put the barley in with the beans; simmer until barley is done.  This is one of those things that actually tasted better the second day than the first; the flavors had time to meld better.


Monday, February 27, 2012

Cake Series: Marble Cake


It's been a while since we've added to our cake series, so I thought I'd pick it up again with marble cake.  This is great for those who can't decide between vanilla and chocolate.  It is a really simple cake to make and makes a big impact, especially with kids.

I start with chocolate cake batter and vanilla cake batter.  For vanilla cake, I simply use the chocolate cake recipe here and substitute French vanilla cake mix and vanilla pudding.

I always line my pans with waxed paper (except when making apple streusel cake).  Kimiko shows you how to do this in the chocolate cake post.  This does take more work and time than oiling and flouring the pans, but it doesn't affect the flavor or texture.  Also, it doesn't crumb as much when you are frosting.


To get the marble effect, simply put alternating layers of chocolate and vanilla.  I usually do two layers of each.

One layer of vanilla, one layer of chocolate...

...followed by another layer of each.  (Can you tell someone
wanted to get their fingers into the batter?)  You'll want to fill the pan 1/2 to slightly more than 1/2 full.

Then you just swirl a spoon or other utensil around in the batter.  The key is to not swirl too much.  You don't want to mix the batters together.


Bake, torte, fill, and frost as desired.

This is one cake sliced into three layers.

To make cupcakes, marble your batters in a bowl before filling your cupcake pans.  The key here is to under swirl as the batter will continue to mix together as you are scooping it out.


Bake, fill, and frost as desired.

Sorry--they got eaten before I could get a "done" photo.

Need some filling ideas?  How about peanut butter filling, ganache, or caramel sauce.

For a fun kid cake, you could use all vanilla cake and add food coloring to get colored swirls.

Friday, February 24, 2012

February Flashback Fridays: Chicken Noodle Soup

It's winter, which means soup!  Actually, we haven't had much of a winter here, so I haven't been able to make as much soup as I would have liked to.  It would start to get a bit on the cold side (and by cold, I mean in the 50's, which is cold by my wimpy standards), so I would plan soup into the menu, only to have it warm again and be in the 80's on the day I had planned on making soup.  Big menu planning fail.  I've had to learn to check the weather before planning my meals.  Anyway, we're currently enjoying spring/summer weather, but some of you may be looking for something warm to eat.  Or, some of you may just be sick and in need of some good chicken noodle soup (this has been us this week).  So, hopefully this flashback will provide some comfort.


Last week I said I would write about cookie decorating, but all three of us have been sick for the past week, so it just didn't get done.  I apologize and promise that it WILL get done in the next couple of weeks.  Since we've all been sick and flu season is upon us, I figured it would be appropriate to write about chicken noodle soup.  While I was sick, I was craving chicken noodle soup.  I'm not a big fan of the canned variety, so I headed down the street to the grocery store and bought a chicken, which just happened to be on sale.  Before I continue, let me just say something about the price of chicken.  Back when we first started our blog, Sumiko wrote about her spending parameters and said that she doesn't pay more than $2/lb for meat.  That's my spending limit as well, except when it comes to bone-in cuts.  For example, I would never pay $2/lb for a whole chicken.  Actually, I won't even pay $1/lb for bone-in chicken, whether it's a whole chicken or pieces of chicken.  I don't like to spend more than 75 cents/lb for them and even that is on the high end.

When you're sick, you probably don't want to be making soup from scratch, but it's just so much better than eating out of a can.  My 2-year-old even loved this soup (I make it hearty, so I just gave her some of it without the broth) and as she was eating it, she said, "Mommy, I like it!"  Thankfully, it's a freezable so you can make it while you're healthy and stick it in the freezer for a sick day!
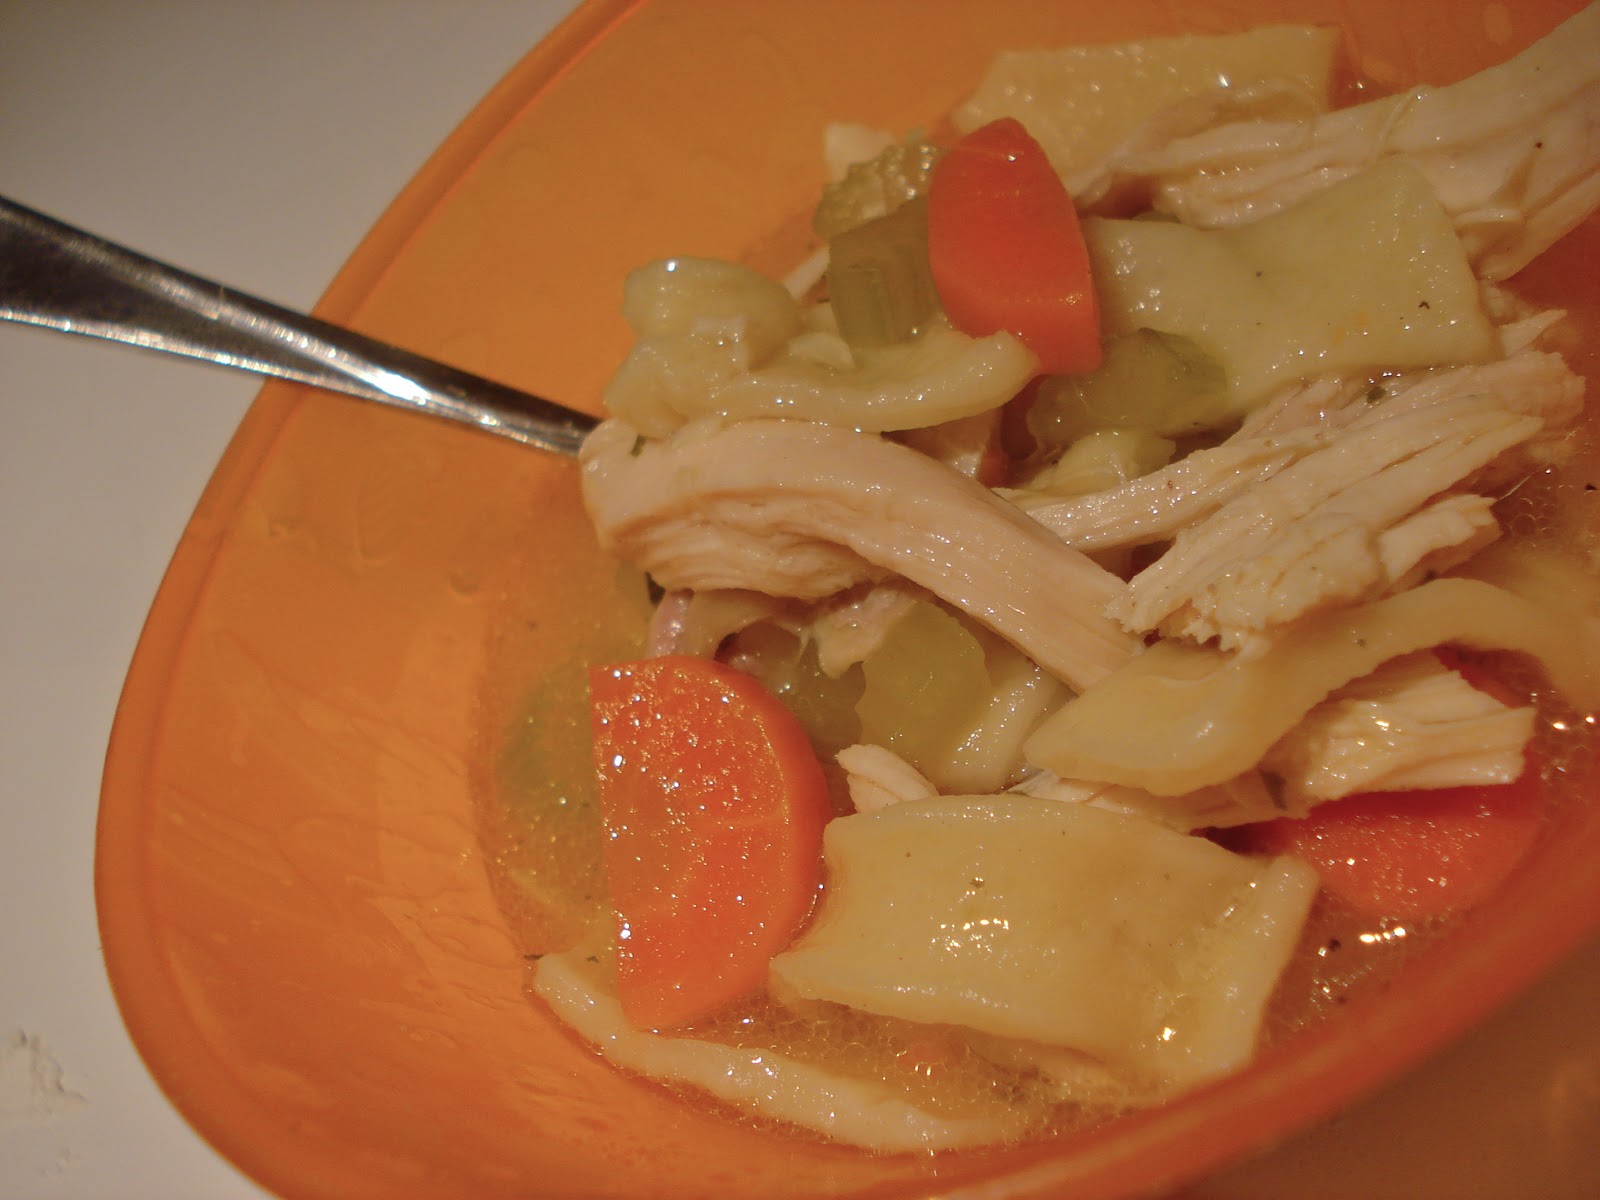
Chicken Noodle Soup
1 whole chicken
2-3 carrots, peeled and sliced
2-3 ribs celery, sliced
1/2 onion, chopped
2 cloves garlic, minced
2-4 Tbsp. chicken bouillon
1 bay leaf
2 tsp. parsley
Salt and pepper, to taste
Egg noodles (see recipe below)

Place chicken in a stock pot and fill with enough water to cover the chicken.


Boil until the chicken reaches an internal temperature of 180 degrees.  By this time, the chicken will be tender and should come off the bones easily.  Remove the chicken from the water and set aside to cool enough to handle.  DO NOT DRAIN THE WATER IN WHICH THE CHICKEN WAS COOKED - this will be the base of your soup!


While the chicken is cooling, boil the carrots, celery, onion, and bay leaf in the broth from your cooked chicken.  Add more water if necessary (I probably added an extra 3 or 4 cups).  Add chicken bouillon, adjusting amount to suit your taste preferences.  Before the vegetables are tender, add the noodles.  Cook until noodles are done and vegetables are tender.  Meanwhile, shred the chicken.  Once the vegetables and noodles are done, add the chicken back into the pot.  Add parsley; season with salt and pepper, to taste.  Remove bay leaf.

The total cost for a large pot of soup (sorry, I didn't measure the exact amount) is around $4!


Egg Noodles
To me, chicken noodle soup just isn't the same without homemade noodles - it's the noodles that make the soup!  They really aren't too difficult to make and they call for ingredients most people probably already have on hand.

2 eggs
1/4 cup milk
1 tsp salt
2 cups flour, plus extra for rolling

Mix eggs and milk.  Add salt and flour.  On a well-floured surface, roll dough to desired thickness.  Some people prefer thick noodles; I prefer thin ones, so mine were probably about 1/16 inch thick.


Cut into strips about 1/2-inch thick by 1 to 1.5-inches long.  Allow to dry for 30 to 60 minutes.  I usually prepare my noodles while the chicken is boiling.  Make sure to watch your noodles closely, as fresh noodles cook faster than dried ones.

Wednesday, February 22, 2012

Frozen Asparagus


Last week Save Mart had asparagus on sale for $0.99 per pound!!  Seeing as I love asparagus and we rarely get it for such a great price, I bought about eight pounds of it!  I probably would have bought more if I’d had the freezer space.  As I was paying, the checker and I were talking about what a great deal it was and she inquired about freezing it.  I had already planned on writing this post, but that solidified in my mind that I needed to do it now.

The first step to freezing asparagus is choosing good asparagus at the store.  You want to make sure the flower is tightly closed and not actually starting to flower.  It is edible once it starts to open up, but not as tender and tasty.  If the produce department is doing a good job, they will keep the asparagus in water to help keep it fresh.

When you get it home, you’ll either want to work with it right away or return it to some water until you can get to it.  When I buy a lot at one time, I like to use my cake pans to store the asparagus.  If you only have one or two bunches, a pitcher will do.  One to two inches of water will suffice.


When you are ready to prepare your asparagus for freezing, rinse it under cold water.  You’ll need to get rid of the tough end by snapping it off.  Don’t cut it off as you will not know where the tough part ends.  By snapping it, you will always remove the tough part and be left with the tender part.  You can see photos of this here.


Cut the asparagus into one- to two-inch pieces and dry on a tea towel.  The key to ending up with individually frozen pieces of asparagus rather than an asparagus ice cube is to remove as much of the water as possible.  Transfer all the cut and dried asparagus to a zip-top bag, remove as much excess air as possible, and store in your freezer.


You can cook this frozen asparagus just like you would cook fresh asparagus.  Just be sure to increase the cooking time.  My favorite way to prepare it is sautéing.  Olive oil, salt, pepper, and a little garlic powder—so yummy!  This lemony version is great too!

Now, one thing to consider when choosing fresh verses frozen is the cost of edible vegetables once the waste has been removed.  Out of about five pounds of asparagus, I had two pounds of waste after I snapped the bottoms (this included a little water weight from washing).  That means I actually paid $1.65 per pound for frozen asparagus.  Wondering how that compares to buying frozen asparagus, I checked out WinCo’s prices yesterday.  They sell a 12-ounce bag for $2.35.  That comes out to $3.13 per pound.  I saved $1.48 per pound by freezing it myeslf!

And those rubber bands that come with the asparagus?  Don’t throw those away!  Those are my favorite kitchen rubber bands.  I use them for all sorts of things, but mostly to close partially used bags of frozen veggies.


Monday, February 20, 2012

Cinnamon Popcorn


Yes, I realize we posted two sweet recipes last week, but this is really the only thing I have ready to post.  I don't think you'll mind, though, because this is so yummy!  It's also very addicting, so beware!  A few weeks ago, one of our friends brought cinnamon popcorn to Bible study and it was just so delicious, I had to ask for the recipe.  She gave it to me, but she makes it in her Whirley Pop.  I don't have one, but I figured that since it's possible to make kettle corn in a regular stock pot, it would also be possible to make cinnamon popcorn in a stock pot.  It took a little experimentation and adjusting the recipe, but I eventually came up with a recipe with which I was happy!

Cinnamon Popcorn
1/4 cup oil
1/2 cup popcorn kernels
1/2 cup plus 1/4 cup sugar, divided
2 tsp cinnamon
1/4 tsp salt

In a small bowl, combine 1/4 cup sugar, cinnamon, and salt.  Set aside.


In a large stock pot, heat oil over medium/medium-high heat (depending on your range).  Put three kernels in the oil.  When all three kernels pop, quickly add remaining kernels and 1/2 cup sugar.  Place lid on pot and continue to cook, shaking the pan frequently.  When the popping slows, remove from heat and add the cinnamon mixture.  Carefully stir the popcorn for about 2 minutes; transfer popcorn to a bowl.  Be careful while stirring the popcorn, as there may be some kernels still popping.  If this is the case, you may want to use the lid as a shield so you don't get hit by one (they're HOT!).


Friday, February 17, 2012

February Flashback Fridays: Taco Soup!

To continue our February Flashback Fridays, I thought taco soup deserved a second look.  This is still one of our favorite soups.  And it is so easy, especially if you are using leftover rice and beans.  It is costing me a bit more to make this dish as the price of frozen corn has gone up.  But it is still well worth it for this flavor-packed, nutritious soup.  Enjoy!


About five years ago, an amazing man came into my life!  No, I’m not talking about my husband, though he is pretty amazing too.  I’m talking about our pediatrician.  He has helped our children stay healthy and feel better when something was wrong.  Lukas is so convinced of Dr. Ng’s abilities that he thinks every owie is worthy of a trip to see him.

One way Dr. Ng helps his patients stay healthy is by making sure they are getting proper nutrition.  When Keanna was a toddler, he told her, “Make sure you eat all the colors of the rainbow every day.”  Of course, he was talking about eating a variety of fruits and vegetables (not Skittles, much to my husband's dismay).  In general, different plant color pigments are associated with different nutrients so it is important to eat an assortment of different colors.

The colors I found in my kitchen and garden, not counting what's in my
freezer and the canned veggies in my pantry.

Ever since then, we’ve been playing the colors of the rainbow game at the table.  While we’re eating, I’ll ask, “What colors of the rainbow are we eating?”  Not only is this a fun game for the kids, but it gets them consciously thinking about the fruits and veggies they are eating and helps them recognize which foods come from plants.  Keanna quickly learned that cheddar cheese does not count for orange.

I started making this taco soup a few months ago and quickly realized that it has a lot of different colors all in one bowl:  red, yellow, green, brown, and black.  Not only that, my version is meatless!!  This means it is super inexpensive and low fat (not counting the toppings).  Because it has beans and rice, it is still a source of complete protein.  It also does not have a lot of extra juice, making it thick and chunky.  Don’t tell your husband it’s meatless, and he might not even notice.  *Wink, wink*  For a vegan version, substitute vegetable bouillon for the beef bouillon and serve with vegan cheese and sour cream.

Taco Soup
4 c. red beans, drained and rinsed
4 c. water
1-28 oz. can diced tomatoes
3 c. cooked brown rice
1 lb. frozen corn
1-7 oz. can or 1 c. diced green chiles
2 Tbsp. beef bouillon
6 Tbsp. taco seasoning (if I wasn't feeding this to my kids I'd add more--I like spicy food!)
Desired toppings:  shredded cheddar cheese, sour cream, sliced olives, diced avocado, sliced green onions, tortilla chips

Combine all ingredients in 5-qt. pot; stir to combine.  Bring to boil, reduce heat, and simmer 10-15 minutes, stirring occasionally.  Serve with toppings.  Yield:  about 3 qts.  (we got two dinners out of one pot)  Total cost:  less than $5 (not including toppings)


I use my homemade red beans because it is way cheaper, but canned will work.  I believe you would need about two cans.  I also use leftover brown rice.  If you don’t have any already made, you can cook the rice right in the soup pot.  Combine ¾ c. brown rice, 6 c. water, and 2 Tbsp. bouillon.  Bring to boil, reduce heat, and simmer, covered, about 45 minutes.  Add remaining ingredients and continue as above.  You may need to adjust the water depending on how much was lost as steam when cooking the rice.

Thursday, February 16, 2012

Lemon Curd


Considering Kimiko posted a sweet recipe on Sunday (homemade marshmallows!), I wasn’t planning on posting this one until next week.  However, I’ve recently had a few requests for it, and we like to keep our readers happy.

I found this recipe in Martha Stewart’s Cupcakes when I was looking for a lemon-flavored cake filling.  Yesterday I had some leftover lemon curd with a cranberry scone (to be posted).  So yummy!  Fruit curd can be used just as you would use jam—toast, French toast, waffles, pancakes, pastries….  It is also a great tart and pie filling.


The recipe calls for egg yolks.  One of my least favorite thing to do is separate eggs.  There are two common ways of separating.  The first is to pass the egg back and forth between the shell halves, letting the white drop into a bowl until only the yolk is left.  The main problem with this method is that the sharp edge of the shell easily pierces and breaks the yolk.  The second common method is to us an egg separator.  I have a plastic Pyrex one that is supposed to fit over the edge of some sort of container.  I have yet to find something in my kitchen on which it fits properly.

Doesn't fit on my Pyrex custard cups, mixing bowls, or
measuring cups.

I have seen an egg separating cup with a slotted lid.  The idea is to crack the egg into the top.  The yolk gets caught in the lid and the whites drip down into the cup.  The problem with this is that if you get to your eighth egg and break the yolk, it gets into the seven whites you’ve already successfully done.

This one is from Wilton.

A few years ago, I figured out my current favorite way to separate eggs.  I simply crack the egg into a small bowl then use my egg separator to scoop out the yolk.  This seems to be a lot faster and cleaner than trying to crack the egg into the separator and get all the white to drip out.  I then pour the white into one container and the yolk into another.  To speed things up, I usually crack two eggs at a time then separate them.  If I break a yolk, I only have to throw the broken one and one extra away.  And don't throw those whites away!!  You can use them for meringue or my vanilla buttercream (coming soon!).

Get everything ready ahead of time.  I put a plate under
my separating bowl to catch the drips.

I usually do two at a time but just did one for
the photo.


Making lemon curd does take some culinary know-how.  If you don’t cook much, you’ll probably want to stay away from recipes like this.  Cooking eggs over water is a delicate process.  If you mess it up, you’ll end up with lemon-flavored scrambled eggs.  A little cooked egg chunk is okay as you can easily strain it out.  Experienced cooks can usually get away without straining.

It also takes some experience to know when to remove the curd from the heat.  The more you cook it, the thicker it will get.  Keep in mind that it will really thicken up as it chills in the refrigerator.

I doubled the recipe so there is
twice as much of everything.
Lemon Curd
2 whole eggs
8 egg yolks
1 c. sugar
2/3 c. lemon juice (fresh is best)
2 Tbsp. unsalted butter, softened and cut into small pieces


Heat about 1-2” water to simmer in large sauce pan.  In heatproof mixing bow, combine eggs, yolks, sugar, and lemon juice.  Set over simmering water and whisk constantly until mixture coats back of a spoon.


Remove from heat.  Add butter, a little at a time, whisking smooth after each addition.


Transfer to bowl, pouring through a mesh strainer if necessary.


Place plastic wrap directly on top to prevent skin from forming.


Refrigerate until cold and firm.  Yield:  about 2 cups.


To use lemon curd as a cupcake filling, follow the instructions here.  For the cupcakes pictured above, fill like normal but let some curd spill out.  Dust generously with powdered sugar.  To fill a cake with it, go here.
Related Posts with Thumbnails