The kitchen diaries of two sisters on a mission to feed their families and save money. Healthy. Delicious. Affordable.
Showing posts with label Fun. Show all posts
Wednesday, December 14, 2011
Waffles (and a fun Christmas breakfast!)
We love waffles at our house, so when I saw this fun Christmas idea with waffles on Pinterest, I just had to try it! Then I realized I've never blogged my waffle recipe, so here I am killing two birds with one stone.
Waffles
2 eggs
1 cup milk
1/4 cup oil
1 cup flour
1 heaping Tbsp sugar
1/4 tsp salt
2 tsp baking powder
Preheat waffle iron according to manufacturer's instructions and grease if needed.
Separate eggs, placing whites in a small mixing bowl and yolks in a large mixing bowl. Beat whites until soft peaks form. In the bowl with the yolks, add the milk and oil; mix well. Add flour, sugar, salt, and baking powder and mix just until incorporated and most lumps are out. Fold in egg whites to incorporate. Pour batter according to manufacturer's instructions and cook. If you'd like to freeze waffles, allow them to cool completely, then place in a zip-top bag and freeze. To reheat, either place in the microwave or toaster until warm.
To make the Christmas trees:
For the trunk: Either make a normal waffle and cut into rectangles or use a piece of bacon.
For the tree: Add green food coloring to the batter; cook waffles. If they come out too brown, turn the heat down on your waffle iron. Because my waffle iron makes waffles that are so thick, in order to cook the middle of the waffle, the outsides ended up with some brown on them, but my daughter didn't even seem to notice!
When waffles are done, separate into triangles. If yours are thin enough, you can just overlap them like this one here. Mine are too thick, so I cut little triangles out of the bottom of each one and just fit them together like a puzzle.
Star: I cut a slice of an apple, then used a star cookie cutter to get the star.
Ornaments: I used M&M's because I had them on hand (they were left-over from my daughter's Halloween stash), but you could also use fresh berries (which, unfortunately, aren't cheap right now).
Thursday, November 24, 2011
Happy Thanksgiving!!
As we pause from our busy lives to reflect upon our blessings and thank God for all His mercies, we'd like to thank all of you, our loyal readers! What started as chit chat between two sisters has blossomed into a year-and-a-half food adventure. Our readership continues to grow, mostly due to all of you sharing Near to Nothing with your friends and family. So thank you very much!
And since this is a food blog, we have to have a recipe.
April Sandwich
1 Mommy
1 Aunt
1 April (any other child will do)
Position April between Mommy and Aunt. Place puckered lips of Mommy and Aunt on cheeks of April.
If you like April sandwiches, you should also check out April burritos!
Labels:
Fun,
Thanksgiving
Monday, November 14, 2011
Homemade Simmering Potpourri
The holidays are approaching, and that means lots of wonderful smells coming from the kitchen! Walking into a house that smells of cinnamon and spice is just so welcoming and comforting. So how do you create those warm and cozy feelings when you don’t have time or occasion to bake something sweet? Make your own simmering potpourri!
Now, I know this isn’t a food recipe, but it uses cooking spices and will make your family and friends think you’re baking up something delicious. In fact, a few weeks ago, I was simmering some of this potpourri when Robbie returned home from work. He walked in and said, “It smells too good to be true!”
If you have a potpourri pot, you can definitely use it to heat your potpourri. I don’t have one so I just heat it on the stove. You may need to increase the spice to water ratio as the pots don’t get as hot as the stove. When heating potpourri on the stove, be careful not to forget about it and let the pot go dry. Burnt cinnamon is not nearly as welcoming.
Cinnamon sticks can be very pricey if you buy them in jars in the spice aisle. I get mine from the bulk bins. I believe they are about $3-something per pound, but it takes a lot of cinnamon sticks to get a pound. I also get the whole cloves in the bulk bins.
I generally reuse the same spices a few days in a row. Simply add more water and reheat. If you decide not to use them one day, discard them so they don’t grow bacteria or fungi.
Feel free to experiment with different spices. These are just the ones I like.
Homemade Simmering Potpourri
2-3 cinnamon sticks
5-6 whole cloves
few dashes nutmeg
Tuesday, November 1, 2011
2011 Grandkid-O-Kins and Costumes
As promised, a special Tuesday post. Of course, I have to share the pics of my little munchkins!
![]() |
| Fire! Complete with orange hair and firey fingernails! |
![]() |
| Our two little firemen--ready for action! |
![]() |
| And our little firehouse puppy! Thanks to Aunt Kimiko for finding this adorable dalmatian costume for only $1.50!! That's a Near to Nothing costume! |
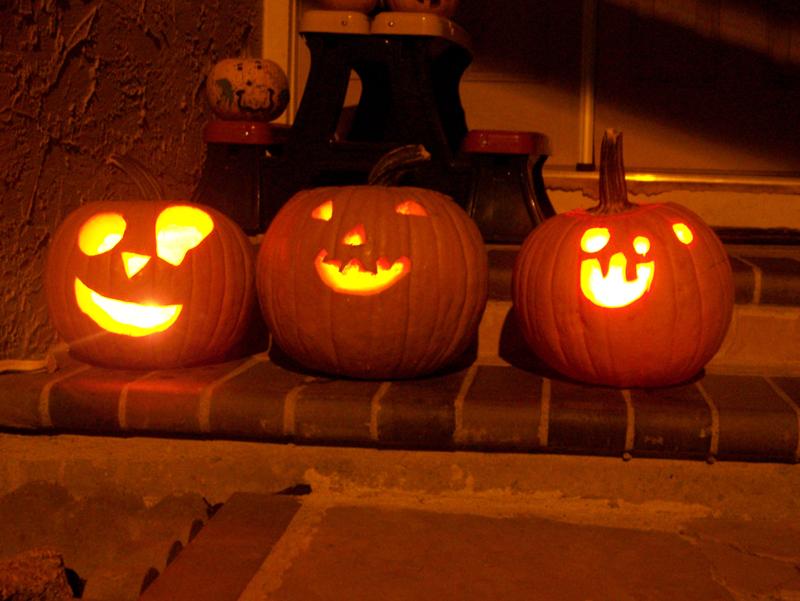
And now for our dad's annual pumpkins!
He never ceases to amaze us!
Labels:
Fun
Monday, October 31, 2011
Jack-O-Lanterns and Roasted Pumpkin Seeds
Happy Halloween!!! Tonight’s the night! Our neighborhoods will be decorated and lit up with jack-o-lanterns! How fun! Our dad has already finished three grandkid-o-kins and just has two more to carve today. (Click here to see last year’s, at the bottom of the post.) We’ll be sure to post a photo of them tomorrow.
| 2009 grandkid-o-kins. No April yet. |
Robbie and I spent yesterday afternoon helping our kids carve their pumpkins. I bought them at Raley’s for only $3 each! And they’re huge!! I don’t have pictures of the process—it was just too messy and too crazy. We started by using a crayon to draw around the stem where we planned on cutting the top out. Then they got to draw their design on the pumpkin, knowing that they could not go inside the circle.
Robbie and I scooped out the insides and Keanna separated out the seeds for roasting. You can find our roasted pumpkin seed recipe here. They are soooo yummy! One tip that we didn’t mention: to help separate the seeds from the strings, place it all in a large bowl or sink full of water. The seeds will float and the strings will sink. Squish the seeds between your fingers to separate them from the strings then skim the seeds off the top of the water.
Once all the pumpkins were cleaned out, we moved on to carving. As much as the boys would love to carve their own jack-o-lanterns, Robbie and I still do the cutting for them. Keanna carved almost all of hers this year. My mom just helped her with the mouth.
There are a few ways you can extend the life of your jack-o-lantern. The first is to store it in the fridge. Of course, this takes up a lot of space. You can also spray or rub all the cut surfaces with vinegar to discourage bacterial and fungal activity. The third method is to apply a coat of petroleum jelly to the cut surfaces to prevent loss of moisture. This is what our dad does on the faces of his pumpkins.
Be sure to stop by tomorrow to see our dad’s 2011 grandkid-o-kins! Have a safe and happy Halloween!
Labels:
Fun
Monday, July 4, 2011
Lemonade Stands: Teaching Kids about Food and Business
This weekend Keanna ran her first lemonade stand!! While a few friends, my mom, and I held a yard sale, Keanna tempted our shoppers with ice-cold fresh-squeezed lemonade. Fortunately for her, it was in the mid-90's that day!
In honor of her first entrepreneurial success, I thought I'd revisit my lemonade recipe that I posted last summer and include some tips for running a lemonade stand.
Lemonade
1½ c. lemon juice
6 c. water
1¼-1⅓ c. sugar
Combine all ingredients in a 2-quart pitcher and mix until sugar is dissolved. Serve chilled or iced. Yield 2 quarts. Total cost (if you have a lemon tree): almost FREE!!
- When deciding how much to charge, don't just take cost and profit into consideration. Think about the mathematical ability of the child running the stand. Keanna is still trying to grasp money so we charged $0.50 for a 16-oz. cup of lemonade. This way she only had to deal in multiples of 50's, or two quarters. For some extra money lessons, I took some of our yard sale money and traded her coins for some bills so she would see that coins add up to bills.
- Have your child help make the lemonade and take the opportunity to teach about fractions.
- Put the lemonade in a glass or clear plastic pitcher so people can see it. More people will be willing to buy it if they can see it first.
- To increase your profit margin, you can put ice in the cups when serving the lemonade. We didn't do this.
- Have your child make the sign--it's cute and will get peoples' attention. Be sure to help them make it large enough for people to see and read easily.
- To keep your lemonade cold without watering it down, use lemonade ice cubes instead of regular ice. A few days before, start freezing lemonade in ice trays. Once frozen solid, transfer the cubes to gallon zip-top bags until they are needed.
Labels:
Beverages,
Fun,
Kid-Friendly,
Recipes
Monday, April 25, 2011
Crayons
Sumiko said we'd be writing a deviled egg recipe this morning to use up those leftover Easter eggs. I have to admit and apologize that time just seemed to escape us and it never got done (that seems to happen when we're together). So instead we have a "recipe" inspired by Sumiko's crayon-eater. Don't worry, we will be posting the deviled egg recipe this week!
If your kids are anything like my daughter, you will end up with more broken crayons than whole crayons. In fact, many crayons will be in such small pieces that they're virtually unusable. Instead of throwing them out, we use them to make bigger, multi-colored crayons! And one of the best parts about this for my daughter was being able to unwrap the crayons (well, the ones that she hadn't already unwrapped, anyway)!
Homemade Multi-colored Crayons
Crayon pieces, unwrapped
Muffin tin (optional)
Aluminum foil
Cupcake wrappers
Preheat oven to 325 degrees. Line muffin tins with aluminum foil (if you don't line them, some of the wax will soak through the cupcake wrappers and stick to your pan, which can be cleaned off, but won't be fun). Place a cupcake wrapper (or wrappers) into the lined muffin tin.
Fill wrapper with crayons (the amount of crayons you put in will determine how thick your crayons will be).
| I love these chubby fingers! |
Place in the oven for 30 minutes, or until crayons are melted into one big crayon.
If you leave them in too long, they will liquify too much and the colors will combine, turning into a brownish color. Remove from the oven and allow to cool completely. Take the wrappers of the crayons and color away!
If you don't have a muffin tin, you can simply make a mold out of the foil and place the cupcake wrapper into the foil mold.
Labels:
Fun,
Gifts,
Kid-Friendly
Friday, April 15, 2011
Easter Egg Dye
Growing up, one of our Easter traditions was to color Easter eggs. We usually bought the dye kits from the store; however, it is very easy to make your own egg dye at home. There are ways to dye eggs using only natural coloring, but I didn't have the time or ingredients to do that, so here's the food coloring/dye version.
Easter Egg Dye (recipe is per color)
1 Tbsp. vinegar
1 cup water
30 drops food coloring
Hard boiled eggs
Combine vinegar, water, and food coloring. Depending on how intense you'd like your colors, use more or less than 30 drops.
Place egg in dye; let sit for a few minutes.
Remove egg from dye and allow to dry completely.
If you have food dye, you can use that instead of food coloring. Just start with a small amount and gradually add more dye until the desired shade is reached .
When you buy an egg dyeing kit, it comes with a handy little gadget to put your eggs into the dye and to get them out again. I used a regular spoon and my fingers. A slotted spoon would work even better. Kits also usually contain little holders on which to place the eggs to dry. You can simply use the carton the eggs came in or cut a strip of paper, make a loop, staple it, and set the egg on top of it.
Labels:
Eggs,
Fun,
Holidays,
Kid-Friendly
Friday, March 25, 2011
Barbara's Cookbook
In a few previous posts, I’ve mentioned a cookbook that someone gave me when I got married. This is where I got the recipes for Auntie Pearl’s sweet and sour chicken and Auntie Laurel’s comfort soup. I promised I’d sometime devote a post to the cookbook itself because it is such a treasure, so here it is.
The cookbook was given to me by Barbara. She has known me since I was two years old, when I attended the preschool she had in her home. But her influence in my life did not end when I went off to kindergarten.
She and my mom developed a friendship, and Kimiko and I became friends with her two youngest sons, who are our ages. Over the years, we’ve gone to school with her boys, carpooled together, spent holidays with her family, and now she and Robbie work at the same school.
When I got engaged, she collected recipes, photos, and notes from friends and family members. She put them all together in a beautiful recipe book that I absolutely love. It would actually be more accurate to describe it as a scrapbook that happens to contain recipes. She put so much love and work into it—I can’t imagine how long it took her to put it together.
She started it out with a page where I can put photos of my family (I still need to do this).
Barbara asked each person to submit a recipe and a photograph. These are the recipes and photos submitted by our mom and Kimiko.
| Yup, that's the two of us when we were little. The puppy is Peru, the first Guide Dog we raised. |
She also gave everyone a card to write a note to me, and precisely cut through the page protectors so I can open and read them without having to take the pages out.
In addition to the pages she designed and decorated, she included blank pages throughout so I can add my own recipes or collect more from other people. This blank page is across from our Grandma’s pot pie recipe.
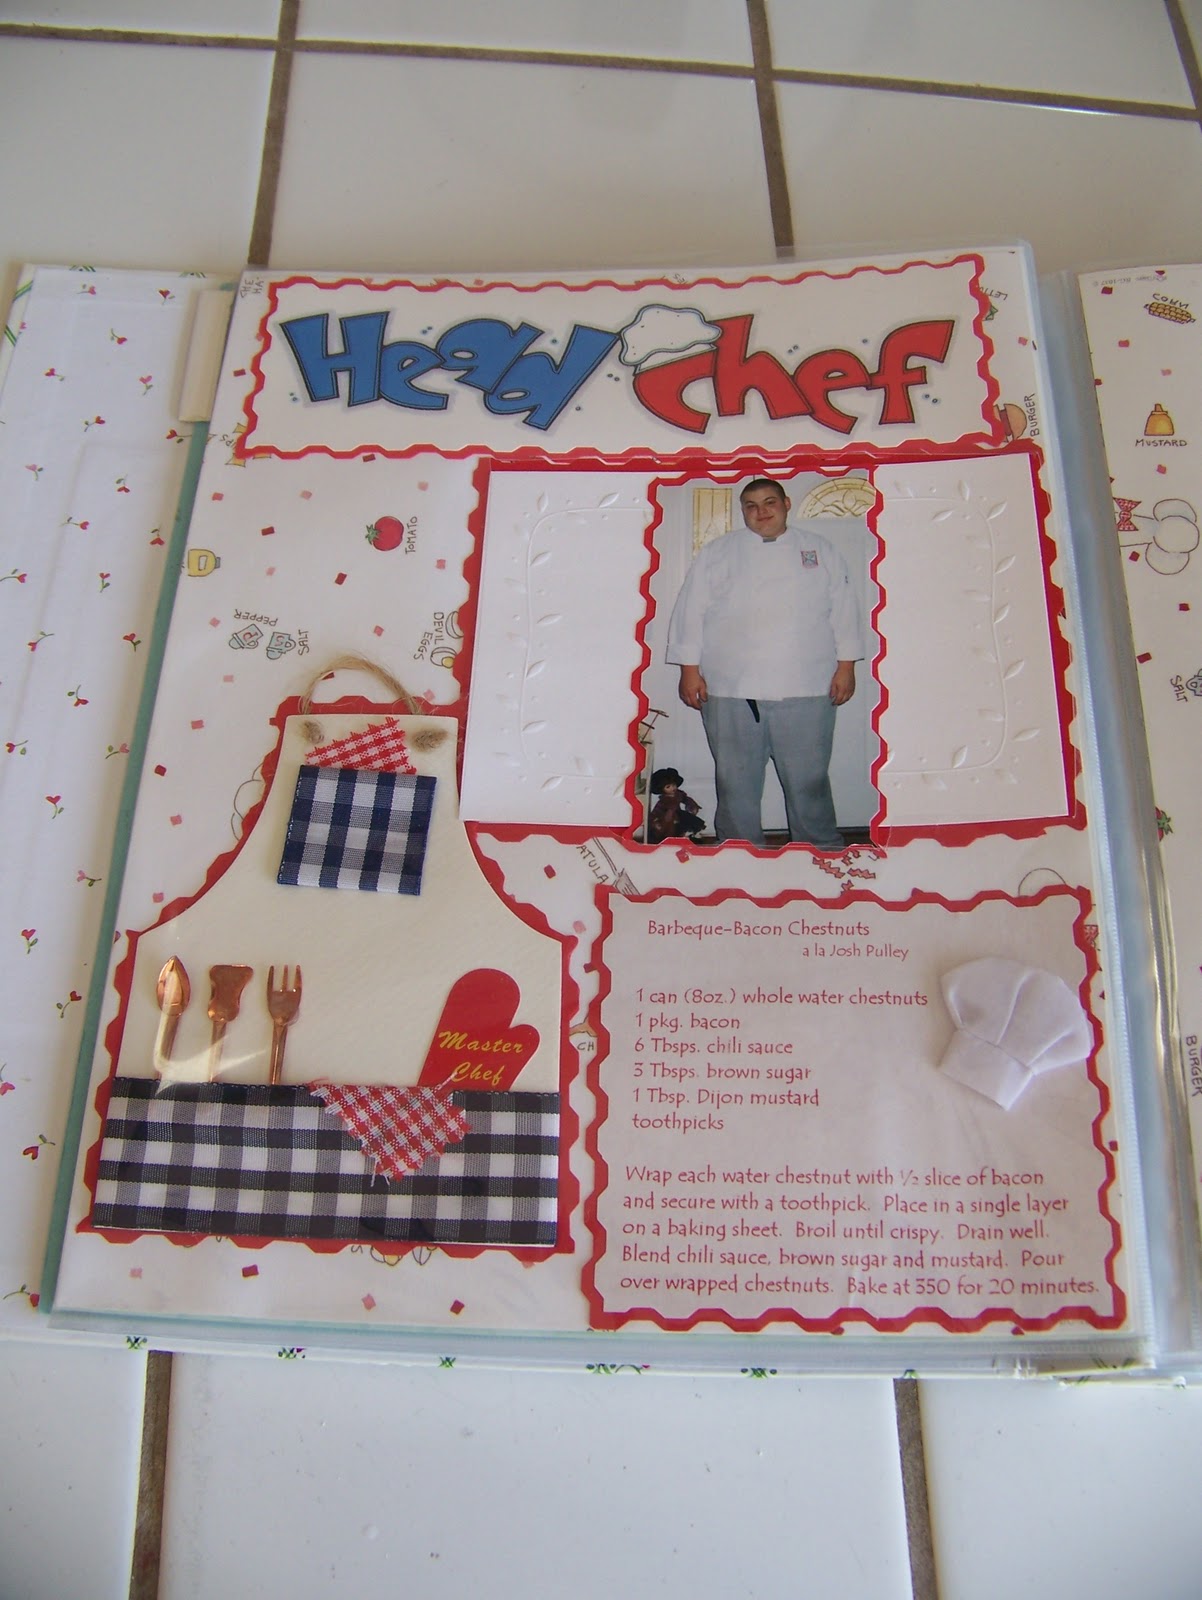
Here is a really cute page she did for her son Josh’s recipe (he’s a chef). He makes these barbeque-bacon chestnuts every Christmas—yum!
All the recipes are organized into categories.
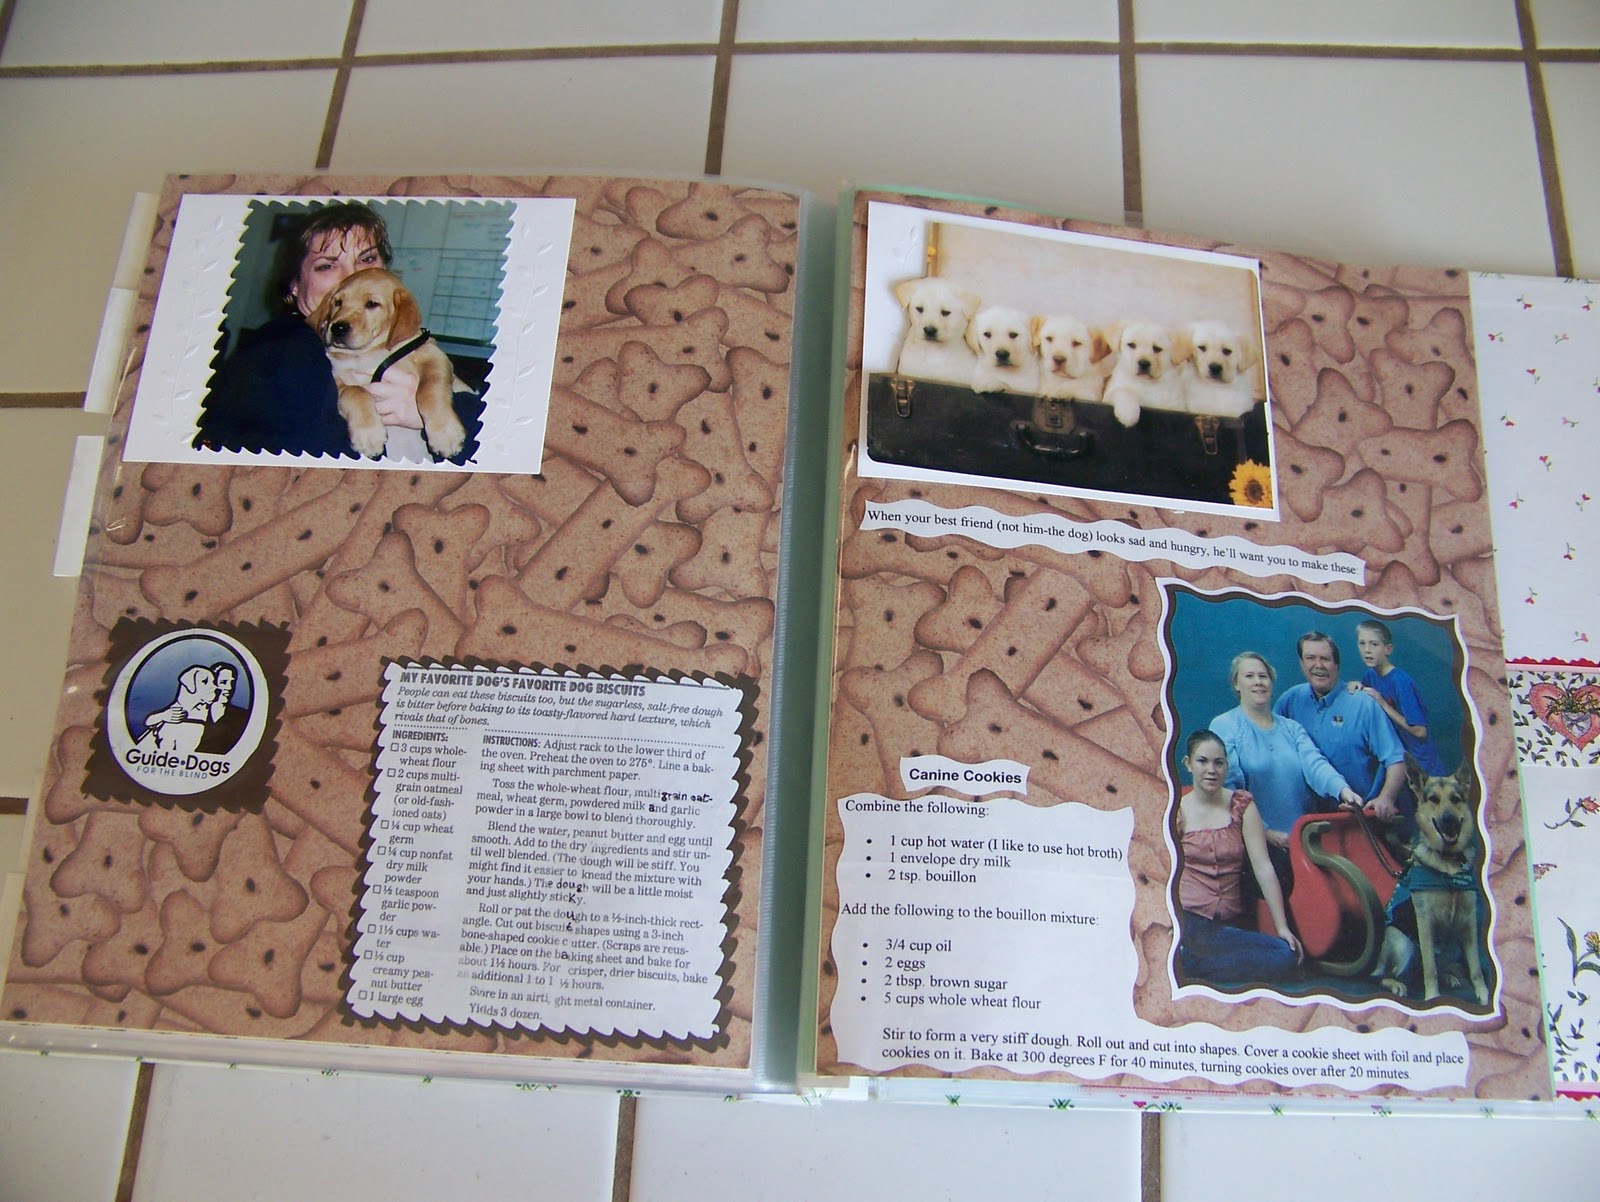
If you clicked on the above picture to see it larger, you would have noticed that the last category is pet food. Yes, some friends submitted pet food recipes. If you know our family, this will not surprise you. For those of you who don’t know us, we have been involved with Guide Dogs for the Blind for about ten years and are also involved with Dogs4Diabetics. (Take a few minutes to click on the links to both organizations and see how their amazing dogs transform lives!)
She typed some of the recipes to make them fit better, but wanted me to have all the originals. The back cover of the book has an envelope that holds them.
As you can see, this cookbook that Barbara made for me is truly special. It contains some of my favorite recipes and represents a lot of the people who have been influential in my life. I will always cherish this book.
Friday, December 24, 2010
Ideas for Decorating Your Christmas Desserts
I want to start this post with an apology. I fully intended to write about our traditional Christmas morning cinnamon rolls, but two of my kids and myself have had the flu this week. Hopefully I'll feel well enough tomorrow so we can have them Christmas morning.
In lieu of those oh-so-yummy cinnamon rolls, I will briefly give some ideas for decorating your Christmas desserts. To give credit where credit is due, I got these ideas from the books Hello, Cupcake! and What's New, Cupcake?

I made these super cute snowmen for my daughter's class Christmas party.
Though you can't see it in the picture, I dipped the tops in sugar to look like snow. They eyes and mouths are chocolate chips pressed into the frosting upside down. For the nose, I bought orange slice candy and cut them into shape. One of my own tips on this: dip the cut edges in sugar so the candy does not stick to your fingers while you're trying to work with it. For the hats, I cut Famous Chocolate Wafers into hat shapes and pressed them into the frosting. A little green frosting and red chocolate-covered sunflower seeds provided the finishing touch.
Now some of you may be thinking, "Where will I get chocolate-covered sunflower seeds?" I found them in the WinCo bulk bins!! That's also where I bought the orange slice candy. The great part about buying decorating ingredients from the bulk bins is that you can buy just the amount you need--it only takes 3 orange slices to make 24 snowman noses so you can just buy 3! If you can't find these ingredients, be creative! Use mini M&M's instead of sunflower seeds and orange Starbursts instead of orange slices.
For the twins' first birthday, I made panda bear cupcakes.
The arms and legs are chocolate sandwich cookies, such as Oreos, cut in half. The fur is made from those same cookies that have been crushed. The noses are brown jelly beans (also from the bulk bins). I'm having a moment of Mommy Brain and can't remember the name of the candy I used for the ears--chocolate-covered caramel. If you know the name, please leave it in the comments. The eyes are mini chocolate chips. All the remaining features are made of frosting.
You can turn these pandas into Christmas polar bears with a few simple substitutions. (Since I've been sick and I don't actually have photos of polar bear cupcakes, you'll have to use your imagination.) For white ears, use white lifesavers. Instead of chocolate sandwich cookies, you can use Golden Oreos for the arms, legs, and fur. You can even add a red scarf made out of a Starburst (microwave a few seconds to soften, roll flat, and cut with sharp knife).Once again, my sincerest apology for this last-minute, semi-Christmasy post. We'd like to wish all of you a very Merry Christmas!!
Labels:
Desserts,
Fun,
Holidays,
Kid-Friendly
Subscribe to:
Posts (Atom)