Friday, March 30, 2012

April Fools! Nachos or Cupcakes?!?


With April fools day coming up, I just had to do something fun for the boys’ preschool class.  When Keanna was in preschool I made these totally fun spaghetti cupcakes.

Looks like it belongs on a potluck table!

Piped frosting, strawberry jam, Ferrero
Rocher, and grated white chocolate.

But I’m not very creative.  I get all my really good ideas from other people.  Enter Pinterest!  My sister found this post about nacho cupcakes from Sweet Simple Stuff.  And they really are simple!  A lot of the fun cupcakes I’ve done in the past require a lot of little candies and cereal that I normally don’t have on hand.  

Had to buy:  sandwich cookies, root beer Jelly Bellys,
and Milk Duds

Had to buy:  chocolate wafer cookies, orange slice candy,
candy-coated sunflower seeds

But for these, I only had to go buy the sour straws.


You can use any cupcake recipe or any frosting (even canned!).  I chose to go with yellow cake (using this recipe with yellow cake mix and vanilla pudding) and a vanilla powdered sugar frosting.

The cinnamon chips are super easy to make and are a great treat!  I’ve made these before and served them with fruit and peanut butter dip.  All you do is get some cinnamon sugar to stick to a tortilla, cut it into wedges, and bake them.  You can use cooking spray to get the cinnamon sugar to stick.  But I don’t buy cooking spray so I just brush some water onto each tortilla.  You could also use melted butter.

One thing that helps get the realism is to put your cupcakes in a dish that you’d expect to use for nachos.  I went with a 9X13 cake pan, a pie plate, and some to-go boxes.


Cinnamon Chips
Flour tortillas (soft taco size work best)
Water, cooking spray, or melted butter
Cinnamon sugar


Preheat oven to 425°.  Brush or spray each tortilla with water, cooking spray, or melted butter.  Sprinkle with cinnamon sugar.


Using a pizza cutter, cut tortilla into wedges.

I wanted small chips for the cupcakes so I cut
each tortilla like this.

For a sweet snack, I just cut them into wedges.

Transfer to baking sheet.  Bake 7-9 minutes or until golden brown and crispy.  Chips will crisp up as they cool.


Soooo yummy!!

Nacho Cupcakes
Cupcakes
Frosting, tinted with yellow and orange
Strawberry or raspberry jam
Cinnamon chips
Sour straws, snipped

Position cupcakes in dish right against each other.  Place a blob of frosting on each one and spread cupcake cake style, covering cupcakes completely.  Or you could pipe the frosting as Sweet Simple Stuff does.


Yes, it's technically a CCC.  Sorry, Jen.

Add a dollop of jam on top of each cupcake.

My apologies for this horribly yellow, 80's fluorescent
lighting photo.

Insert cinnamon chips into frosting and sprinkle with snipped sour straws.


What kid (or grown-up) wouldn't be excited to see this
on the table on April Fools day?!?

If you want to go all out, you could add a little vanilla or plain yogurt for sour cream and snipped black licorice for olives.

Thursday, March 29, 2012

Planning Ahead for Easter?


As Kimiko mentioned yesterday, we will be having non-traditional carnitas for our Easter dinner.  We just want the day to be as stress-free and dish-free as possible.  We'd rather spend our day hiding and re-hiding (and re-hiding and re-hiding...) the plastic eggs in the backyard for the kiddos.

Leftover ham quiche

But if you're having a more traditional meal, you might want to check out these recipes:

Mashed potato casserole


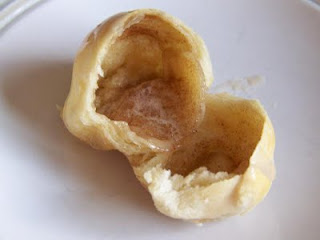
Resurrection rolls--empty like the tomb!

For those of you who will be dying Easter eggs, you might be interested in these posts from last year:


Wednesday, March 28, 2012

Kimiko's Carnitas and our Easter Menu


In honor of Easter coming up next week, I've decided to post my carnitas recipe.  Yes, I realize that carnitas and Easter don't really go together for most people; however, the family is going to be together and we wanted to do something easy that didn't take away from family time.  As I got to thinking about what we would have, the idea of spending hours making a meal that would take (probably) minutes to eat is ridiculous!  Especially when we're with out-of-town family.  So this year, we decided to have carnitas, since we'd be able to throw them in the slow cooker before church and have them done when we're ready to eat.  In addition, we're also planning on having homemade refried beans, guacamole, brown rice, chips, resurrection rolls, and some other dessert (probably cheesecake - to be determined).  Much of the prep work will be able to be done a day or two before and we can just reheat on Sunday afternoon, leaving more time for enjoying time with each other (not to mention, less clean-up too)!

And yes, I realize that Sumiko posted a recipe for carnitas a few months ago.  In posting another recipe for carnitas, I'm not saying that her recipe isn't good.  I'm simply saying that I also have a recipe that I use and that we like a lot!!!  I actually got it from my sister-in-law and it has become a favorite in our house! Don't skip the last step in the oven - that really makes this meal!

Oh, and a note on the meat.  I recommend using a fatty cut, like a shoulder roast or a pork butt.  The fat will cook down and will result in a super tender, juicy, and flavorful meal.  Cuts like loin roasts aren't really fatty enough and won't give you the tenderness of the flavor you're looking for.  I must confess that when I made it and took pictures, my pork butt wasn't large enough, so I added a little chunk of loin roast.  Since it didn't have the fat, I made sure to put it on the bottom, under the pork butt, so it would still cook in the fats from the other pork.  When I shredded it, you could definitely tell a huge difference in flavor between the two cuts, but I mixed it all up, making it harder to tell the difference.  Additionally, to make this meal more cost-effective, I wait until pork butt goes on sale for under $2/lb (which is quite often where I live).

The pork butt - notice all the marbling.

Pork loin is good for things like pork chops,
but not the best choice for carnitas.  Notice how
different this looks than the pork butt.

Kimiko's Carnitas
4 lb pork shoulder or pork butt roast
3 tsp salt
3 tsp cumin
1 1/2 tsp dried oregano
1 tsp ground coriander
1 tsp paprika
1 tsp chili powder
1/4 tsp cinnamon (optional)
4 bay leaves
4 cloves garlic, minced
1 cup water
1 Tbsp chicken bouillon
1 onion, diced

In a small bowl, combine salt, cumin, oregano, coriander, paprika, chili powder, and cinnamon if using.  Set aside.


Place chopped onions, water, bouillon, and bay leaves in the bottom of your slow cooker.

Prepare the roast by trimming it of most of the excess fat on the outside of the roast (there is still plenty of fat throughout the meat itself).  Cut the roast into 4 or 5 large chunks.  Rub garlic onto meat, making sure each piece is adequately covered.  Reserve 1 Tbsp of your dry spice mixture and set aside for later.  Rub the remaining dry spice mixture over meat, covering all surface areas; place meat in slow cooker.

I love the natural light!  I don't photograph food using natural light too often, due to the fact that my kitchen is no where near a window.  However, I had a little extra time to spare this day and kept running over to the sliding glass door in the living room with my food to take pictures.  I'm pretty sure my 3-year-old thinks I'm crazy - and she's probably right!

Cook on low for 8-10 hours.  


Mmmm...perfectly tender!
Preheat oven to 400 degrees.  Shred cooked meat and spread it evenly over a jelly roll pan.  Pour some of the juices from the slow cooker over the meat, then sprinkle it with the reserved spice mixture.  Bake 10-15 minutes, or until the juices have evaporated and the meat gets a little crispy.  DO NOT SKIP THIS STEP!  This takes it from delicious to absolutely AMAZING!!  

Before crisping in the oven...

...after crisping.  Yum!
Serve with tortillas, and your choice of toppings, like rice, beans (pinto, refried, or black), lettuce, sour cream (or Greek yogurt), salsa, avocado or guacamole, and cheese (we like Monterey Jack).  Keep in mind that incorporating rice and/or beans will reduce the cost of your meal, since you'll be using less meat!

I apologize that I have no picture of this as the final product (ie on a tortilla along with the other toppings), but I had been smelling this amazing meal cook ALL DAY LONG and I was hungry and neglected to snap a photo.  On a side note, instead of putting this in a tortilla, you can make a salad or a rice bowl out of it.  Just put it on some lettuce and rice, along with whatever other options you choose and enjoy!

Monday, March 26, 2012

Parmesan Baked Potatoes


A while ago I posted this recipe for parmesan baked potatoes on The Frugal Find.  It was such a hit there that I had to share it here on Near to Nothing.  Potatoes are a great way to stretch your grocery budget—they are filling and versatile!  And this recipe is so easy that Keanna can put it together.  I just help her with the oven.

There are many different types of potatoes, but the most common in my area are Russet (baking) potatoes, red potatoes, white potatoes, and Yukon gold potatoes.  Russets are by far the most inexpensive, though the others offer more depth of flavor.

I bought these 10-pound bags of potatoes for $1.99
each at Safeway a while ago.  I can never have too
many potatoes on hand!

Thanks to America’s affinity for French fries and potato chips, potatoes have really gotten a bad rap.  But potatoes are actually very nutritious.  One raw medium (~7.5 oz.) potato provides 4 grams protein, 5 grams dietary fiber, 70% daily vitamin C, 31% daily B6, and 26% daily potassium along with loads of other vitamins and minerals (see complete breakdown here).  The key to getting all these nutrients is to eat the skin, which contains a lot of the healthy components.  So to get the most nutrition for your money, don’t peel your potatoes.

Of course, the cooking method can also affect the final nutritional value of potatoes.  Remember:  more heat=more nutrient loss and more water=more nutrient loss.  With this in mind, the healthiest way to eat a potato is raw.  While not appealing to most people, it is perfectly fine to eat raw potatoes (see note at end).  In fact, April loves to eat raw potatoes!  On a side note to you moms, this is a great way to occupy your little ones while you’re trying to cook—the potato keeps April busy for quite a while, but since she doesn’t have all her teeth, she doesn’t actually end up eating very much of it.

A potato for my sweet potato!

Yummy!

For those like me who like their potatoes cooked, there are so many options!  I can’t possibly dive into all of them today so I’m going to focus on the methods that require the addition of oil, since that seems to be America’s favorite way to eat them.

French fries and potato chips are deep fried; and, frankly, that’s what makes them taste so good!  When deep frying potatoes at home, always make sure your oil is clean, you maintain the proper temperature, and you let the finished potatoes drain a bit after cooking.  Keep in mind that the more surface area there is, the more oil will be added during the frying process.  So one pound of steak fries is healthier than one pound of shoestring potatoes.


Sautéing is a much healthier option to deep frying.  You still need to oil the pan, but a lot less oil is used.

A third option is oven-frying.  This basically means baking potatoes in the oven but adding some fat to get some caramelization and crispiness.  The amount of fat can vary greatly from a spritz of non-stick spray to a layer of fat on the bottom of the pan.

A while ago I found this great recipe for parmesan baked potatoes in our church cookbook and have been making them like crazy!  Of course, they do have added fat in the butter and the parmesan, but they are so delicious and so easy with minimal active prep time!  And the amount of fat can be altered to your preference simply by reducing the amount of butter and parmesan.

An added bonus to this recipe is that you can freeze the baked potatoes and reheat them in the oven at a later time!

Parmesan Baked Potatoes
6 Tbsp. butter
3 Tbsp. grated parmesan cheese
¾ tsp. salt (more or less to taste)
½ tsp. garlic powder (more or less to taste)
Few dashes pepper
About 6 medium Russet potatoes, washed and halved length-wise (any type of potato will work)


Preheat oven to 375 for a clear pan or 400 for any other.  Place butter in 9”X13” baking dish; cut into small pieces.  Place dish in oven as it is heating to melt butter (DON’T LET IT BURN!); remove from oven.


Melted, but not browned.

Sprinkle parmesan cheese, salt, garlic powder, and pepper over melted butter.


Place potatoes in dish, cut-side down.  Bake uncovered 40-45 minutes or until tender.


Delicious!!

To freeze, let potatoes cool completely.  Place on rimmed baking sheet.  Freeze until solid, at least 2 hours.  Transfer to gallon zip-top bag.

To reheat, bake, cut-side up in preheated 350° oven for about 20 minutes.  Reheating time will vary depending on type and size of potatoes.

Note:  Green potatoes can contain a higher concentration of solanine, a toxin found in trace amounts in normal potatoes.  The amount of solanine even in a green potato is not likely to cause problems, but for safety’s sake, any potatoes that are green should be discarded.  See the Snopes.com article here and the NIH information here.

Friday, March 23, 2012

Spicy Black Bean Soup


Ok, so it's officially not winter anymore, but that doesn't mean I'm done eating soup!  At the moment, this is my favorite!  I stumbled upon this recipe and I'm so glad I did.  I did alter it a bit, though.  Because it has a bean base, it is very inexpensive but is so full of flavor!  I've been eating it over a little steamed brown rice to bulk it up a bit.

Spicy Black Bean Soup
2 cups dry black beans
2 bay leaves
2 Tbsp minced or pureed chipotles in adobo
5 cups water
2 Tbsp olive oil
2 large onions, diced (mine came out to about 4 cups)
3 celery ribs, diced
2-3 carrots, diced
2 cups frozen corn
6 cloves garlic, minced
1/2 tsp red pepper flakes
1 1/2 Tbsp cumin
6 cups water
2 Tbsp chicken bouillon
1-2 Tbsp lime juice
Salt and pepper to taste

Place beans, bay leaves, chipotle, and 5 cups water in a large saucepan.  Cover and bring to a boil.  Once boiling, reduce heat to low/medium-low; simmer until beans are tender (1 1/2 to 2 hours).  If necessary, add more water as beans cook.  Once tender, remove from heat and set aside (don't drain them).


Heat olive oil over medium-high heat in a stock pot or Dutch oven.  Add onions, celery, and carrots; saute until tender and slightly browned.  Reduce heat to medium-low; add garlic, red pepper flakes, and cumin.  Cook, stirring frequently for about 2 minutes.  Add beans with cooking liquid, water, and bouillon.  Increase heat to high; bring to a boil.  Once boiling, reduce heat and simmer, uncovered, for 20 minutes, stirring occasionally.


Remove about 1/3 of the soup and blend in a blender until smooth or use an immersion blender right in the pot to get desired texture.  Return to pot; add frozen corn.  Simmer until heated through.  Remove from heat and add lime juice.  Season with salt and pepper to taste.  Serve with tortilla chips, sour cream (or Greek yogurt), avocado, cheese, etc.

Related Posts with Thumbnails