Wednesday, September 29, 2010

Homemade Refried Beans

If you are a faithful reader of Near to Nothing, you know that we love dried beans!!  They are economical, easy, nutritious, and versatile (e.g. hummus, taco salad, chili, and burritos).  I’ve been cooking and serving dried beans for quite a few years, but I just recently started using them to make homemade refried beans.

Traditional refried beans are made with lard (or bacon drippings).  While not the healthiest way to eat beans, definitely one of the tastiest in my opinion.  If you’re willing to give up authenticity, you can make homemade fat-free refried beans.


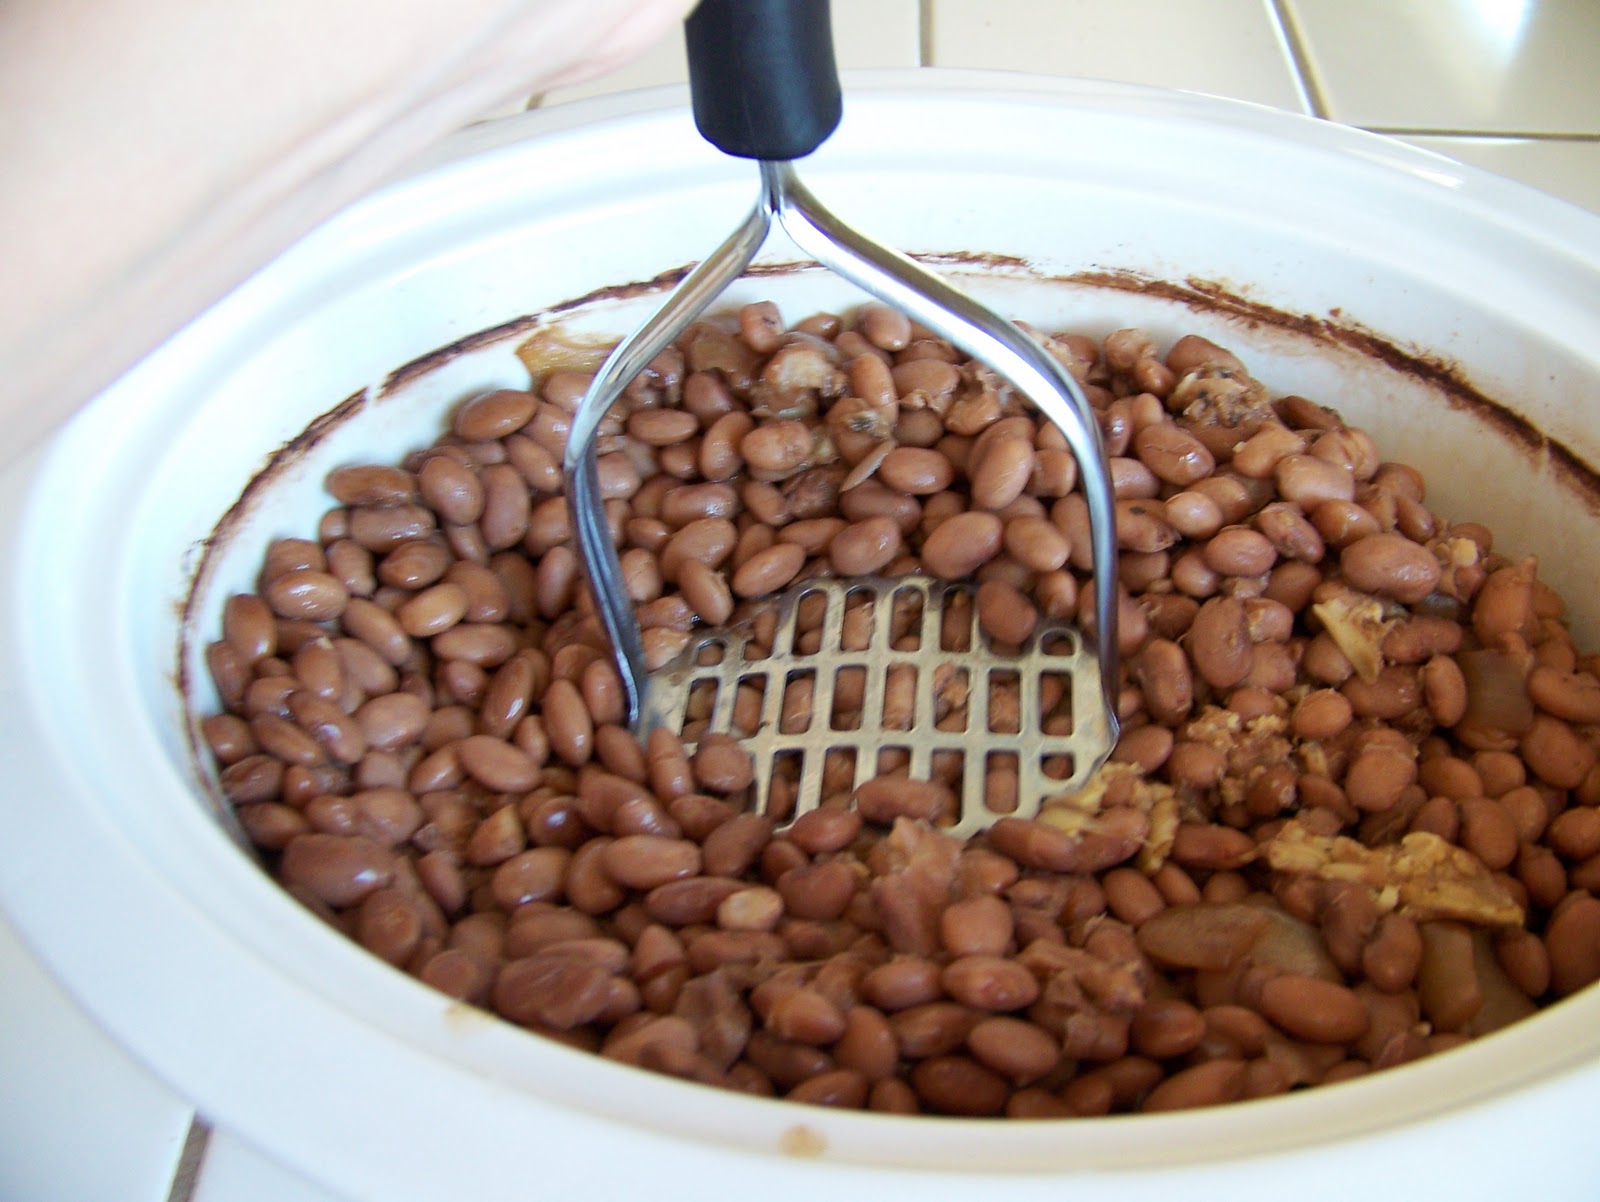
Committed Near to Nothing readers will also know that I like to use kitchen gadgets for more than their marketed use (like using my egg slicer for olives or strawberries).  If a tool or utensil only has one specific use, you probably won’t find it in my kitchen.  No salad spinner here!  Consequently, my potato masher is used for more than just mashing potatoes:  sweet potato casserole, guacamole, baby food, cookie crumbs, and refried beans.  Once the beans are tender, I just mash them in the pot with my potato masher.


Traditional Refried Beans
1 lb. dry pinto beans (about 2½ c.)
6 c. water
¼ c. lard or bacon drippings (do not substitute vegetable shortening)
2 tsp. salt
2 cloves garlic, minced
½ Tbsp. cumin
Sprinkle of cayenne pepper (optional)

Put beans and water in crock pot.  Cook on high until beans are very tender, about 5-6 hours, adding water as needed to keep beans covered.  In a large skillet, melt lard over medium heat.  Add beans, cooking liquid, salt, garlic, cumin, and cayenne.  Mash beans with back of spoon or potato masher.  Cook, uncovered, about 10 minutes, stirring often, until desired consistency.  Can be frozen in an air-tight container.  Yield:  about 6 cups (about 54 oz.).  Total cost:  less than $1!!!

Fat-free Refried Beans
2 lb. dry pinto beans (about 5 c.)
½-¾ large onion, roughly chopped
8 cloves garlic, peeled and crushed
3 Tbsp. cumin
½ Tbsp. dried oregano
Sprinkle of cayenne pepper
12 c. water
4 tsp. salt

In large crock pot, place all ingredients except salt.  Cook on high 5-6 hours, until beans are very tender, adding water as needed to keep beans covered.  Ladle out 4 c. cooking liquid; reserve.  Stir in salt.  Mash beans with back of spoon or potato masher.  Add reserved liquid as needed for proper consistency.  Can be frozen in an air-tight container.  Yield:  about 12 cups. (about 110 oz.).  Total cost:  about $1.50!!!

Refried beans can be topped with cheese and served as a side dish or used to fill burritos and chimichangas.  They are also great for bean dip or seven layer dip.  Yum!

Monday, September 27, 2010

Gourmet Mayonnaise and a Delicious Sandwich

A major food company has recently come out with gourmet mayonnaise.  These gourmet mayonnaises are basically mayonnaise that has been dressed up with various flavors.  I have tried a couple of these new flavors of mayonnaise and can honestly say that I wasn't very fond of them.  They tasted fake and processed.  I did find out, however, that you can make your own gourmet mayonnaise at home and it tastes absolutely wonderful!!!  Even my husband, who is a meat and potatoes type of guy and doesn't particularly like gourmet anything, likes it!

Garlic Herb Mayonnaise
3/4 cup mayonnaise
1/4 to 1/3 cup minced fresh basil* (MUST be fresh!)
2 Tbsp lemon juice
3-6 garlic cloves, minced

Mix ingredients, adjusting amounts of ingredients to meet your preferences.

*A note on mincing basil: I used to hate chopping/mincing herbs until I learned how to do it properly.  First of all, it's always helpful to start with sharp knives.  If your knives aren't sharp, it's going to be a frustrating task regardless of how you do it.  Start by stacking your basil leaves on top of one another (I try to put the largest leaves on the bottom of the pile) then roll them up lengthwise.


Carefully cut the basil into thin strips (this is called a chiffonnade) then cut across the strips at a 90 degree angle to mince it.


This mayonnaise is great on many different sandwiches, but one of my favorites is a grilled veggie and chicken sandwich - yum!


To make the sandwich, grill whatever vegetables you'd like: red bell peppers, green bell peppers, red onions, brown onions, zucchini, tomatoes, etc.  Instead of grilling mine, I drizzle them with olive oil, sprinkle them with salt and pepper, and put them under the broiler until they're nice and grilled (and starting to brown in some spots).


You can also make Sumiko's chicken, slice it, and put it in these sandwiches for those that want some meat.  Put desired ingredients on a toasted sandwich roll with the garlic herb mayonnaise and enjoy!!!  Delish!

Friday, September 24, 2010

Getting Kids to Eat Vegetables: Sautéing and Roasting


Vegetables are the most commonly abused food group.  Most kids don’t like them; many adults don’t like them.  In fact, the US government is so concerned that Americans aren’t getting enough of them that they spend millions on ads telling us we need to eat more veggies.  But does the fault lie with vegetables themselves?  Are they inherently destined to be tolerated simply because they are good for us?  Absolutely not!

I can see a few reasons why vegetables do not occupy the exalted position they deserve.  1)  Mass produced produce must be picked before its peak in order to ensure “freshness” by the time it reaches the consumer.  2)  Many Americans do not realize the full flavor potential of vegetables and therefore do not know how to unlock those flavors in preparation.

I used to teach an after-school cooking class for fourth through seventh graders.  I did an entire class about vegetable cookery.  Using broccoli and carrots, we explored six different ways to cook vegetables:  boiling, boiling/steaming, steaming, microwaving, roasting, and sautéing.  The kids tasted each one and analyzed how each cooking method affected taste and texture.

The preferred method of preparation was sautéing followed closely by roasting.  The kids’ least favorite vegetables were those that were boiled or microwaved.  After sampling all the different types, they kept returning for more sautéed and roasted broccoli and carrots and eventually finished it all off!!


After class one of the moms came to the kitchen to pick up her daughter.  I told her that we had tested various methods of cooking vegetables.  Holding her bowl full of broccoli and carrots, the daughter chimed in and said, “From now on I’m cooking all the vegetables at home.”

Not only does sautéing and roasting develop the delicious flavors of vegetables, but these are also the most nutritious cooking methods.  Any time vegetables are cooked in liquid, vitamins and minerals are lost in the cooking liquid.  Therefore, boiling is the least nutritious way to cook vegetables.  Of the methods using liquid, steaming is the most nutritious.  Since roasting and sautéing don’t use liquid, there is minimal loss of vitamins and minerals.

These two methods of preparation do require oil.  But that is not a bad thing.  Your body actually needs some sort of fat to help it absorb the fat-soluble vitamins in the vegetables.  Olive oil is a good choice because it is a healthy oil and contributes great flavor.

Sautéed Vegetables
Vegetables, cut to consistent-sized pieces (e.g. carrots, broccoli, cauliflower, zucchini, green beans, bell peppers, onions, Brussels sprouts)
Olive oil
Salt
Garlic, minced (optional)

Heat oil in skillet over medium-high heat.  Add vegetables, sprinkle with salt, and toss to coat.  Sauté until desired tenderness (10-20 minutes), stirring frequently.  If using garlic, add it a couple minutes before vegetables are done.  Note:  cooking time varies greatly depending on stove, pan, type and size of vegetables.


Roasted Vegetables
Vegetables, cut to consistent-sized pieces (e.g. carrots, broccoli, cauliflower, zucchini, green beans, bell peppers, onions, Brussels sprouts)
Olive oil
Salt

Preheat oven to 350°.  Place vegetables in roasting pan.  Drizzle with olive oil and sprinkle with salt.  Toss to coat.  Roast in oven until desired tenderness (30-60 minutes), stirring occasionally.  Note:  roasting time varies greatly depending on oven and type and size of vegetables.

Wednesday, September 22, 2010

Sugar Cookies


When it comes to desserts, I'll choose chocolate over anything else 99% of the time.  Basically, I'm a chocoholic.  However, I do have a weakness for good sugar cookies - no chocolate necessary.  I'm not talking about just any old sugar cookie; they have to be good!  When I was in junior high, I stumbled upon the following sugar cookie recipe, and it is my favorite!  Of course, you can always buy sugar cookie dough in the refrigerator section of your grocery store, but this is a much more budget-friendly alternative.  I've made these cookies for various events and have always gotten compliments on them.  It's a very basic, but oh-so-delicious recipe!  These are the cookies I made for my daughter's birthday party.

Sugar Cookies
2 sticks butter at room temperature (margarine cannot be substituted for this recipe, as it will make   your cookies spread too much when baking, thereby losing their shape)
2 cups sugar
2 eggs
1/4 cup sour cream
1 1/2 Tbsp vanilla
4 cups flour
2 tsp baking powder
1 tsp salt

With an electric mixer, cream butter and sugar.  Add eggs, sour cream, and vanilla.  Beat until light and fluffy.

In a separate bowl, mix dry ingredients.  Gradually add to wet ingredients, mixing to combine.


Divide the dough into 3 equal parts.  Wrap each third in cling wrap and place in the refrigerator for at least 30 minutes.  You can also make the dough ahead of time and just stick it in the freezer at this point.


On a floured surface, roll dough to 1/4-inch thick.  Using a cookie cutter, cut into desired shapes.  **UPDATE** It is sometimes easier to roll out the dough between two pieces of floured parchment paper.


To pick up your cut-out dough, first remove the dough surrounding the cookie, then pick up the cookie.

Place shapes 1-inch apart on a cookie sheet or stone.  Bake at 350 degrees for 8-10 minutes.  Allow to cool for 1 minute before removing to a cooling rack.  Yields about 3 lbs. of dough.

Monday, September 20, 2010

Fruit and Nut Salad


If you read my taco salad post, you may remember that I used my egg slicer to slice olives.  I have also found that this is the perfect tool for slicing strawberries.  Whether I am making a strawberry dessert or this scrumptious fruit and nut salad, the egg slicer is just the thing for quickly slicing a lot of strawberries.


The creamy tartness of feta or blue cheese is a great contrast to the sweetness of the fruit and dressing.  I personally prefer feta over blue cheese and always buy it in a block rather than crumbled.  A block is cheaper per ounce and gives you the option of feta cubes or crumbles.  Also, a block of feta has a longer shelf-life than crumbled feta.  I never use a whole block at one time, so I cut it into smaller portions and freeze them for later use.


To serve this as a side salad, simply omit the chicken.

Fruit and Nut Salad
Choose desired ingredients from the lists below.  Place a bed of greens on each plate.  Add desired toppings.  Drizzle with dressing.  Note:  Ingredients marked with * are the ones in the pictured salad.

Greens:
Romaine*
Spinach
Green leaf lettuce
Red lettuce

Fruit:
Strawberries, sliced*
Grapes, halved*
Applies, diced
Kiwi, diced
Mandarin orange slices
Avocado, diced
Raisins
Dried cranberries

Nuts:
Walnuts, chopped*
Almonds, sliced or slivered
Pecans, chopped
Pine nuts

Meat:
Chicken, chopped*
Bacon, cooked and chopped

Cheese:
Feta, crumbled*
Blue cheese, crumbled

Dressing:
Balsamic vinaigrette*
Raspberry walnut
French

Friday, September 17, 2010

Throwing a Party on a Budget


A couple weekends ago, we celebrated my daughter's 2nd birthday with a Goldfish-themed party.  We are on a limited budget, but decided to throw a party anyway.  Now I understand that a birthday party for a two-year-old is definitely not a necessity, but planning her birthday parties is a lot of fun for me.  It's almost like my hobby, but I only get to do it once a year, so I take advantage of it!  Even on a limited budget, it is possible to have a fun party!  Here are some ways I was able to save money:

1. You don't need to provide a whole meal.  I knew we wouldn't be able to afford to feed everyone lunch, so we started her party at 2 in the afternoon and had snacks, drinks, and dessert.  For a few weeks leading up to her party, I watched the grocery ads for good deals on snack foods and drinks (i.e. 2-liter bottles of soda, chips, pretzels, Goldfish Crackers - a must for a Goldfish party!).  I was able to combine some of the sales with coupons I had to get much of the food quite inexpensively.  If your budget is really tight, you can have a dessert party and just provide various baked goods.  Just make sure you mention this in the invitation, so your guests know to eat before they come.


2. Make your own veggie platter.  I wanted something healthier than just chips and crackers, so I made my own veggie platter.  By making my own, I was able to save quite a bit of money.  I bought carrots, green bell peppers, red bell peppers, broccoli, and a cucumber.  Again, I scoped the grocery ads the week of her party to see where I could get veggies at a low price.  I cut all the veggies the morning of her party, so that I wouldn't be rushing around at the last minute to get it done.  With the veggies, I served Ranch dressing that I had in my pantry and homemade hummus

3. Make as much as you can yourself.  I didn't have to buy a whole lot for her party, because I made a lot of things myself.  For invitations, I cut fish out of yellow constructions paper.  On one side, I wrote, "Swim on over to Hannah's 2nd Birthday Party!"  On the other side were all the details - location, time, date, etc.  For even cheaper invitations, you can always opt for the free method and use an invitation website like Evite.

I also made the party favors myself.  Favors aren't a necessity, but since I was able to make them with things I already had on hand, I went for it!  I made goldfish sugar cookies and packaged them in cellophane bags, then tied them with a ribbon.  I didn't have a fish cookie cutter, but my sister did, so she let me borrow it.  However, even that wasn't the exact shape I wanted, but I was able to adapt it to make it what I wanted.  The cookie cutter had fins on it, but since I was going for the Goldfish Cracker look, which doesn't have fins, I simply cut the fins off the dough after I had cut the cookies.  Voila!  A simple fix!


4. Make your own cake.  Cakes can be expensive - especially if you want it to have a specific theme.  Making your own cake will save a lot of money.  Your cake doesn't have to be extravagant or fancy; a simple cake will do.  In a future post, we'll be writing about how to make cakes at home along with some of our favorite cake recipes!


5. Use things you already have on hand.  I like to stock up on things when they're on sale or clearance.  After Easter, I bought a few bags of Dark Chocolate (yum!) M&M's on clearance.  They were only about 25 cents each and I knew I'd be able to use them, whether it be for company, in baking, or just to eat.  I pulled out a bag for Hannah's party and no one seemed to mind that they were pastel!  Also, I wanted to have a Goldfish Cracker "buffet" with several different flavors of Goldfish.  I wasn't sure how I was going to serve them, since I don't have any nice little bowls (let alone 6 of them!).  One day, it hit me!  For our wedding, we had little vases that looked like fish bowls with little fish swimming around in them and flowers in the top. I thought it would be cute to serve the Goldfish in little "fish bowls."   I still had one vase from our wedding and I was hoping I'd be able to find more at a decent price, so the hunt began!  I knew the vases from the wedding were from Michael's, so that's where I started.  I couldn't find anything online, but I was able to find them at the store and they were only $1 each!  I was thrilled, so I bought a few more and the Goldfish looked so cute in them!


6. Be creative.  In addition to the cookies for favors, I wanted to make some smaller goldfish sugar cookies to serve at the party.  I didn't have a small fish cookie cutter, so I made one!  I'll post how I did that in the near future, so be on the lookout!

Wednesday, September 15, 2010

All-Purpose Sautéed Chicken Breasts


Simple can be delicious.  One of my favorite ways to cook chicken breasts is to sauté them in butter with some simple seasonings:  salt, pepper, garlic powder, and paprika.  The result is super juicy, flavorful chicken that can be served as is or chopped up and added to dinner salads such as taco salad, fruit and walnut salad, or Chinese chicken salad.  One large breast is enough chicken for a dinner salad for my whole family plus a salad for Robbie's lunch the next day.  I usually sauté more than I need and freeze the leftovers for easy salad preparation.


There are two keys to achieving a finished product that is thoroughly cooked yet still juicy:  a hot skillet and an instant read probe thermometer.  I always make this chicken in my iron skillet over medium-high heat.  The pan should be so hot that it starts sizzling as soon as the chicken touches it.  An iron skillet is ideal because it gets really hot and retains the heat well.  The result is a nice, flavorful crust that seals in the juices.


To prevent overcooking, I always use my thermometer to I know exactly when the chicken is done.  Poultry should always be cooked to an internal temperature of 165°.  I usually set my thermometer to alert me at 160° and turn the burner off at that point because the residual heat will continue to cook the chicken, bringing the temperature up to 165°.


Sautéed Chicken Breasts
2-3 Tbsp. butter
Boneless, skinless chicken breasts
Salt
Pepper
Garlic powder
Paprika

Heat iron skillet over medium-high heat.  Meanwhile, generously season one side of chicken with salt, pepper, garlic powder, and paprika.  Add butter to skillet.  When butter is melted and bubbly, add chicken breasts, seasoned side down.  Be sure not to overcrowd the pan—leave space between breasts.  Generously season other side of chicken.  Insert thermometer probe into thick end of one breast.  Sauté without moving until first side is blackened (10-15 minutes, more or less depending on breast thickness).  Flip chicken and sauté until thermometer reads 160°.  Turn off heat and let sit until temperature reaches 165°.  Remove from heat.  Note:  If second side starts to blacken too much before temperature reaches 160°, flip back to first side.

Note how dark the finished chicken is--it is not burned.
The blackened crust has tons of flavor!!

Monday, September 13, 2010

Hummus

I love garbanzo beans.  They're great in salads, soups, sandwiches, hummus, or just by themselves.  I used to buy canned garbanzos but recently became daring and decided to buy dried beans, and I'm glad I did!  The dried garbanzos scared me.  They looked funny, and I didn't believe that there was any way they would turn out like "normal" garbanzo beans, but they did!  I bought a can of garbanzo beans to see how many garbanzo beans a can actually contains.  I was shocked to find that a 15.5 oz can only contained about 9 oz of beans which equals 1.75 cups!  A 1 lb bag of garbanzos (which will actually yield more beans by weight once cooked) produced 7 cups of cooked garbanzo beans and cost about the same as 1 can of them.  Additionally, if you cook them according to the method* my sister wrote about, it really isn't inconvenient to make them yourself.  I can honestly say that I don't think I'll ever be buying canned beans again!


One of the great garbanzo bean discoveries I've recently made is hummus!  I remember trying hummus in elementary school and not liking it, so I've had an aversion to it ever since.  I'm glad I finally got over it and decided to try it, because it is delicious!  It can also be very inexpensive if you make it yourself.  There is one ingredient, tahini, that is quite pricey, but you only need a few tablespoons of it per batch, so you'll be able to get a lot of hummus out of one jar.  For those who aren't familiar with tahini, it is sesame seed paste.  It is often sold in a jar near the peanut butter or in the international foods section.  I've found it at Ralphs, Sprouts, and Whole Foods.  Sumiko has found it at WinCo and Raley's.  Our Trader Joe's had Tahini sauce, which is different than tahini, so keep that in mind when looking for it.

If you're not sure what to do with hummus, it makes a great dip for pitas, pita chips, pretzels, and raw veggies.  Hummus is a healthy alternative to using Ranch in which to dip veggies - try it sometime!  It also makes a great spread on sandwiches!

Hummus
1 cup garbanzo beans
2-3 Tbsp. tahini
2 Tbsp. lemon juice
2 cloves garlic
1 tsp. salt
1-2 Tbsp. olive oil
Water reserved from cooking the beans

In a food processor, combine the first 5 ingredients.  Process on high until the ingredients are combined, then slowly add the olive oil while blending.  Continue processing until smooth.  Add enough of the water to reach the desired consistency.  Drizzle a little more olive oil over the top.  Serve.


This recipe can be easily altered to suit your personal preferences and tastes.  You may want to start with less of certain ingredients and taste as you go, adding more of them as necessary.


Variations
Roasted Red Pepper Hummus - Drizzle half of a red bell pepper with olive oil and place under broiler until tender (there will be some black spots on it, which is fine).  Make hummus as directed above, but add the roasted pepper with the first 5 ingredients.
Jalapeno Hummus - Add 1 seeded and chopped jalapeno.
Roasted Garlic Hummus - Roast a bulb of garlic.  In recipe above, replace garlic with 6 cloves of roasted garlic.
Basil Hummus - Add 1 Tbsp fresh chopped basil.
Sun-dried Tomato Hummus - Add 1/4 c. sun-dried tomatoes.


For more hummus ideas/recipes, check out AllRecipes.  Leave us a comment with your favorite uses for hummus!

*In her post, she puts specific amounts of beans and water.  I simply put a whole pound of beans in my crockpot with enough water to cover the beans by a few inches.  While cooking, I periodically check to make sure all the beans are still submerged in water.  If not, I add more water.

Saturday, September 11, 2010

Iron Skillet Follow-up: Lids and a Great Sale!


On Wednesday I posted about iron skillets.  Both Kimiko and I mentioned that we love our iron skillets but wish they had come with lids.  My old friend Paul read that and referred me to this site where you can buy cast iron lids!  The 10” lid is only $10!!


Unfortunately, they don’t carry a 12” lid, so I searched around and found a great deal being offered by Lodge right now.  September 10-27, Lodge is having a 20% off sale for selected products including 10¼” and 12” glass covers!  That makes them $16.95 and $20.95, respectively.  The sale also includes skillets, deep skillets, and Dutch ovens, all with lids, as well as a reversible stove-top griddle.  If you’re looking for iron cookware, now is a great time to buy.


Related Posts with Thumbnails