Friday, October 14, 2011

Apple Crisp


It's fall (even though the thermostat says it's still summer), and I'm excited about making fall-ish recipes!!!  Last week we were housesitting for some friends of ours and were taking a dessert to some other friends of ours.  As I pondered what to take, it hit me.  The friends we were housesitting for had a tree full of granny smith apples!  I would make an apple crisp!  I didn't have a go-to apple crisp recipe, so I hit the web, searching for what seemed to be the best apple crisp recipe.  I finally landed on one from Tammy's Recipes.  So really, all credit should go to her; I just made one tiny change to her recipe.


Apple Crisp
8 cups cored, peeled, and sliced apples
2 Tbsp lemon juice
2/3 cup flour
1 1/3 cup packed brown sugar
1 1/2 tsp cinnamon
1 1/2 cup quick oats
2/3 cup butter, melted
1/4 cup chopped pecans

Preheat oven to 375 degrees.

Grease a 9 x 13 baking pan.  Place apples in prepared pan and pour lemon juice over the apples; mix to evenly coat the apples.


In a medium mixing bowl, combine flour, brown sugar, cinnamon, oats, and butter.  Crumble over apples; top with pecans.


Sorry that only one spot on all of these pictures is in focus.  I had to shoot using a large aperture to get enough lighting.


Bake for 25-30 minutes, or until top is golden brown and the apple are soft.  Serve with vanilla ice cream if desired!

Wednesday, October 12, 2011

Zucchini Lasagna

Please excuse my after photos.  Fall means not enough natural light
by the time dinner is ready and I'm not using my own camera right now.


Robbie’s parents live near Mt. Shasta.  Consequently, they didn’t get summer weather until much later than we did.  This means their harvest came in later than ours.  A few weeks ago they came to visit and brought a load of zucchini with them!

I wanted to try something new with them, so I decided to make zucchini lasagna.  I didn’t just want to add zucchini to my usual lasagna though.  I wanted to use sliced zucchini in place of the noodles to make a healthier lasagna.  The end result was a success!

I did use one layer of lasagna noodles—I just LOVE pasta too much!  But I was surprised by how much that one layer contributed to the dish.  Had I not made the lasagna myself, I would have guessed there was a lot more pasta.  Simply replace this layer of pasta with zucchini to make gluten-free lasagna.

As far as the zucchini, I tried two ways.  First, I just sliced it into flat pieces with my chef knife.  This worked really well.  The next time I made it, I hauled out the food processor to see if I liked that approach better.  While it was super fast, it sliced the zucchini a little thinner than I would have liked.

Fast, but too thin.


Going along with my goal of a healthier lasagna, I also added shredded carrots.  I found that I like the texture of the carrots shredded on the cheese grater better than those I put through the food processor.


Feel free to add whatever vegetables you desire.  The second time I made this, I added finely chopped broccoli.  Cauliflower, mushrooms, and eggplant would all work great!


As far as the cheese goes, the mozzarella/parmesan/cottage cheese mix I use in regular lasagna would be delicious!  However, I accidentally went healthy on this one.  When making my shopping list for that week, I incorrectly assumed I had plenty of mozzarella and parmesan in my fridge.  When I went to make the lasagna, I realized I had no mozzarella and only a little parmesan—I should have checked.  I ended up just using cottage cheese between the layers and parmesan cheese on top.  It was still super tasty, not to mention easier on the waistline and the wallet.

Zucchini Lasagna
1 jar spaghetti sauce
5-6 lasagna noodles (enough to cover the bottom of your pan)
1 lb. cottage cheese
2-3 carrots, shredded
1 small bunch broccoli, finely chopped
2 large or 3 small zucchini, sliced
Parmesan cheese

Preheat oven to 350°.  Spread a layer of spaghetti sauce over bottom of pan.  Cover with single layer of lasagna noodles.


Top with 1/3 of cottage cheese; sprinkle with 1/3 each of carrots and broccoli.  Spoon sauce over.


Cover with a layer of zucchini.  Create another layer of cottage cheese, carrot, broccoli, and sauce, covering with 2nd layer of zucchini.


Repeat again.  You should end up with 1 layer of noodles, 3 layers of filling, and 3 layers of zucchini.  Pour remaining sauce over top.

Yummy layers!


Cover tightly with foil; bake 1 hour.  Remove foil and sprinkle top with Parmesan cheese.  Bake an additional 10-15 minutes, until Parmesan starts to turn golden.  Remove from oven and let rest 5-10 minutes before serving.  


Gluten-Free Zucchini Lasagna
Prepare as above, replacing layer of lasagna noodles with zucchini.

Extra Cheesy Zucchini Lasagna
Prepare zucchini lasagna above.  Decrease amount of carrots and broccoli.  Replace cottage cheese with the following mixture:

1 lb. cottage or ricotta cheese
1 c. shredded mozzarella cheese
½ c. shredded Parmesan cheese
2 eggs
Dash each garlic powder, basil, oregano, thyme, and marjoram

Monday, October 10, 2011

Easy Eggs


As a little kid, I remember eating eggs only two ways: scrambled and over easy (dippy eggs, as we called them).  Today, I still eat them only two ways, but I think dippy eggs are disgusting, so I've replaced over easy with over hard.  My husband grew up eating them that way and introduced me to them.  After a morning run, eggs over hard is my favorite way to get my much-needed protein, and they're so easy to make.  They're so easy, in fact, that my 3-year-old daughter likes to watch me and tell me how to make them!

Eggs Over Hard
Oil or butter
Eggs
Salt and pepper
Garlic Powder
Ketchup (optional)
Hot sauce (optional)

Lightly grease the bottom of a skillet (I use nonstick) and preheat the pan over medium heat.  When the pan is warm, crack an egg and drop it into the skillet.  


With a spatula, break the yolk of the egg.  Season with salt, pepper, and garlic powder.  


Allow the egg to cook for a couple minutes, them flip egg and cook until the egg is cooked through.  My favorite way to eat these eggs is with hot sauce (Tapatio) and ketchup.  


Friday, October 7, 2011

English Muffin Pizzas


We’re almost at the end of our first quarter of school.  I can’t believe it!  Keanna is a quarter of the way through second grade and the boys are a quarter of the way through their first year of preschool!  That’s thirty-eight days of packing school lunches.

I recently decided to mix it up a bit by adding English muffin pizzas to the menu.  Just like the pb&j, grilled cheese, bean and cheese burritos, and quesadillas, you can make a big batch and freeze them for grab-and-go lunches!

One great thing about little pizzas is that you can customize them according to each family member’s preference.  Keanna likes pepperoni.  Lukas and Koda, when they decide they like pizza, prefer cheese.  Robbie is pretty easy to please but really likes bacon and pineapple on his pizza.

Before assembling the pizzas, I like to toast the English muffins on medium-low.  Not only does this give them a little extra crispiness, but it also helps keep them from getting soggy in the sauce.  I usually use whole wheat muffins.  WinCo was out of them this particular time, so I went with white.

I set my toaster oven on 3 out of 9.

I stick with traditional American pizza combinations (red sauce, mozzarella, toppings), but feel free to branch out.  I’m sure Kimiko’s BBQ chicken pizza would work well too.

English Muffin Pizzas
English muffins
Pizza sauce
Mozzarella cheese, shredded
Toppings (pepperoni, olives, bell peppers, sausage, bacon, onions, pineapple…)

Preheat oven to 400°.  Split English muffins with fork.  Lightly toast.  Transfer to stone, crisper pan, or baking sheet.  Spread sauce over muffins; sprinkle with cheese.


Add desired toppings.  Bake until cheese is melted, about 8-12 minutes.  Baking time will vary depending on type of pan and amount of cheese and toppings.  If freezing, completely cool pizzas on rack.  Return to English muffin sleeve or store in gallon zip-top bag; store in freezer.  Place pizzas in microwavable container to pack in school lunches.


Wednesday, October 5, 2011

Special Series: Ganache

Not the prettiest piece of cake ever, but it was delicious!
If you like chocolate, you'll like this recipe!  It can be used as a glaze, frosting, or filling for cakes or cupcakes.  It can also be used to make truffles, but we'll talk about that another time.

Many ganache recipes call for fancy chocolate, which is expensive.  You want to know a little secret?  I use whatever chocolate chips I happen to have on hand.  Yep!  They don't even have to be fancy chocolate chips; basic semisweet chocolate chips will work!

Ganache
8 oz chocolate
3/4 cup heavy whipping cream
2 Tbsp butter

Combine cream and butter in microwave safe dish (I use a Pyrex measuring cup).


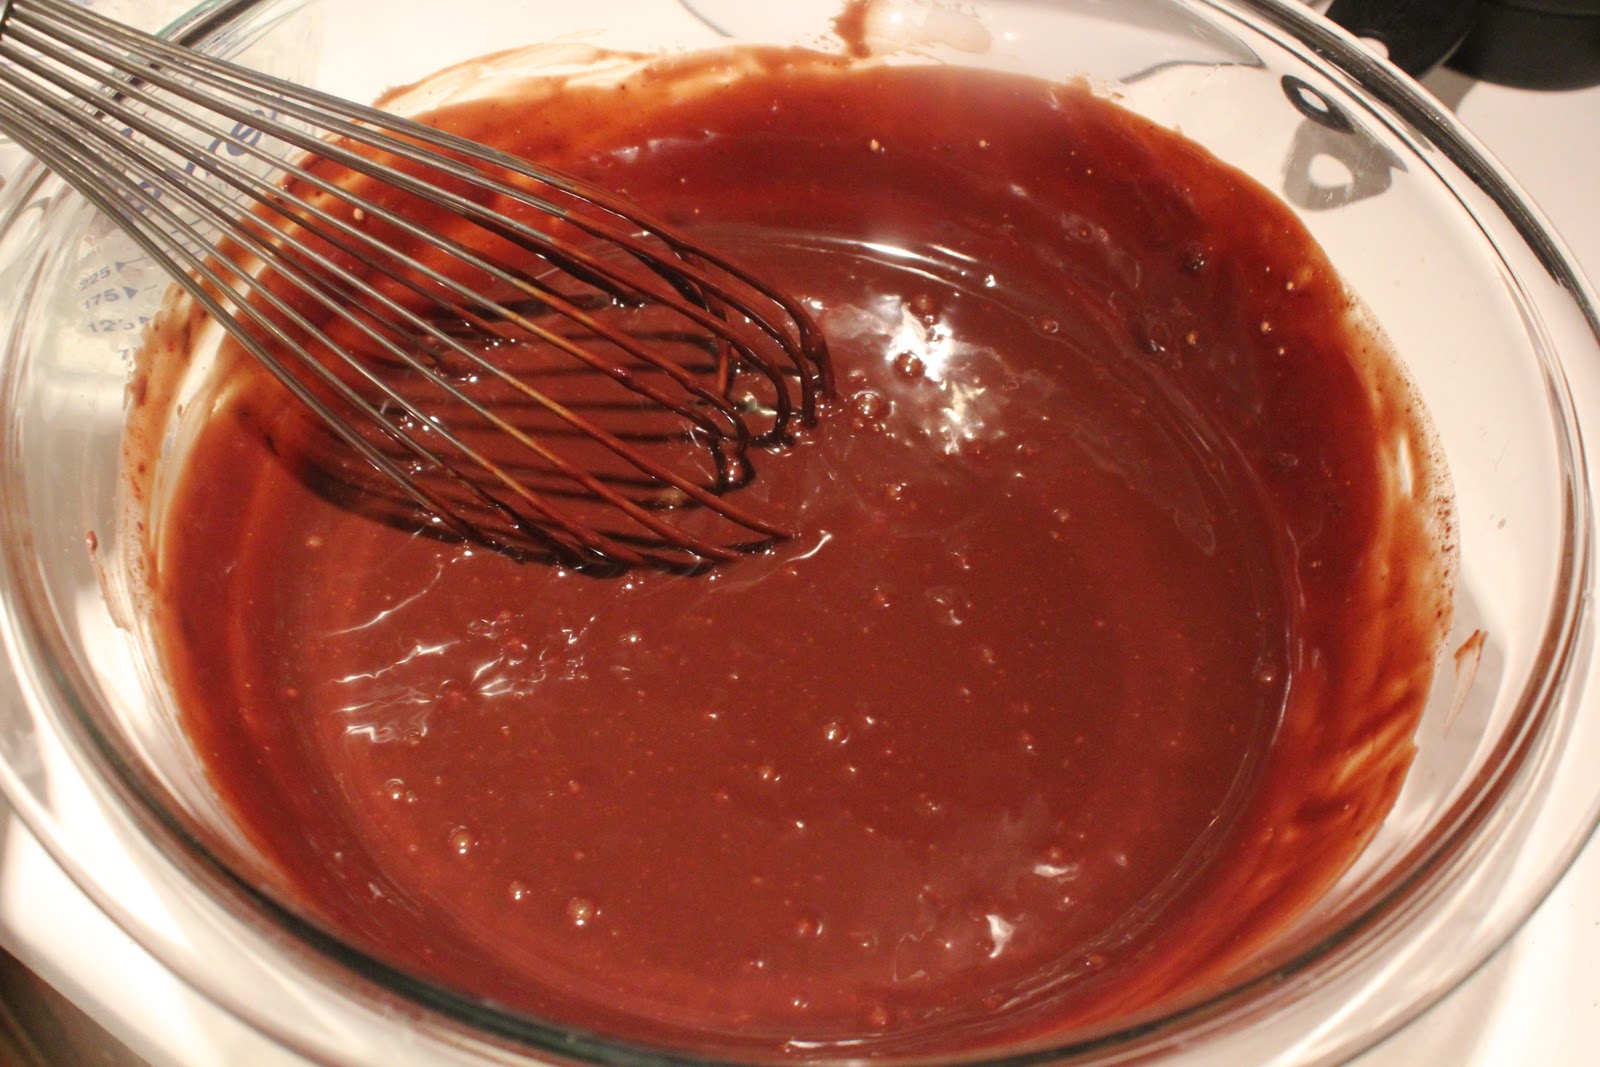
Heat until butter is melted.  Pour over chocolate chips; mix until chocolate is melted and smooth.


At this point, you can either pour it over a cake as a glaze, or you can let it cool a while and spread it on as frosting.  Alternately, you can whip the ganache until fluffy and frost or fill a cake or cupcakes.

For my daughter's birthday last month, I whipped up the ganache to make a filling for her cake.

Before being whipped.

Whipped

Monday, October 3, 2011

French Toast


My family loves French toast!  But we rarely have it these days, because I like to use homemade bread.  Since April was born, I haven’t had much time to make my own bread.  Can’t imagine why.  Well, last week, I just couldn’t resist anymore.  Instead of vacuuming the floor, I made bread.  And the floor is still unvacuumed.  But we had the best French toast Saturday morning!

If you don’t want to make your own bread, you can use regular sandwich bread, but a better option is the unsliced bread in the bakery.  French toast ends up with a better texture when the slices are thicker than pre-sliced bread.  I don’t actually measure, but I would guess that I slice it ½- to ¾-inches thick.

Regardless of what type of bread you use, the key to French toast that is crispy on the outside and soft on the inside (not soggy) is to stale the bread.  You don’t want it completely dry as when you are making croutons.  The night before you want to make French toast, lay bread out on a rack about dinner time.  Before going to bed, flip all the pieces over and leave out overnight.

I like to make little loaves for the kids!

I slice it thicker than pre-sliced bread.

There is a lot of variety among cooks as far as the egg dip used to make French toast.  While I would like to someday experiment with some fancier custards, for now I use a very simple egg, milk, vanilla, and cinnamon mixture.  I usually don’t even measure, I just mix it all together so the eggs are thinned and it is flavored.

The size, type, and staleness of your bread will determine how many eggs you need.  I’ve found that I generally need 1-1½ eggs for every 2 slices of bread.

French Toast
4 eggs
about 3 Tbsp. milk
½ tsp. vanilla
¼ tsp. cinnamon
Butter for pan
6-8 slices staled bread
Desired toppings:  butter, syrup, fresh fruit, whipped cream, peanut butter, chocolate chips, powdered sugar, cinnamon…

Preheat skillet over medium-high heat.  Meanwhile, in a shallow dish, whisk together eggs, milk, vanilla, and cinnamon (or whisk together in bowl and pour into shallow dish).


Add 1-2 Tbsp. butter to pan.  Once butter is melted, dip bread into egg mixture and place in pan.


I use my hands, but tongs would work too.


Cook until golden; flip.  Cook second side until golden.  Remove from pan; top as desired.

Little French toast!  So cute!


Crispy on the outside, soft in the middle.

French toast sticks?  Follow the same procedure, but cut
bread slices into sticks.

To store leftovers, cool completely and transfer to zip-top bag.  Store in freezer.  The best method of reheating can vary depending on the thickness of your bread.  Thin French toast can be reheated in the toaster.  Thicker toast won’t get hot in the middle before the outside burns.  In our house, we usually microwave the frozen French toast to slightly heat it, then toast it on medium-low to finish heating it and crisp up the outside.

If I have time in the semi-near future, I’d like to share with you how I make stuffed French toast—so yummy!  Keep your eyes open for that one!
Related Posts with Thumbnails