Monday, August 15, 2011

Summer Harvest Pasta (Pasta with Zucchini and Tomatoes)


As I mentioned last week, my neighbor Jerry has been giving me tomatoes from his garden.  He has also been giving me zucchini!  So far I’ve made zucchini bread, zucchini fries, sautéed zucchini with tomatoes and balsamic vinegar, zucchini brownies, and pasta with zucchini and tomatoes and I still have a few more zucchini dishes I want to make.


Today I’d like to share the pasta with you.  The quantities I give for the ingredients are all approximate as I was using mostly fresh produce and didn’t bother weighing or measuring any of it.  But that’s one of the great things about pasta—it’s not an exact science.  And I don’t know how much pasta I added to the sauce.  Because my kids don’t like zucchini, I made a bunch of pasta but only put some of it into the sauce.  While Robbie and I ate fresh harvest pasta, they had noodles with spaghetti sauce from a jar.

A lot of advanced-skilled cooks would probably skin the tomatoes before adding them.  Too much time and effort for this point in my life so the skins stay on.


I would also add more salt and pepper when making this for Robbie and myself, but went more conservative for those who don’t like as much salt and pepper.  Just taste and adjust as necessary.

Summer Harvest Pasta (Pasta with Zucchini and Tomatoes)
About ¾ lb. spaghetti or fettuccine, preferably whole wheat
1-2 Tbsp. olive oil
1 large onion, diced
5 cloves garlic, minced
5-6 medium tomatoes, cut in wedges or 30 oz. canned diced tomatoes
1-2 tsp. salt plus more
½ tsp. pepper plus more
½ tsp. oregano
Small bunch fresh basil leaves, torn or ½ tsp. dried
1 large zucchini, cut into large chunks
Parmesan cheese (optional)

Boil pasta according to package directions.  Meanwhile, heat skillet over medium-high heat; add oil.  When oil is hot, add onion and sauté until translucent.

From this...

...to this!

Add garlic, 1-2 tsp. salt, and ½ tsp. pepper; sauté until fragrant.  Stir in tomatoes, oregano, and basil.


Continue to cook until fresh tomatoes are cooked down and heated through.  Stir in zucchini and continue to cook until desired tenderness.


Add additional salt and pepper as desired.  Stir in hot, drained pasta.


A rogue corkskrew snuck in there!

Serve with Parmesan cheese if desired.


Friday, August 12, 2011

Breakfast Burritos Revisited

We will occasionally be revisiting some of our previously posted recipes with updates and things we have changed.  Part of the reason for doing this is to introduce some of our newer readers to our earlier posts, but one of the main reasons is to show that recipes don't need to be followed exactly.  At least most of them don't.  With cooking, you can be creative and make adjustments to create new flavor combinations and make old recipes new and exciting again.  I don't have measurements for this "recipe," but I just want to show you how you can easily spice up or alter a recipe.

Back at the beginning of Near to Nothing, I wrote a post about potatoes, which featured a recipe for breakfast burritos.  We got tired of eating these, so we hadn't had them for a long time.  I decided to make them again, but made a few changes to the recipe, using different ingredients I already had on hand.  You can find the original recipe here

And now, for the changes I made this time:
  • Potatoes: I used garlic powder, salt, and pepper as the recipe calls for, but I also added a little bit of cumin and some chili powder to kick up the flavor a bit.
  • Onions and Green Bell Peppers: I sauteed them with some chopped fresh tomatoes, minced garlic, and chopped green chiles.  
  • Sausage: I left it out completely.
  • Black Beans: I added black beans.

They are just small changes, but can liven up a recipe.  We encourage you to try different things and to even stray away from recipes if you're feeling adventurous!


Wednesday, August 10, 2011

Basil-Tomato Bites


Here in Northern California, the unusually late winter weather we had in May and June has caused a long delay for our gardens.  Consequently, I now have a few tomatoes that are just starting to turn yellow.  Fortunately, my neighbor Jerry's tomatoes are ahead of mine and he's very generous.  He brought a box of tomatoes over last week and we've certainly been enjoying them.  He brought me another box today!!  Yippee!


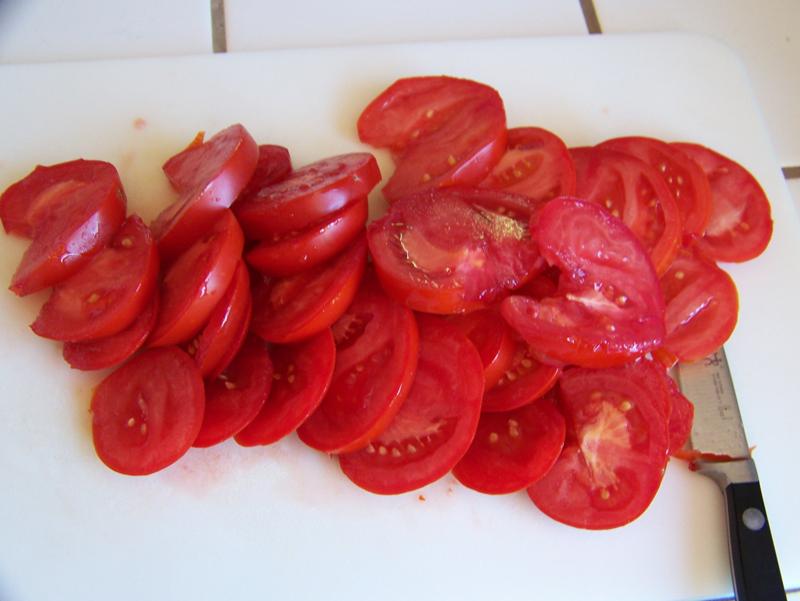
So red!!

Tomatoes hold together better if sliced from top to bottom
rather than across.


Unfortunately for my tomatoes, my herb garden was ready for harvest on time.  The cilantro is seeding and the basil is flowering.  Plus, something large is eating the leaves off the basil.  Anyhow, there probably won't be many fresh herbs left before my tomatoes decide to ripen up.  So I took the opportunity to use some of my basil with Jerry's tomatoes.

Mmmmm!!!  Smells so good!

The ingredients and flavors are simple, but the result is amazing!  In fact, the ingredients are so deceivingly simple that, as Robbie watched me make these, he kept asking if I was sure I wasn't supposed to mix in some ground beef or top it with bacon.  Then he ended up really liking them.

These tomato bites can be served fresh or baked.  I like them better fresh; Robbie prefers them baked.  Either way, they are an easy, delicious, healthy dish.  I could very easily be satisfied with a batch of them for lunch.  Baked, they make a great appetizer or side-dish.

If you want a richer, more filling variation, you can put a slice of mozzarella cheese on each one, between the tomato and the basil.  And I'm not talking about the low-moisture mozzarella that you shred for pizza.  I'm talking about real, soft mozzarella cheese.  Mmmm...my mouth is watering just thinking about it!  Unfortunately, it's expensive so I don't buy it.

Basil-Tomato Bites
Tomatoes, sliced
Olive oil
Salt
Garlic powder
Mozzarella cheese, sliced (optional)
Parmesan cheese, grated
Pepper
Fresh basil, chiffonade or torn

If baking, preheat oven to 400.  Line a jelly-roll pan with parchment paper.  Place tomatoes in single layer on paper and drizzle with olive oil.  Sprinkle with salt and garlic powder.


If using, place a slice of mozzarella on each tomato.  Sprinkle with Parmesan cheese and pepper.  Top each tomato with a few pieces of basil.


Can be served at this point or baked for 8 to 10 minutes.  Keep an eye on the basil so as not to burn it.  Can serve on crostini.

Unbaked--my favorite!


Monday, August 8, 2011

Grilled Potato Packets


Last week I shared about my new adventures in grilling/barbecuing.  Today I'm going to share a side dish that can easily be thrown on the grill along with whatever meat or main dish you're making.  It's also a cheap side dish, as it's comprised mainly of potatoes.

Grilled Potato Packets
5 cups potatoes, cubed
1/4 onion, sliced
1/2 tsp garlic powder
1/4 tsp pepper
1/2 tsp salt
1 tsp oil
1-2 Tbsp butter, cut into small cubes

Combine all ingredients except butter in a large bowl; mix well.


Divide potatoes among 4-5 sheets of foil.  Place a few cubes of butter on each pile of potatoes.


Fold foil around potatoes; seal well.


Place on grill for 30 minutes, or until potatoes are tender.  When they were done, I put mine into a serving dish, but you could just serve them in the foil packets if you wish (great for camping).


Friday, August 5, 2011

Peach Preserves


One of the added bonuses that came with our house when we bought it two years ago was a mature peach tree. When we closed on the house, we actually didn't know what it was.  We thought apricots or almonds.  As the fruit started getting bigger and we realized what we had, I got very excited.  Peaches are one of my absolute favorite fruits.

Unfortunately, this year's crop is about a third of what it usually is due to leaf curl.  Nevertheless, we still have more peaches than we can eat before they go bad.  So yesterday I made a batch of peach preserves!!  Because the peaches grow in my front yard, it costs me pennies to make a lot of preserves.  But even if I had to buy the peaches, I can often get them for $0.98 per pound, making homemade much more economical than store-bought.

Peach preserves are very simple.  All you need are peaches and sugar.  I do add a few more ingredients, but they can easily be left out with very little difference in the end product.

The first time I made preserves, I removed the skins by dropping the peaches in boiling water for about 15 seconds and then dunking them in cold water.  My stove doesn't heat efficiently and doesn't maintain a boil without the lid on so this was a very involved, long, frustrating process.  The next time I decided to just leave the skins on.  Once the peaches were cooked down, you couldn't even tell the skins were there!  No more peeling peaches for me!


Because peaches differ in sweetness, you will need to adjust the amount of sugar according to your peaches and your preference.  Once the preserves are almost done, take a taste and add more sugar if needed.  Give the sugar a few minutes to cook into the preserves before tasting again.  Remember, start with less--you can always add more, but you can't remove any.

Cooking time will vary depending on your stove, cookware, and preferred thickness.  Mine cooked for over an hour, but I was way distracted by the craziness in my house.  If I was focused in the kitchen, it probably would have taken 45 minutes to an hour.

I like to eat the preserves on toast or mix them into steel-cut oatmeal or yogurt.  They are also good on pancakes, waffles, and French toast--yum!  Next time I make a batch of homemade ice cream, I want to add the preserves to make peach ice cream.

I don't process my preserves, so I keep them refrigerated and use them or give them away immediately.

Peach Preserves
3 lb. diced peaches (about 10 medium peaches from my tree)
3/4 c. sugar (adjust according to peaches and preference)
1/4 tsp. salt (optional)
1 Tbsp. butter (optional)
1 1/2 Tbsp. lemon juice (optional)

Combine all ingredients in large saucepan.  Bring to boil over medium-high heat, uncovered, stirring often.  Once at a full boil, reduce heat to maintain boil without spattering, medium-low to medium.  Continue to cook and stir until desired thickness.  Keep in mind that they will thicken a little more in the refrigerator.  Carefully transfer preserves to canning jars.  Process in canner or store in refrigerator when cooled.  Yield:  about 3 cups.  Total cost:  less than $0.50!!


Starting to cook down.

Keep going!

Almost there.

Just right!

Wednesday, August 3, 2011

Cold Noodles (aka Somen and Miso Soup)


When Kimiko and I were kids, one of our favorite summertime dishes that our mom made was “cold noodles.”  And now that I’m the mom, I like it even more because it’s quick and easy.  It only has three ingredients (four if you count the water) and takes minutes to prepare.


Somen is the Japanese version of angel hair pasta.  It is made from wheat flour and is long and skinny with a circular cross section.  It is much skinnier than angel hair, however, so be careful not to overcook it.  It only takes about three minutes to boil.  I also suggest using a mesh strainer to drain them rather than a colander.  They tend to slip right through the larger holes of my colander.


As far as the miso soup goes, I know, I’m cheating by using a just-add-water mix.  Some day I will master miso soup from scratch.  But for now this is how I do it.  And it wouldn’t be a quick, cool summer dinner if I had to make soup.

I buy the somen and miso soup mix at WinCo in the Asian food section.  They don’t carry the memi sauce so I have to buy that at Safeway or Raley’s.  If you can’t find the ingredients in your regular grocery store, see if you have an Asian food market in your area.
  
Cold Noodles (Somen and Miso Soup)
Somen noodles (1 bundle per person)
Instant miso soup mix
Boiling water
Memi sauce

Boil noodles according to package directions.  Drain and rinse with cold water.  If not using right away, add some ice cubes and store in fridge in strainer.  Pour mix into bowls.  Add boiling water per package directions.  Serve with pot of cold noodles and memi sauce.


I served an Asian-style salad on the side.

Monday, August 1, 2011

Ribs


This summer, I've been brave.  I ventured out of my comfort zone and have been using our grill.  I was actually surprised that it's really not difficult nor is it much different than cooking in the kitchen!  I haven't tried very many things yet, but one thing I did try was pork spareribs.  They were mighty yummy!  Since I don't have much grilling experience, I asked the grill expert (my dad) for advice and tips on making ribs.

First of all, let me say that you don't grill ribs, you barbecue ribs.  Yes, there is a difference (my dad will be the first to correct anyone on this fact).  Grilling is when you cook something over direct heat (the flame is right under the meat).  Barbecuing is when you use indirect heat.  When making ribs, you don't want the flame to be right under the meat.  On our grill, there's a front burner and a back burner.  I simply had only the front burner on and put the meat over the back burner (which was turned off).  Second, the way to barbecue ribs is low and slow.  You want to keep the heat low (mine was hovering between 225 and 250) and slow (my ribs barbecued for almost 5 hours).

I used spareribs, because they were on sale for well under $2 per pound.  However, I think baby back ribs would be even better (but also much more expensive)!  Maybe I'll have to splurge and get baby back ribs for some special occasion!  There are different dry rub recipes, but I use the one found on The Pioneer Woman's blog.  It's simple and delicious! If you go to her blog, she gives a recipe for making these in the oven.

Barbecued Pork Ribs
Slab of pork spareribs or baby back ribs
Dijon mustard (I just used as much as I needed to coat the ribs)
1-2 tsp liquid smoke
3 Tbsp brown sugar
3 Tbsp paprika
1 1/2 Tbsp ground black pepper
1 1/2 Tbsp garlic powder
3/4 tsp salt
Vegetable oil
BBQ sauce (optional)

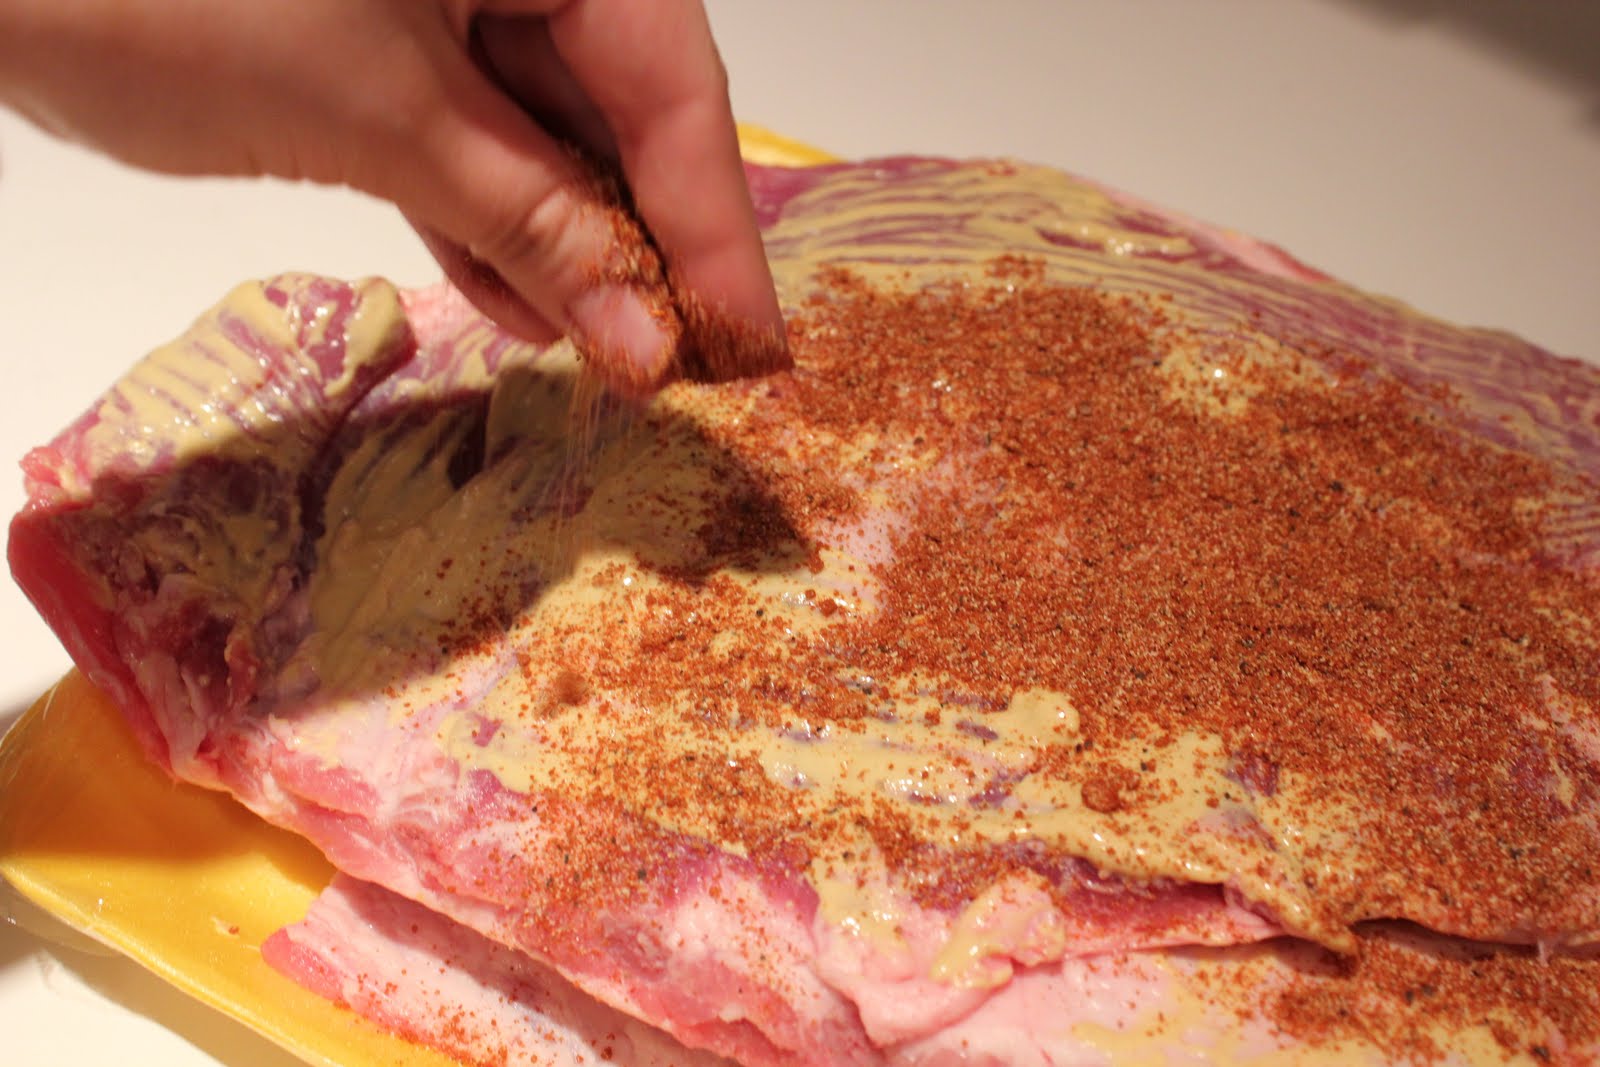
In a small bowl, mix Dijon mustard and liquid smoke.  In a separate bowl, combine brown sugar, paprika, pepper, garlic powder, and salt.  Set aside.


Remove membrane from the bone side of ribs.

Use a durable butter knife to separate the membrane from the ribs.

Brush mustard mixture onto both sides of the ribs.  Rub the brown sugar mixture over the entire surface of the ribs.


Preheat grill on low.  You want to maintain a temperature between 225 and 250 degrees.  Place ribs, bone side up, on grill, but not over the flame.


Allow the ribs to barbecue for an hour to an hour and a half, then baste with a little vegetable oil and flip.  Baste them with oil every 45 minutes or so until they are done.  You'll know they're done when the meat has shrunk back from the ends of the bones about 1/4 inch.  Once they're done, put barbecue sauce on (if desired) and cook on high until sauce caramelizes, being careful not to burn it. 

The meat has shrunken back from the ends of the bones.


Remove from heat and allow them to rest in foil for 10-15 minutes before cutting.  Enjoy and don't be afraid to get messy!
The ribs on the left have sauce; the ones on the right don't.
Related Posts with Thumbnails