Friday, April 8, 2011

Pan-fried Pork Chops


I've previously mentioned more than once that I try to serve meals with little or no meat.  Not that we don’t enjoy meat—we actually really like it.  But meat tends to be the most expensive part of the grocery bill.  Consequently, when I find a good sale on meat or find it on clearance for a great price, I buy it and I buy a lot of it.


A few weeks ago I found myself browsing the Safeway meat clearance section.  Keep in mind that just because it’s on clearance, doesn’t mean it’s bad.  It just needs to be used or frozen that day or the next.  Anyway, I found pork loin assorted chops that had been on sale for $2.49 per pound on clearance for 50% off.  That’s $1.25 per pound, well below my meat spending limit.

Pork chops are very simple, but there are a few tricks I use.

First, I try to get bone-in pork chops.  They just turn out juicier and more flavorful than boneless.


Second, I always pan-fry them.  I used to broil them, but one day I pan-fried them and have never gone back.

Third, I don’t trim the pork chops before cooking them.  The extra band of fat around the edge contributes to the flavor.

Unfortunately, that fat also causes bubble-shaped pork chops, which leads to my fourth trick.  I slice through the fat layer a few times around the chop.  The result is flat pork chops rather than concave.


Lastly, I usually keep it real simple.  I do occasionally jazz it up with a sauce or breading, but my go-to method is simple seasonings:  Montreal steak seasoning, lemon pepper, or salt, pepper, and garlic.


Pan-fried Pork Chops
1-2 Tbsp. vegetable oil
Pork chops
Montreal steak seasoning, lemon pepper, or salt, pepper, and garlic powder

Heat oil in skillet over medium-high heat.  If chops are juicy or wet, blot with paper towels to remove excess moisture.  Slice through fat around edge of pork chops a few times on each chop.  Season as desired, pressing seasoning into meat.


Montreal steak seasoning
Lemon pepper


Arrange chops in pre-heated pan, being sure to leave space between them.


Cook 14-18 minutes, turning half-way through cooking time once first side is seared.


Actual cooking time will vary depending on thickness of chops, stove, and cookware, so be sure to check for 160° internal temperature.

I cut through the fat of the pork chop on the left but
not the right.  Notice how the one of the left is nice and flat.

The underside of the bubble pork chop.

Wednesday, April 6, 2011

Sauteed Asparagus


Last summer Sumiko wrote about her spending parameters and mentioned that she doesn't spend more than $1 per pound for produce, which is what I typically follow as well.  This doesn't mean we eat only potatoes, onions, and other cheap produce.  Instead, we watch the grocery ads and buy produce when it's on sale.  This week, Safeway had asparagus on sale for 97 cents per pound - within her spending parameters.  While asparagus is usually well over our spending parameters, when it's on sale, we jump on it!

In a previous post, Sumiko wrote about her favorite ways to cook vegetables - sauteeing and roasting.  Since we had asparagus, we decided to sautee some for a family dinner last night. 

This recipe calls for lemon zest.  To zest a lemon, use a microplane (recommended) or the smallest holes on a cheese grater to scrape off the yellow portion of the peel.  You want to avoid getting down to the white pith, as it is bitter.  Only grate over each spot once.

Sauteed Asparagus
2 Tbsp vegetable or olive oil
1 bunch asparagus
Salt and pepper, to taste
1-2 tsp lemon zest
4 cloves garlic, minced

Heat oil in a large skillet over medium to medium-high heat. 

Meanwhile, wash asparagus and break off the cut ends of each spear.  The best way to do this is to snap the end of the aspargus and it will naturally break above the tough part.  Cut the spears into 2-inch pieces.


Place asparagus into oil.  Season with salt, pepper, and lemon zest.


Sautee until asparagus is crisp-tender.  Add garlic and cook an additional 1-2 minutes or until garlic is fragrant.  Remove from heat.


Monday, April 4, 2011

Cinnamon Toast--So Simple, Yet So Good!


Somehow I made it through about the first twenty years of my life without knowing about cinnamon toast.  I don’t know how it happened.  But it did.  One day in the college cafeteria, Robbie told me he was going to make cinnamon toast.  He was astonished when I asked him, “What’s that?”

It’s so simple, yet so good.  I don’t feed it to my family every day, but it does make a nice treat.  Sometimes Robbie and I have some late at night as dessert.  Since I make it with 100% whole grain bread, it’s actually not that unhealthy.  And it’s certainly healthier than most kids’ cereals and desserts.

The whole grain provides fiber as well as all the nutrients associated with grains.  The butter or margarine provides the fat necessary to help the body absorb the fat-soluble vitamins.  And cinnamon has antioxidants.
  

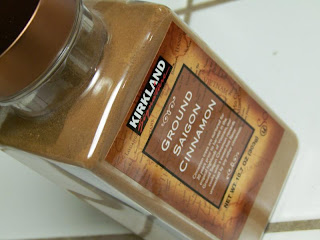
It is possible to buy cinnamon sugar at the store, though I don’t know why there’s even a market out there for it.  I don’t know how much it costs, but I’m sure it’s at least 15-20 times more than it costs me to make my own.  Plus, I can adjust the sugar/cinnamon ratio to fit my family’s preference.  I make a big batch and store it in an air-tight container in the pantry.  You can also keep it in a shaker.


Cinnamon Sugar
½ c. sugar
½ Tbsp. cinnamon (more or less, to taste)

Mix sugar and cinnamon thoroughly.


We’ve experimented with different ways to make cinnamon toast and come up with three basic methods.

Cinnamon Toast
Bread
Butter, softened, or margarine
Cinnamon sugar


Follow directions for desired method below.


Simple and Quick Cinnamon Toast
Toast bread as desired.  Spread hot toast with butter or margarine.  Sprinkle with cinnamon sugar.


We like ours lightly toasted, but darker is fine too.


Melty Cinnamon Toast
Toast bread as desired.  Spread toast with butter or margarine.  Sprinkle with cinnamon sugar.  Place under broiler until sugar is bubbly, being careful not to burn it.  In my toaster oven, it takes 3-4 minutes on high.

I use my toaster oven for this in order to save energy, but
a normal oven broiler will work too.


Grilled Cinnamon Toast
Heat skillet over medium to medium-high heat.  Butter both sides of bread.  Place in heated skillet.  Flip when first side is toasted.  When second side is done, remove to plate.  Sprinkle with cinnamon sugar.

There's no clean way to butter both sides--just go for it.


Saturday, April 2, 2011

Baby Food: Acorn Squash and Apple Sauce


As I promised in last week’s post, I will be discussing how to microwave acorn squash.  It’s basically done the same way as spaghetti squash.  I like having the option to microwave acorn squash because it uses a lot less energy than baking it in the oven and it doesn’t heat up the house as much (we are in the middle of a warm spell).  Other small winter squashes may be microwaved too.

Not only is microwaving squashes a lot faster than other cooking methods, but it also retains a lot of the nutrients.  Because no water is used, the vitamins and minerals do not leach out.

Acorn Squash
1 acorn squash

Rinse squash and place on microwave-safe plate.  Pierce several times with fork or knife.  Microwave on high, 5 minutes.


Using extreme caution, turn squash over; microwave 5 more minutes.  Let rest in microwave 5 minutes.  Slice squash down middle; scoop out and discard seeds.


Scoop flesh into bowl.


Mash with fork or potato masher.  Add water to achieve desired consistency.


April loved it!  Because the weather was so nice,
she got to eat her dinner outside on the lawn.

May be puréed in food processor for smoother texture.

I also introduced applesauce into April’s diet this week.  She wasn’t too keen on it.  I think it’s because I tried to give it to her cold from the fridge.  I will try warming it up next time.

Up until now, I have made all of her food.  It’s healthier and much more inexpensive than buying baby food.  Applesauce is the exception.  Unless you have your own apple tree, it is usually cheaper to buy applesauce already made than to buy apples and make your own.  It is not necessary, however, to buy special baby applesauce.  I simply buy the cheapest applesauce (no sugar added) from the canned fruit section.  Sorry, I don’t have any photos of me opening the store-bought jar, so here's another picture of April instead.

Check out those chunky thighs!!

Friday, April 1, 2011

Baked Rigatoni


I love pasta!  It's cheap, filling, and can feed a crowd.  I stumbled upon this recipe and decided to give it a try.  This is one meal that my whole family enjoys, which is quite an accomplishment!  I have altered it just a bit, so here's my version.

Baked Rigatoni
12 oz. rigatoni, cooked and drained according to package directions
1 cup cottage cheese (you can use ricotta, but we prefer cottage cheese)
2 cups mozzarella, divided
1/4 cup grated Parmesan
26-oz jar marinara sauce

Preheat oven to 350 degrees.

In a large bowl, place rigatoni, cottage cheese, 1 1/2 cups mozzarella, Parmesan, and a little more than half of the marinara sauce.


Stir to combine.  Place mixture in a 9 x 13 baking pan and top with remaining 1/2 cup mozzarella.


Cover tightly with foil and bake for 30 minutes or until heated through.  Remove foil and bake for an additional 5 minutes.


Pair this with a veggie or green salad and garlic bread and you've got yourself a meal!

Made with ricotta.
Made with cottage cheese.

P.S. regarding Pampered Chef Mini Measure-All Giveaway:  Congratulations to Georgia B., winner of our first ever Near to Nothing giveaway!!  Be sure to let us know how you use your new measuring cup!  Thanks to all who entered.
Related Posts with Thumbnails