Wednesday, February 15, 2012

A Mommy Time Out

Image from:  www.drmomma.org

I regret to inform you that there is no post for today.  But don't worry--it will be here tomorrow!  This past week has been very busy and a bit stressful.  It all culminated last night when I had to put myself on time out.  Yes, Mommy's heart was ugly, and she had to take some time for a heart adjustment.  Lukas and Koda were a little giddy (and a bit confused) at the thought of Mommy on time out.  =-)  Anyway, today I will be making more of a concerted effort to show the love of Christ, depend on Him for my strength, and rest in His promises.  And tomorrow, you will have a post.

Sunday, February 12, 2012

Homemade Marshmallows (plus a Valentine's breakfast idea)


I'm not a fan of marshmallows.  Well, that is unless they're melted and inside of a s'more...but only if the s'more's made with dark chocolate.  Ok, so I'm realizing I'm a bit of a chocolate snob, but really, dark is the only kind of chocolate that's worth eating.  Anyway, as I was saying, I'm not a fan of marshmallows.  That is, until I discovered homemade marshmallows.  Mmmm...these things take marshmallows to a whole new level.  They're not dry and hard like the store-bought variety.  It's really hard to describe; you'll just have to try them for yourself!  I have to thank Alton Brown for this recipe (and you'll want to thank him too after you try these!).

As I was brainstorming what I could give my neighbors for Valentine's Day this year, homemade marshmallows came to mind.  I like to do something different than the typical cookie when I have the time. Anyway, I was thinking it might be strange to just give marshmallows, so I was trying to think of a way to make it work.  Then it hit me.  I could make pink marshmallows, cut them into heart shapes, and give them with hot chocolate mix!  If I had a little extra time to plan, I would have gone in search of some cheap Valentine's mugs to put the marshmallows and hot chocolate mix in, but I didn't, so I had to make what I had work.

Marshmallows
3 packages unflavored gelatin
1 cup ice cold water, divided
12 oz granulated sugar (this was just over 1 1/2 cups for me)
1 cup light corn syrup
1/4 tsp kosher salt
1 tsp vanilla extract
1/4 cup powdered sugar
1/4 cup corn starch
Nonstick spray

In the bowl of a mixer fitted with the wisk attachment, add the gelatin and 1/2 cup of the cold water.  Set aside.


The gelatin and cold water after it had ben sitting for a couple minutes.

In a small saucepan over medium-high heat, combine granulated sugar, corn syrup, and salt.  Cover and let cook for 4 to 5 minutes.  Remove lid and continue cooking, without stirring, until it reaches 240 degrees.  Once it reaches this temperature, immediately remove it from the heat.


Turn the mixer on low and slowly pour the sugar mixture down the side of the bowl into the gelatin mixture.  Once all of the sugar mixture has been added, increase the speed to high and beat until the mixture is thick and lukewarm, about 12-15 minutes.  Add vanilla during the last minute of whipping.  For my special Valentine's treats, also add red food coloring during this time.


While the mixture is whipping, prepare your pan.  Take a metal 9 x 13 pan and spray it with nonstick spray.  Mix powdered sugar and corn starch; put some into the greased pan.  Shake the pan around to coat the bottom and sides with the powdered sugar mixture.  Return the excess powdered sugar to the bowl for later use.  I ended up using two pans because my heart cookie cutter was bigger than I would have liked it to be.  However, I figured it would still work but because my cookie cutter was on the bigger side, I didn't want them to be too thick.  Hence I divided mine between two pans.


Pour marshmallow mixture in prepared pan(s).  Use some self control and try not to eat all of the marshmallow creme now.  Use a well-oiled rubber spatula to spread it evenly in your pan(s).  Dust the top of the marshmallows with your powdered sugar mixture.  Allow to sit, uncovered, for at least 4 hours or up to overnight.  Turn marshmallows out onto a cookie sheet.  You may need to use your hands to help pull them out of the pan.

For regular marshmallows, dust a pizza cutter with your powdered sugar mixture and cut into 1-inch marshmallows.  For the Valentine's Day marshmallows, take a heart cookie cutter (not too big if you want it to fit into a mug with hot chocolate), dust it with the powdered sugar mixture, and cut out the hearts.  When the hearts (or regular marshmallow cubes) have been cut out, make sure all sides are coated with your powdered sugar mixture so that they don't stick together.  You can store these in an airtight container for up to three weeks.  For instructions on how to make miniature marshmallows, click here.

Ready to sit for at least 4 hours. (sorry for the lack of white balance on this photo)


The gifts we took to our neighbors.

For extra yummy marshmallows, you can dip them in melted chocolate.  Yum!  I've even been known to dip them in chocolate, then roll them in graham crackers for a sort of s'mores marshmallow.

And if you're in need of a Valentine's breakfast idea, here's a pretty simple one.  In October, Sumiko wrote about eggs in a hole and talked about making fun shapes for the hole.  This is such an easy breakfast to make on Valentine's Day by using a heart shaped cookie cutter!  Also, in order to make the shape a little more distinguishable (Sumiko outlined hers in ketchup), I first cut out the heart, buttered both sides of the outer part of the bread and toasted one side in my frying pan.  Once it was nicely toasted, I flipped it over, then added the egg and broke the yolk.  Once the egg was cooked well on that side, instead of flipping it over, I stuck it in a preheated 350 degree oven and left it in there until the egg was cooked through.  Easy peasy!

Saturday, February 11, 2012

Special Sunday Post

Our long-time readers will know that our normal posting days are Monday, Wednesday, Friday.  However, instead of a post on Monday, we'll have a special post tomorrow morning.  It's a fun Valentine's treat that you can make for your family, coworkers, neighbors, friends, or teachers!  I want to post it a day early so that you'll have Sunday and Monday to make them so that they're ready for delivery on Tuesday.  So be sure to check back tomorrow for a fun treat!

Friday, February 10, 2012

February Friday Flashback: Chocolate-Covered Strawberries

Tuesday is Valentine's Day and it seems that one of the most popular Valentine's treats is chocolate-covered strawberries.  You can buy chocolate-covered strawberries, but they come with a hefty price tag.  Sumiko and I were looking through the grocery ads this week and noticing the prices various grocery stores had for chocolate-covered strawberries.  They ranged anywhere from 4 strawberries for $5.99 to 4 strawberries for $9.99.  Yes, one store was asking almost TEN DOLLARS for 4 strawberries!  However, while looking through the ads, I also noticed most stores had strawberries on sale.  The cheapest I found was 1 lb for $1.50, which is more than I usually pay for them, but I might splurge for a special occasion.  And while you can buy special chocolate dips to make your own chocolate-covered strawberries, it's easy and even cheaper to make your own with regular chocolate chips!  I shared this recipe about a year and a half ago, but I thought it would be good to post it again right before Valentine's Day.  Enjoy!


One of my favorite treats is chocolate-covered strawberries!!  However, they can cost an arm and leg to buy.  I've seen them in bakeries for $4 per strawberry and online for $50 per dozen, which is the low end of the price spectrum, believe it or not.  Thankfully chocolate-covered strawberries are easy to make at home and cost much less.  In fact, I made about 20 (I forgot to count, so I don't know how many I made!) for approximately $3!  I usually wait for strawberries to go on sale for $1 per pound or less - which they often do in the summer - before I buy them.

Dipping Chocolate
1 cup chocolate chips
1 Tbsp. vegetable shortening

In a microwave-safe bowl or mug, place chocolate chips and shortening.


Microwave for 1 minute, then stir.  Microwave in 30 second increments, stirring after each 30 seconds, until chocolate and shortening are smooth, being careful not to overheat the chocolate.  Depending on how thick or thin you want your chocolate, you may need to adjust the amount of shortening.  Note: For you bakers out there wondering why I didn't temper my chocolate, it's because this works just fine for what I'm trying to accomplish.  Also, this method is much easier.

Chocolate Covered Strawberries
Dipping Chocolate
Strawberries
White chocolate (optional)
Shortening (optional)

Clean strawberries and dry.  This is important because any moisture in your chocolate will cause lumps.


In the meantime, line a plate with wax paper.


Once the strawberries are dry, pick them up by the stem/leaves and dip into the chocolate.  Swirl the strawberry around to coat the entire strawberry, except a little bit at the top.  Remove the strawberry and shake off any excess chocolate.


Place the dipped strawberry onto your prepared plate.  Allow chocolate to cool and harden.


In the summer, I place mine in the refrigerator to set.  Once the chocolate has hardened on the strawberries, I like to drizzle some white chocolate on the strawberries to add some decoration.  To do this, I melt white chocolate chips with shortening.  Keep in mind that in order to drizzle the chocolate, it needs to be thinner than the dipping chocolate, so your chocolate to shortening ratio is going to be different.  Once the white chocolate has reached the desired consistency, dip a spoon into it.  Hold the spoon about 4 to 6 inches above the strawberries, and quickly move it back and forth over the strawberries.  Allow white chocolate to set.


Viola!  You've got chocolate-covered strawberries!  Simply add some nice packaging, and you've got a great gift that didn't cost you $50 but easily could have!


For some added variety, you can dip the strawberries into white chocolate and drizzle with chocolate.  (Fun fact: I made some white chocolate ones, but left them in the freezer [I put them in there to speed them up a bit] until the next day.  Woops!  I would have pictures, but they were frozen and the chocolate had cracked.) I've also seen a lot of websites that dip their chocolate covered strawberries in sprinkles, mini chocolate chips, nuts, and an assortment of other toppings.  Be creative with this one and have fun! 

Wednesday, February 8, 2012

Zucchini Pizza Casserole


I was browsing through our Near to Nothing Great Grandmother’s cookbook a couple weeks ago when I found this recipe for zucchini pizza casserole.  Since zucchini and ground beef were on sale, I just had to try it!  The results?  Delicious!  Keanna, who normally doesn’t eat anything with zucchini in it, asked for seconds!

One great thing about this recipe is that it is gluten-free.  For those of you who do not normally cook GF, a few words of caution if you are serving this to someone with gluten allergies.  Though you would not suspect it, gluten can be hiding in ingredients that you would think are GF.  For example, pre-shredded cheese is often coated with flour or other floury powder to keep it from sticking.  Simply buy cheese in a block and shred it yourself to ensure that it is GF.  Also, be sure the sauce you choose is GF.

If you are wary of trying to pass off zucchini on your family, you could probably substitute shredded potatoes for the zucchini.  I haven’t actually tried this yet, but it seems like it would work.  In that case, you probably wouldn’t need to squeeze the liquids out, but you would still want to add the salt for flavor.

Zucchini Pizza Casserole
4 c. zucchini, shredded
½ tsp. salt
2 eggs
½ c. grated Parmesan cheese
2 c. shredded mozzarella cheese, divided
1 c. shredded cheddar cheese, divided
1 lb. ground beef
½ large onion, chopped
2 c. pizza or spaghetti sauce (or 1 can tomato sauce, 1 tsp. basil, ½ tsp. oregano, ½ tsp. garlic powder, ½ tsp. salt, and a few dashes pepper)
1 medium green pepper, chopped

Preheat oven to 400°.  Place zucchini in strainer over bowl; sprinkle with salt.  Let stand 10 minutes.


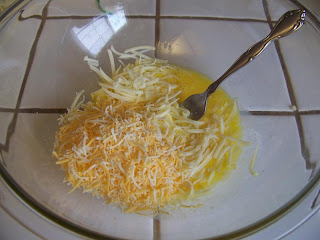
Meanwhile, break up eggs in medium bowl.  Mix in Parmesan cheese, 1 c. mozzarella cheese, and ½ c. cheddar cheese.


Squeeze moisture out of zucchini; mix into egg and cheese mixture.


Press into greased 9”X13” baking dish.  Bake 20 minutes.


Meanwhile, brown ground beef and onions.  Drain off grease; stir in sauce (and seasonings if needed).  


Spoon over baked zucchini mixture.


Top with remaining cheeses and sprinkle with green pepper.  Bake an additional 20 minutes.


Monday, February 6, 2012

Greek Turkey Burgers


While I'm not a huge fan of burgers (much to my husband's dismay), I do really like these Greek turkey burgers!  I have to thank one of my friends who introduced me to them a few years ago.  The flavors blend together so beautifully, and even my 3-year-old enjoys these!

I will say that some of the ingredients in this recipe can get somewhat pricey, though.  For example, ground turkey is usually over my $2/lb limit for meat.  However, it often goes on sale for under $2/lb and when it does, I stock up.  I also use Kalamata olives in this recipe.  When first looking at the price for a jar of kalamatas, you may get sticker shock.  But one thing to keep in mind is that you'll be able to get several meals out of one jar.  You can also use other types of olives, but I really like the flavor the kalamatas add.  And keep in mind that it's cheaper to buy a block of feta and crumble it yourself than to buy the pre-crumbled feta.

Greek Turkey Burgers
1 1/4 lb ground turkey
1 cup crumbled feta cheese
1/2 cup kalamata olives, chopped
1 tsp Italian seasoning
1 tsp dried parsley
1 tsp dried basil
1 tsp onion powder
1/2 tsp garlic powder
ground black pepper, to taste

In a large mixing bowl, combine all ingredients.  I've found that the easiest way to mix everything is to use your hands.  (Just make sure you wash them really well with soap and water before touching anything else in the kitchen!  You don't want to cross-contaminate your food!)


Once mixed, form into desired size patties.  I usually get about 6 patties, but you can make them bigger or smaller if you'd like.  Once the patties are formed, you can either grill them or cook them in an oiled saute pan until cooked through.  I like to serve them on toasted hamburger buns with red onion slices.  I'm guessing they would taste amazing with hummus or tzatziki on them, too!  I haven't tried it, yet, but I'd like to!


Friday, February 3, 2012

February Flashback Fridays: Sumiko's Meatless Comfort Soup


Since Near to Nothing has been going for over a year-and-a-half, and our readership has grown tremendously, we thought we'd revisit a few "old" recipes.  If you've been with us the entire time, you may have forgotten about some of our originals.  If you're new to Near to Nothing, you may have missed some really great dishes.  So every Friday in February, we'll be reposting a previous recipe.

I thought I'd kick it off with a soup.  Yesterday morning Punxsutawney Phil saw his shadow.  As the legend goes, that means six more weeks of winter.  In my book, that means six more weeks of soup!  (Of course, we here in the Bay Area are still watering our lawns, waiting for winter to come.)  So, without further ado, Sumiko's meatless comfort soup from last winter.


A few weeks ago I posted about Auntie Laurel’s comfort soup.  While I really like it, I’ve developed my own version.  One way I try to save money on food is by making meatless meals so I omitted the Italian sausage.  I also added brown rice to complement the garbanzos for a complete protein and to boost the fiber.

This recipe makes a lot of soup but can be easily cut in half if you don’t want such a large batch.  I tried freezing it once, not expecting it to work.  Surprisingly, it did!  The zucchini ended up a little on the mushy side, but not too bad.

Sumiko’s Comfort Soup
1 Tbsp. vegetable oil
1 large onion, diced
5 cloves garlic, minced
6 c. water
3 Tbsp. beef bouillon
1 tsp. dried basil
3 c. cooked brown rice
28 oz. diced tomatoes
1 qt. garbanzo beans, drained
3 zucchini
1-2 tsp. salt
Parmesan cheese


Heat oil in 5-qt. stock pot; sauté onion and garlic over medium-high heat until onions begin to turn translucent.


Add remaining ingredients and increase heat to high.  Bring to boil, reduce heat and simmer until zucchini is tender, about 5-6 minutes.


Serve with Parmesan cheese.  Yield:  about 4 quarts.


If you don’t have leftover cooked rice and don’t want to make any just for this soup, you can start with uncooked rice.  Increase water to 8 cups.  After sautéing onion and garlic, add water, bouillon, basil, and 1 c. dry brown rice.  Simmer until rice is almost done, about 35-40 minutes.  Add remaining ingredients and continue as above.
Related Posts with Thumbnails