Monday, December 13, 2010

Hot Cocoa


One of my favorite things to do at Christmas time is to sit by the fire at Robbie’s parents’ house, enjoying a mug of hot cocoa and watching my kids play next to the Christmas tree in their footy pajamas.  Just thinking about it brings warmth to my heart!  I’ll have to wait a couple more weeks before I can enjoy that fire, but I can enjoy hot cocoa any time.  In fact, I’m drinking some as I write this.

I am very picky about hot cocoa.  I do not like hot chocolate mixes, especially those that call for water.  Fortunately, it takes only minutes to make hot cocoa from scratch, and it calls for ingredients I always have on hand.  And it can be made without dairy!!

If you like sweeter hot cocoa, use only one tablespoon of cocoa.  For a more bitter flavor, use two tablespoons of cocoa.

Hot cocoa does contain a lot of sugar, and therefore, should be enjoyed in moderation.  Also keep in mind that milk is really nutritious and cocoa is packed with antioxidants.

The key to smooth hot cocoa that doesn’t have lumps in it is to add the milk to the dry ingredients rather than the dry ingredients to the milk.  Add a little milk to form a paste, then add the rest of the milk while stirring.

Hot Cocoa
1 c. milk
2 Tbsp. sugar
1-2 Tbsp. cocoa
Pinch salt
¼ tsp. vanilla
Desired toppings (optional):  marshmallows, whipped cream, chocolate shavings, cocoa powder, ground cinnamon, ground nutmeg


Heat milk in microwave 1½-2 minutes, or until hot.  Do not boil milk.  Meanwhile, using a small whisk, combine sugar, cocoa, and salt in a mug.


Whisk in 1-2 Tbsp. of the hot milk until smooth.  Whisk in remaining milk.


Add vanilla.  Top as desired.


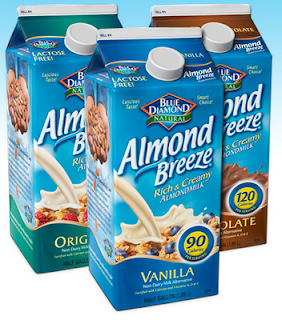
Dairy-free:  Substitute vanilla almond milk for regular milk.  Reduce sugar to 1 1/2 Tbsp; omit vanilla.

Friday, December 10, 2010

BBQ Chicken Pizza

One of our methods for saving money on groceries is to use the ingredients from one meal to make another.  Sumiko has talked about this before with her spaghetti sauce which can be turned into chili and minestrone.  This is particularly great for people who don't like leftovers.  It's a way of using extra ingredients, but since you're making an entirely different meal out of it, it doesn't seem like leftovers.  Last month I gave my recipe for BBQ chicken sandwiches.  You can freeze the leftovers or you can turn them into BBQ Chicken Pizza.

BBQ Chicken Pizza
Unbaked pizza crust
Leftover BBQ sauce
Monterrey Jack cheese
Leftover shredded BBQ chicken
Red onions, sliced
Cilantro, optional
Jalapenos, optional

Bake crust at 375 for 10 minutes.  Add enough BBQ sauce to cover crust.  I have found that you don't need a lot of sauce - if I use too much, it's too sweet.


Next, place your desired toppings and cover with cheese.


Place back into the oven for 10-15 minutes or until cheese is melted and bubbly.

Wednesday, December 8, 2010

French Onion Soup


Sometimes the simplest dishes are the most delicious.  French onion soup is basically onions, broth, bread, and cheese.  These are all very ordinary ingredients, but when combined in just the right way, the result is surprisingly delicious!  And most of the ingredients are very inexpensive!

You don’t need to spend more money to buy any special kind of onion.  Ordinary brown onions work wonderfully.  The onions I used for my last batch came from Sprouts at $0.15 per pound.  You will need more onions than you think because they cook down.


A mandolin is a great tool for this job, but is not necessary.

That's a 5-quart bowl!

The most expensive ingredient in French onion soup is the cheese.  Traditionally, it is made with Gruyère cheese.  At more than $6 per pound at WinCo, however, I pass on the Gruyère and substitute with provolone.

Because the bread is toasted, you do not need it to be really fresh.  If your grocery store has a bakery clearance section, get the bread there.

Another great thing about this recipe is that it is freezable.  I always make a huge pot and freeze half of it.  We end up getting two dinners plus multiple lunches out of it.

French Onion Soup
3 ½ lb. brown onions
3 large garlic cloves
½ c. butter
1 tsp. salt
¼ tsp. pepper
¼ c. flour
¾ c. beef bouillon
3 qts. water
2 bay leaves
1 loaf French bread
Provolone cheese, sliced or shredded
Parmesan cheese, grated

Slice onions using a mandolin (of a knife if you don’t have one).  Mince garlic.  Melt butter in a large pot (at least 5 qts.) over medium-high heat.  Add onions, garlic, salt, and pepper.  Cook, stirring occasionally, until onions are soft and translucent.


Notice how much the onions cooked down from
the previous photo.

Stir in flour and bouillon; continue to cook about 1 minute.  Add water and bay leaves.  Bring to boil, reduce heat, and simmer 15-20 minutes.  Discard bay leaves. 


Slice bread in ½”-¾” slices; toast.  Spoon soup into oven-proof bowls.  Add a slice of toasted bread to each bowl and top with provolone and Parmesan cheeses.


Place under broiler about 5 minutes, or until cheese begins to brown.  Serve each bowl on a small plate and be sure to warn everyone that the bowls are hot.  Yield:  about 4 qts.  Total cost:  about $10.


Monday, December 6, 2010

Peanut Butter Bars and Cups

I love to bake but I don't necessarily like having baked goods around the house, so I look for any excuse to bake.  Christmas is one of my greatest baking excuses!  If your budget is tight and you're not able to afford to buy gifts, food and baked goods are always great, inexpensive gifts!  You can find different suggestions for ways to  package food as gifts here.


One of my favorite flavor combinations is peanut butter and chocolate, which is one reason I absolutely love these peanut butter bars!

Peanut Butter Bars
2 1/2 cups graham cracker crumbs
1 cup peanut butter
2 3/4 cups powdered sugar
1 cup butter, melted
2 cups semisweet chocolate chips
1 Tbsp. shortening

Grease the bottom and sides of a 9 x 13 pan.  Mix peanut butter, graham cracker crumbs, powdered sugar, and melted butter.  At this point, I tasted my mixture and decided to add a little more peanut butter.  This is a taste preference, so you can add as much peanut butter as you like at this point.

 
Spread peanut butter mixture in the bottom of the pan.  Melt chocolate and shortening in the microwave and spread over peanut butter.  Cool until chocolate hardens; cut into squares.  If desired, melt white chocolate chips with a little peanut butter and drizzle over the top of the squares. 


To make peanut butter cups: Place liners in a mini muffin pan.  Roll peanut butter mixture into small balls.  Place a enough chocolate in each liner to cover the bottom (about 1/4-inch deep).  Lightly push one peanut butter ball into the chocolate of each liner, being careful not to push it all the way through to the bottom.

Cover each ball with chocolate, being sure to fill the sides of each liner with chocolate as well.  You can either spoon the chocolate into the liners or put the melted chocolate in a zip top bag, cut a hole in the corner of the bag, and pipe it into the liner.  Allow to cool.


**UPDATE** To make cutting them easier, cut before the chocolate hardens completely.  You want the chocolate somewhat set, but not completely set.

Friday, December 3, 2010

Buying in Bulk


Faithful readers of Near to Nothing will know that I love buying from the bulk bins at WinCo.  A dear friend of mine told me the other day that she just started buying from the bins.  Until recently, she was scared of them.  And I know she’s not alone.  So I thought I’d give a brief definition and discussion of bulk, a very short history of dry goods, and some tips for buying in bulk.  If you don't have a WinCo near you, check your area for stores that carry bulk items.  Kimiko likes the bulk bins at Sprouts.

Definition of bulk
According to Merriam-Webster.com, bulk simply means “not divided into parts or packaged in separate units; in large quantities.”  The basic principle is that, the more of a good that one buys, the cheaper it is per unit.  For example, if my daughter buys a half-pint carton of milk at school, it costs $0.50, or $8.00 per gallon.  However, I can go to Costco and buy 2 gallons of milk for $3.79, or $1.90 per gallon.  This principle is true for most types of foods.  Remember, check the unit price.

Why buy in bulk
Following this principle, it is much cheaper per pound to buy a 50-pound bag of flour than a 5- or 10-pound bag of flour.  But the average home cook does not need 50 pounds of flour at one time.  Enter the bulk bins.  A store can buy the large quantities at a cheaper price and then distribute it out to its customers.  Buying in bulk is like buying that 50-pound bag and sharing the flour and the cost with others in your community.

Not only does buying in bulk get you a better price, but it prevents you from overbuying and wasting food and money.  For example, if you need wheat germ to make Kimiko’s granola bars, but do not normally use it for any other purpose, it would be prudent to buy just the right amount for the recipe from the bins.  If you were to buy a whole jar, you would only use part and the rest would go to waste.


History
Until the late 1800’s, this was the only way to buy dry goods.  When pre-packaged oats were introduced by the Quaker Oat Company in 1885, people were afraid of them because they could not see the product.  The company had to convince people by giving away free samples and placing bonus items in the boxes.

As people grew accustomed to pre-packaged food, more and more products were available that way and bulk bins disappeared.  Consumers then grew wary of buying products from bulk bins because they felt packaged products were safer.  But bulk bins have reappeared in the last few years as people have come to realize that these products are a safe, economical alternative to packaged foods.  Even high-end grocery stores now have bulk bins, usually in the natural foods section.

If you’re afraid of buying from bins because other people have had access to the products before you, remember that they too are trusting you to exercise care.  I have been buying from the bulk bins ever since I discovered WinCo about seven years ago, and I have never had a problem with the products.

Tips
  • Only buy items that you are confident have a quick turn-around.  The more commonly used the product, the fresher it is in the bins.
  • Make sure the size of the bin correlates with demand.  Buying flour from a large bin is okay because it has a quick turn-over.  Buying sun-dried tomatoes from a large bin is probably not a good idea because they sell more slowly.
  • Buy only as much as you can store and use before it goes bad.
  • Do not buy from bins if you have a food allergy to other items around them.  If have a wheat allergy, do not buy sugar from the bin located next to the flour.
  • Double bag products such as flour and sugar.
  • As soon as you get home, transfer the products to air-tight containers.  Label the containers if you think you may forget what is in them.  Here are the various ways I store my bulk bin products:
Leaving the products in the store bags creates a disorganized
pantry and often leads to spills as the bags get holes in them.

Canisters or clamp jars keep food fresh.  I like clear acrylic
canisters (available here) because they are lightweight
and you can easily see what's in them.

Canning jars are also excellent and are
available at almost any general
merchandise store and most grocery stores.

I refill my spice jars from the bulk bins.  The shaker with
the red top I bought at WinCo (from the bulk bins).
Sometimes I just refill old packaging.  I like
the baking soda box and baking powder
canister because they have the flat surface
for leveling off when measuring.

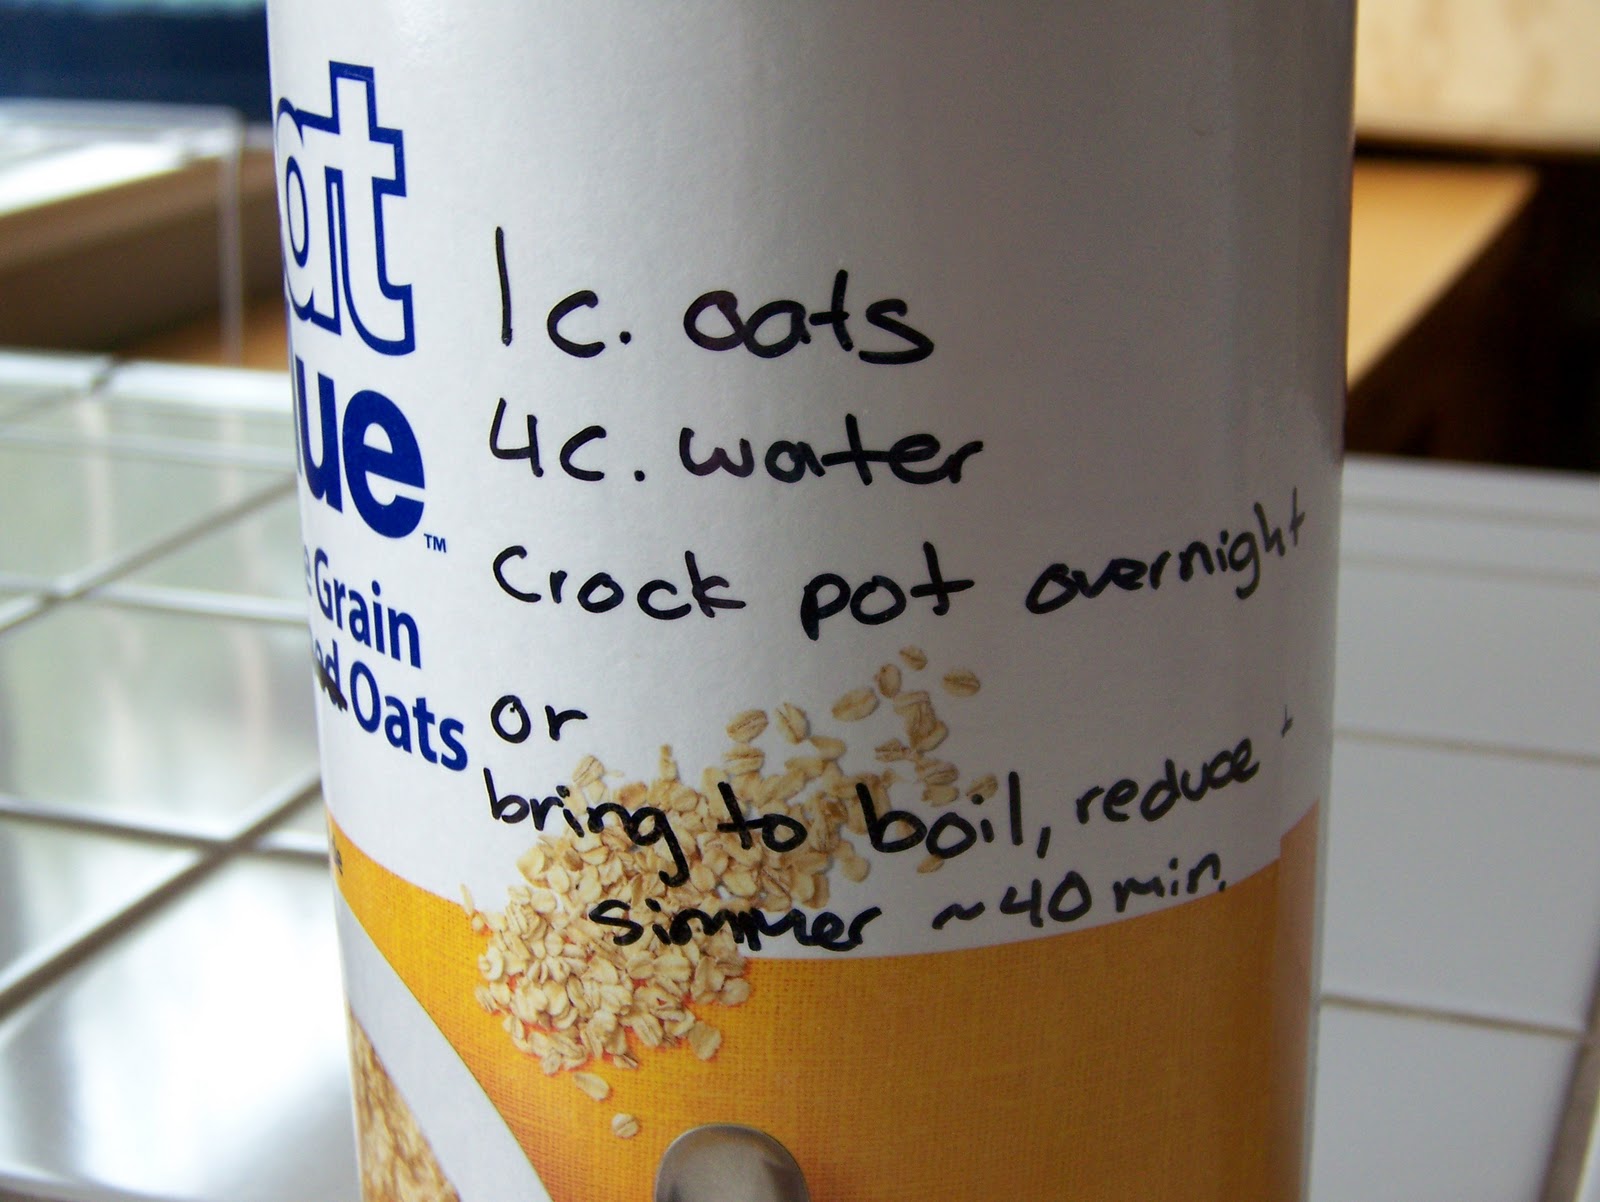
I re-labeled an old-fashioned oat container to store
steel-cut oats.
And I added the cooking instructions.


Thursday, December 2, 2010

The Importance of Unit Prices

When I go shopping, one thing I always check is the unit price (ie price per ounce, pound, etc.).  With so many different packaging sizes and brands, this is an important factor in grocery shopping on a budget.  For example, I went to the grocery store this morning to get Cuties, which were on sale for $3.99 for a 5-pound box.  However, when I got to the store, I noticed their 3-pound bags of Cuties were also on sale for $1.99 per bag.  A little math reveals that the 5-pound box costs 80 cents per pound, while the 3-pound bag only costs 66 cents per pound.  I could buy 2 3-pound bags of Cuties (6 pounds total) for the same price (actually one cent cheaper) as a 5-pound box - this was a no-brainer for me!  While the price difference in this scenario may not have been huge, this is just an example of why it's important to comparison shop by unit price.

I know many people don't like math, so here's a quick explanation of how to figure out unit price:

Take the price of the item and divide it by the size or weight (ie ounces or pounds).  For example, for the 5-pound box of Cuties, I did: $3.99/5 lbs = $0.80 per pound.

If you want the unit price per ounce, simply divide by 16:  $0.80/16 = $0.05/oz.

Some stores do all the work for you and print the unit price on the shelf tag, usually in ounces.  It is useful to memorize that $1/lb = $0.0625/oz.  Knowing this, you can simply look at the price per ounce on the tag and estimate how much you are paying per pound.  If the shelf tag says an item costs $0.19/oz, you know you are paying about $3/lb.

Wednesday, December 1, 2010

Delicious (Sweet) Cornbread

A couple weeks ago I posted my favorite chili recipe.  In our house, it's a given that if we're going to have chili, we're also going to have cornbread!  Not all cornbreads are created equal.  Some are more buttery in flavor and others are sweet.  One isn't necessary more superior than the other - it's merely a personal preference.  This recipe produces a cornbread that is both buttery and sweet.  It's delicious with a crunchy crust on top and moist and sweet in the middle.  I always have to give my daughter her cornbread after she's eaten everything else, otherwise she'll eat nothing but cornbread!  You can save quite a bit of money making your own cornbread versus buying a mix.

Cornbread
1/2 cup butter, melted
2/3 cup granulated sugar
2 eggs
1 Tbsp. vinegar combined with enough milk to make 1 cup (or 1 cup buttermilk)
1/2 tsp. baking soda
1 cup all-purpose flour
1 cup cornmeal
1/2 tsp. salt

Preheat oven to 375 degrees.

Mix melted butter and sugar.  Add eggs and blend well.  Combine buttermilk and baking soda; add to butter mixture.  Stir in cornmeal, flour, and salt and mix until few lumps remain.  Pour into a greased 8-inch square pan.  Bake for 30 to 40 minutes or until a toothpick inserted into the center comes out clean.
Related Posts with Thumbnails