Friday, June 17, 2011

Americanized Greek Salad


Lettuce, cucumbers, red onions, bell peppers, feta.  Most of us Americans would look at this salad and say it's a Greek salad.  And it is.  Sort of.  You see, a true Greek salad has no lettuce.  We would probably look and wonder what happened to the lettuce.  So to make it more of what we think of when we think of a salad, most of the Greek salads that we tend to eat in America include lettuce.

Greek Salad
Romaine lettuce, cut into bite-sized pieces
Tomatoes, diced
Green bell peppers, diced
Red bell peppers, diced
Red onions, sliced
Cucumbers, chopped large
Olives, sliced (either kalamata or black will work)
Feta cheese, crumbled
Greek salad dressing (recipe below)


Combine all ingredients in a bowl.  You can either toss it all with the dressing or have people put their dressing on individually.  If you choose to toss the salad with the dressing, make sure you add it immediately prior to serving so that the lettuce doesn't get soggy.

My salad didn't have olives, simply because I didn't have any.  If I did, you can bet they would have been added!

Greek Salad Dressing
1/2 cup olive oil
1 1/4 tsp garlic powder
1 1/4 tsp dried oregano
1 1/4 tsp dried basil
1 tsp ground black pepper
1/2 tsp salt
1 tsp onion powder
1 tsp Dijon mustard
1/2 cup red wine vinegar


Combine all ingredients in a salad carafe and shake well.  If the dressing is too tangy for your taste, you can add a little sugar to tone it down a bit.  To help prevent separation, you can put all ingredients except the oil into a blender or food processor.  While the blender or food processor is running, slowly add the oil.


Wednesday, June 15, 2011

No-Stick Scrambled Eggs


About three weeks ago I posted about my spiffy new Costco cookware.  I can enthusiastically say that I have been nothing but pleased with it!!  I love that I don’t have to worry about scratching the surface and that I can put it in the dishwasher.
                     
Anyway, that post prompted a few questions about scrambled eggs and whether or not they stick to the frying pans.  While I did post the answer in the comments, I thought the issue deserved it own post.

Scrambled eggs is one of those dishes that there are as many ways to make as there are cooks.  I am very picky about my scrambled eggs and seldom come across any that I think are really good.  My basic “recipe” is there to serve as a guide—use more or less milk or cream, use different seasonings, add sautéed veggies, melt cheese over the top—the possibilities are endless.

The one factor that should remain the same is pan preparation.  Regardless of what you are adding to your eggs, you should always start with a hot, oiled pan.  This is the key to prevent them from sticking.

You don’t need a lot of oil.  Spray oils work, but I don’t buy them because you pay a lot for the can and the accelerant.  I simply put some vegetable or olive oil on a paper towel and wipe it around the inside of the pan, bottom and sides.

My oiled pan.  The film of oil is so thing it doesn't even
look like it's been oiled.

You want to heat your pan and cook your eggs slightly above medium.  My stove knobs are marked 0 through 10.  I cook eggs at about 6.5.  I recommend starting to heat the pan after you’ve gathered your ingredients but before you start preparing the egg mixture.  Once everything is whisked together, test the pan to make sure it is hot enough by dripping a few drops into it.  If the pan is hot enough, they should start to sizzle immediately and cook within seconds.  It is then safe to pour the remainder of the eggs in.


To illustrate the difference a hot pan makes, I made two identical batches of eggs—one with a well-heated pan and one with a cool pan.

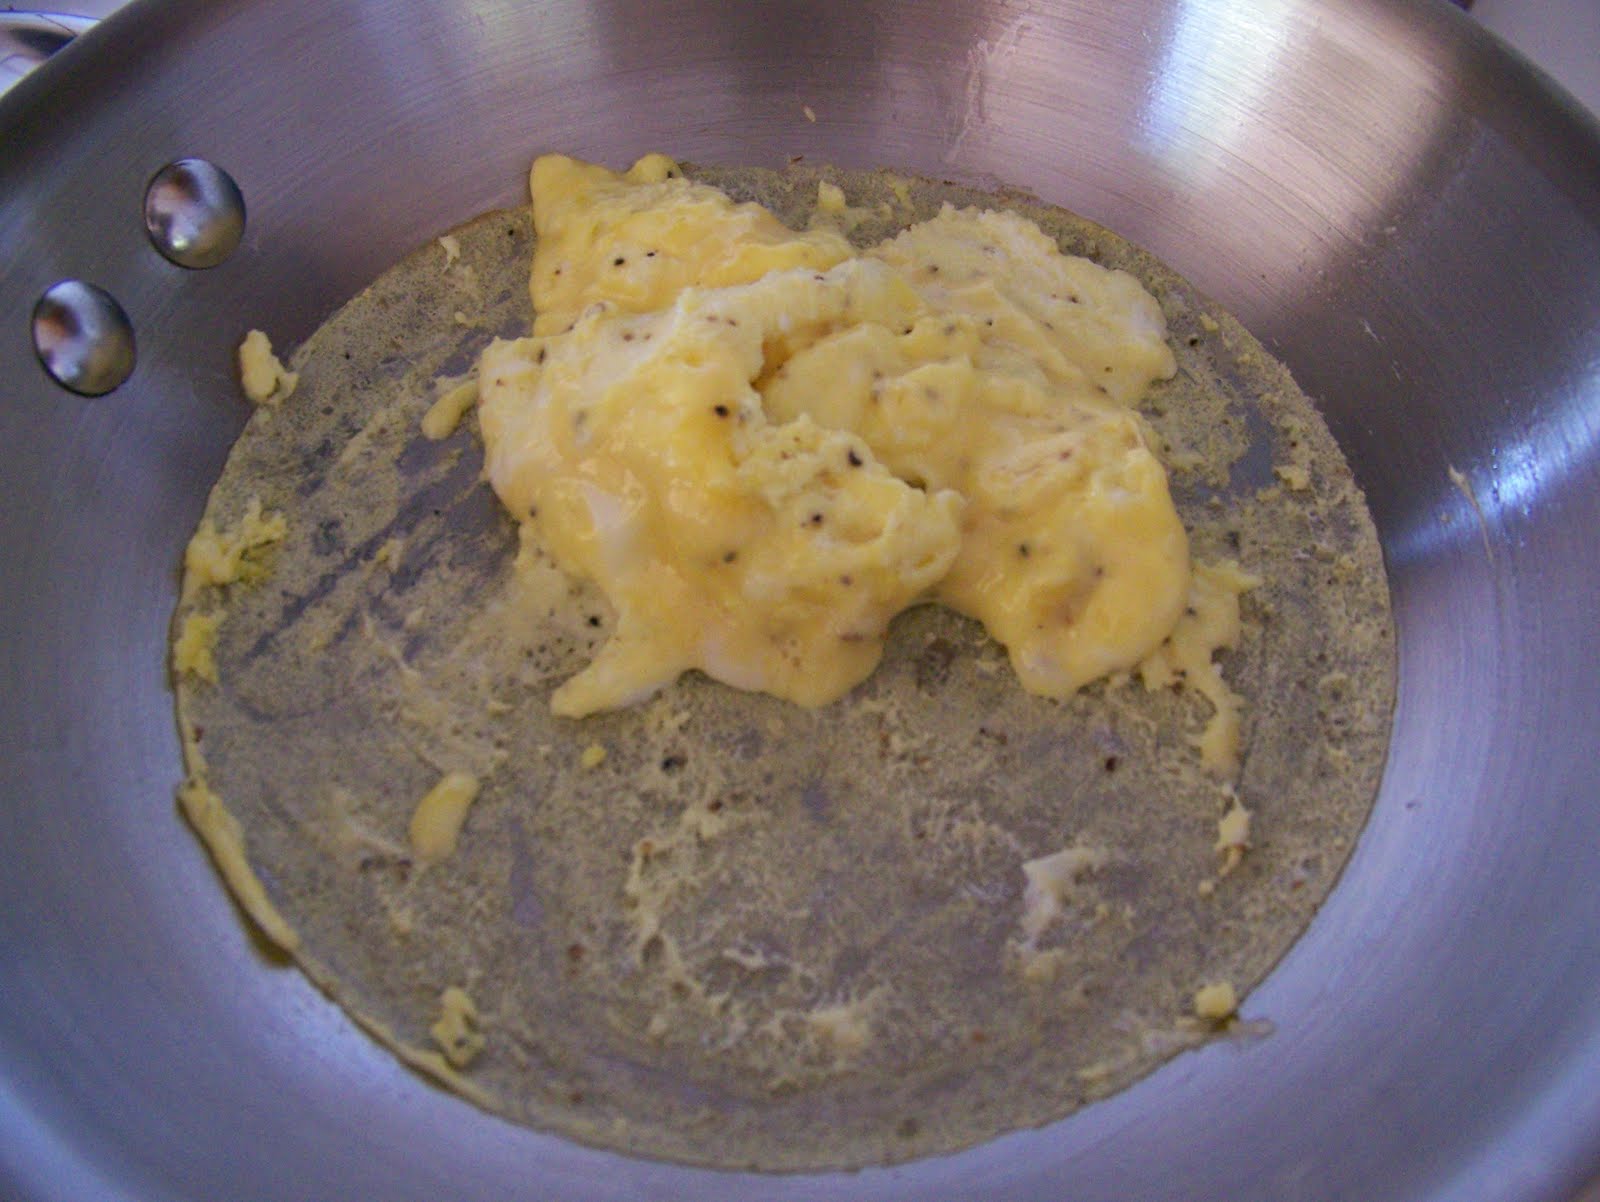
Heated pan
Unheated pan


Coming off the bottom nicely!  A little
over-done because I was taking
pics.
Uh-oh!  Looks like trouble!


Hardly any sticking!
Lots of stuck-on eggs.  Ick!


Basic Scrambled Eggs
2 eggs
1-2 Tbsp. cream or milk*
⅛-¼ tsp. Montreal steak seasoning

Lightly grease small frying pan.  Preheat pan just above medium.  Meanwhile, whisk together eggs, cream or milk, and seasoning.  Pour eggs into heated pan.  Cook, stirring occasionally, until cooked through.


For the sake of this "experiment" I only made one egg at a
time, but I rarely make less than six.


*I usually make scrambled eggs with milk.  But when I happen to have cream in the fridge, I like to use it as it produces fluffier eggs.


Monday, June 13, 2011

Life with a 2-Year-Old

This weekend ended up being busier than expected, so I wasn't able to get a post done.  Therefore, in lieu of a normal post, here's a glimpse into my life! 

If you've ever wondered what one pound of baking soda (yes, it was a brand new box!) looks like on carpet, no need to wonder any longer, thanks to my 2-year-old!  I guess she decided to explore my "pantry" while I was making dinner.


I'm thankful it was just baking soda on my carpet and not the contents of that box of food coloring. :)

Saturday, June 11, 2011

Baby Food: The Cost of Convenience


For the past four months I have taken you on our baby food journey with April.  Now that she is basically eating everything, I’ve run out of material to post.  Except for a few additions to her diet that will come later (cow milk, honey, peanut butter, ribs, etc.), there pretty much isn’t anything she can’t or doesn’t eat.  But before I put this series aside until we introduce those foods, I’d like to take two more weeks to look solely at the financial savings of making your own baby food.

I started April on cereals first.  I made rice, wheat, oats, and grits.  I didn’t get to barley before she moved on to veggies, but she does eat it in soups now.  Rather than buying baby cereals, I went to the grain section of the WinCo bulk bins.  You can find all of these grains in the beans and rice section or the hot cereal section.  The average price I pay for any of these grains is $0.50-$0.60 per pound (remember, a pound is 16 ounces).  Keep in mind that this is per dry pound.  One pound of dry grain yields a couple to a few pounds of cooked grain.

Now let’s take a look at packaged baby cereals.

Gerber rice cereal:  8 oz. for $1.88

Gerber oatmeal:  16 oz. for $3.19

"Mixed grain" must be special because 8 oz.
costs $2.15.  Mixing grains at home is easy
and doesn't cost an extra $0.56 per pound.

Beech Nut oatmeal:  8 oz. for $1.69

Cheapest baby cereal?  Gerber oatmeal at $3.19 per pound!

Cardboard boxes taste good too.

Next we moved on to vegetables.  I made peas, corn, green beans, yams, butternut squash, acorn squash, and potatoes.  I generally pay $0.88 per pound for frozen vegetables and never pay more than $1.00 per pound for fresh.

Let's see what Gerber and Beech Nut have to offer.

Gerber peas:  7 oz. for $1.16

Gerber sweet potatoes and corn:  7 oz. for $1.16

Beech Nut corn and sweet potatoes:  4 oz. for $0.55

Beech Nut butternut squash:  2.5 oz. for $0.48

Cheapest baby vegetables?  Beech Nut corn and sweet potatoes at $2.20 per pound.

After vegetables we tackled applesauce and bananas.  First, I cannot believe people pay for baby food bananas...that's just bananas to me!  Second, I also mentioned that I do buy pre-made applesauce.  For me that is the most cost-effective way.  If you have an apple tree or can get them really inexpensively, it may be cheaper for you to make your own.

Let's see what I found at the store.

Gerber bananas:  5 oz. for $0.98

Beech Nut bananas:  2.5 oz. for $0.48

Beech Nut applesauce:  2.5 oz. for $0.48

Tree Top applesauce:  25 oz. for $2.19 (sale price)

Gerber blended fruits with oatmeal:  7 oz. for $1.16
Once again, I can mix things together at home pretty easily.

Cheapest baby fruit (without grain)?  Beech Nut bananas and applesauce at $3.07 per pound.

I can't possibly calculate how much money I have saved over April's solid-food-eating life.  But most of these pre-packaged baby foods cost 2-3 times more than my homemade baby food.  Plus my food was fresh!


Friday, June 10, 2011

Tender and Flaky Pie Crust


Easy as pie?  For a lot of people, this saying doesn’t make sense.  Just the thought of making a pie crust can scare even experienced home cooks.  And I can’t blame them.  There is a lot that can go wrong; and if you don’t know what’s going wrong, you can’t fix it.

The ingredients themselves are very simple:  flour, salt, shortening, and water.  Some recipes call for sugar to make the crust itself sweet.  I prefer to let all the sweetness come from the filling.

The process of putting those simple ingredients together is where it gets tricky.  An ideal pie crust is tender and flaky, yet holds together.  To achieve this, it is necessary to get thin layers of fat (shortening) sandwiched between thin layers of flour.  All the techniques involved in making a good crust have this goal in mind.

Black=flour, orange=shortening
You can tell I'm not the artist of the family.

The fist step is to start with the correct amount of flour and incorporate air into it by sifting.  Contrary to popular belief, the main purpose of sifting flour is not to get the lumps out, though that definitely is one result.  The number one reason to sift is for consistent and accurate volumetric measurement.  If you measure one cup of packed flour, you will end up with more by weight than if you measure sifted flour.  Considering I have four kids and a crazy buys life, I generally skip the sifting step and just stir the flour with a chopstick before measuring.  But not when making pie crusts—they are just too delicate and fussy.

I prefer the crank version of a sifter rather than the spring-
loaded tricker kind--it's not as tiring.
I usually do this right in the flour canister...

...thus preventing this.

Level off with a chopstick of the backside of a knife.

Don't have a flour sifter?  Use a sieve.

I keep my leveling chopstick in the canister and use
it to aerate the flour when I'm not sifting.

Second, you want to cut the shortening into the flour, not mix it in.  The result of cutting in is small pieces of shortening, each coated with flour.  After rolling, these pieces will end up as the thin layers of fat in the above diagram.  A pastry blender is the best tool for cutting in flour.  Some cookbooks instruct you to use two knives if you don’t have one.  I suggest buying a pastry blender.  The results are so worth it and you can use it for any recipe requiring cutting in (e.g. biscuits, streusel topping).


I would guess the third step is where most people make a mistake.  You need to incorporate some water, but you want to do so without mushing all those shortening pieces and flour together, ending up with a homogenous, gooey mixture.  Using ice-cold water will help prevent this by firming up the shortening.  You also do not want to stir the water in.  Rather, drizzle the water in slowly while tossing the flour mixture with a fork.  Purposefully drizzle the water on dry particles and use as little water as possible—there will still be some dry pieces.  Avoid the temptation to add too much water, mix the dough, or overwork it!!!

To be sure the water is as cold as possible, I get it ready
before I gather up any of the other ingredients.  I added
another cube to this bowl a few minutes before using it.

You should toss while adding the water, but I just can't do
both of those things and take a picture at the same time.

Avoid the strong temptation to toss more than this!!

Even once the dough is correctly mixed, it can still turn into a flop if it is not properly rolled.  To once again firm up those fat particles and prevent mushing, wrap your pie crust dough in plastic wrap and refrigerate at least half an hour before rolling.

Yes, it's supposed to look crumbly.


Carefully, with as little manipulation as possible, form the chilled dough into a ball and place on a lightly floured surface.  Roll away from you with firm pressure.  Lift the dough and turn it a quarter turn, giving your surface a light dusting of flour if necessary.  You can also lightly dust the top of the crust if it is sticking to the rolling pin.  Roll away from you again, make a quarter turn, dust with flour, and repeat.  Continue rolling until your crust is about one-and-a-half inches larger than your inverted pie plate.

I use my Pampered Chef shaker to get a fine, uniform dusting.

After first roll...

...quarter turn, dusting of flour...

...second roll, repeat.

As the dough gets to large to lift to dust underneath, simply
fold over half, dust, then fold back the other way
to dust the other half.

If you get tears, holes, thin spots, or just a weird shape, DO NOT start over!  This will result in overworked dough and a tough pie crust.  Simply cut off an extra piece and patch it together with the next pass of the rolling pin.

Definitely not the ideal pie shape.

Cut off from here...

...add here.

Once the dough is large enough, carefully transfer it to your pie plate.  I do this by wrapping it around my rolling pin then unrolling it into the pie plate.

Be careful not to let the weight of the rolling pin
mash one edge into the other.


Cut off excess dough so that you still have a quarter-inch left around the top.  Tuck the edge under and flute, if desired.

There are tools to do this.  You won't find one in my kitchen.


Baking temperature and time will vary depending on the filling.  I filled mine with strawberry and added a top crust.  Rather than using a second large sheet of dough for the top, I cut out hearts and slightly overlapped them.  A lattice top would work too.  The main key is to leave gaps for steam to escape.


If you attempt a pie crust and it doesn’t turn out, don’t give up!  The more you make, the better they will get.  Pretty soon they truly will be easy as pie!

Tender and Flaky Pie Crust
2 c. sifted flour
1 tsp. salt            
⅔ c. shortening
6-8 Tbsp. ice water

Mix flour and salt in medium bowl.  Cut in shortening.  Drizzle in ice water 1 Tbsp. at a time while tossing with fork until most flour is moistened.  Divide dough in half and wrap each half in plastic wrap.  Refrigerate at least 30 minutes.  Form into ball, roll to desired size on lightly floured surface.  Transfer to pie plate and bake according to filling directions.


*Of course you can’t let all the scraps go to waste.  Make pie crust cookies!  I give Keanna the extras and let her go at it.  Cut out desired shapes, sprinkle with sugar, bake at 400° until golden brown.


Unfortunately, I didn't get a photo before they all got eaten.

Related Posts with Thumbnails